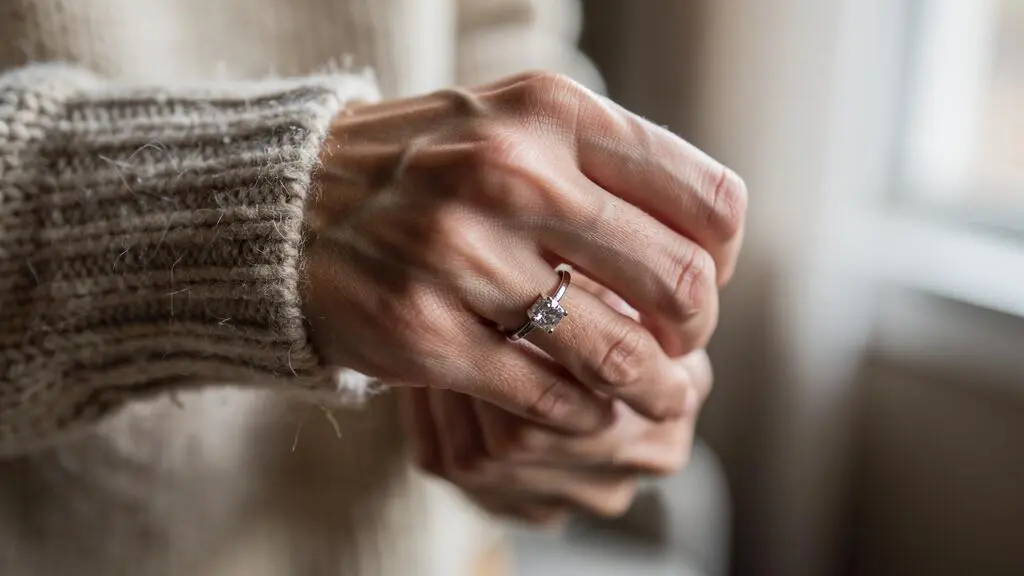
If your ring catches on jumpers, gloves or jacket sleeves several times a week, the problem may be the setting rather than the gemstone. A raised prong, an exposed gallery or a poorly finished metal edge can catch fabric even when the ring looks perfectly smooth from above.
For people who regularly snag their jewellery, a low-profile full bezel or flush setting is generally the most practical starting point. Both minimise exposed catching points and offer useful protection against everyday contact. A well-made channel setting can also work, particularly for smaller stones arranged along a band. Prongs remain a reasonable choice when properly finished and regularly inspected, but they demand greater attention from active wearers.
The strongest option is not necessarily the easiest to repair, however. A protective bezel can become complicated to rebuild after deformation, while an accessible prong head may be simpler to service. Choosing well means balancing snag resistance, stone retention, maintenance and the appearance you actually want to wear.
Quick guide to snag-resistant ring settings
- For frequent snagging: Start with a low-profile full bezel or flush setting, checking that no metal edges protrude.
- For everyday sparkle: Consider low, well-finished prongs or a partial bezel, accepting more exposed stone and potential maintenance.
- For long-term ownership: Ask how the setting can be tightened, resized and repaired before prioritising a seamless appearance.
- Why Do Some Settings Snag Knitwear Every Week While Others Don’t?
- How to Choose a Setting Technique Using a 3-Question Lifestyle Test?
- Bezel or Prong: Which Should You Choose if You’re Prioritising Protection Over Maximum Sparkle?
- The Setting Choice That Looks Sleek but Becomes a Repair Nightmare Later
- When Should You Tighten Stones in Different Setting Styles to Avoid Surprise Loss?
- Prongs, Bezel, or Channel: Which Setting Should You Choose if You Wear Gloves Daily?
- Four-Prong or Six-Prong: Which Should You Choose if You’re Hard on Your Hands?
- Why Do Stones Fall Out Even When the Ring Looks Perfect From the Top?
Why Do Some Settings Snag Knitwear Every Week While Others Don’t?
Ring settings snag knitwear when a raised edge, protruding prong or exposed opening catches individual fibres as the fabric moves across the ring. The problem depends on the setting’s shape, height and finish, not simply whether it uses prongs. A low, carefully finished prong setting may catch less than a poorly constructed channel setting with exposed metal edges.
Imagine the ring viewed from the side rather than from above. A raised centre stone sits on a head supported by a gallery, with prong tips bending over its upper edges. Each change in height or exposed opening creates a possible contact point. When a knitted sleeve slides over the ring, a loose fibre may slip beneath an imperfectly seated prong and resist as the hand continues moving.
The height of the setting and the setting technique are separate considerations. A high-set bezel may still interfere with a tight sleeve because of its overall bulk, despite having a smooth rim. Conversely, short, rounded prongs that sit closely against a gemstone may present relatively few catching points.
The Gemological Institute of America explains these construction differences in GIA’s guide to engagement ring settings, including the importance of correctly shaping, positioning and finishing prongs.
Different settings create different contact patterns:
- Prong: Individual metal tips and exposed gallery openings can catch loose fibres, particularly if a tip has lifted.
- Full bezel: A continuous rim surrounds the stone, removing individual prong tips but requiring a smooth, well-finished edge.
- Channel: Continuous metal walls produce a relatively smooth surface, provided the walls and gemstone seats are accurately finished.
- Flush: The stone sits within the surrounding metal, offering minimal projection when correctly constructed.
Wear changes this picture. A prong tip may gradually lose its original shape, while repeated knocks can shift the head enough to create a new snag point. Wide or bulky ring profiles may also drag against fitted sleeves even without a visibly raised claw.
Before purchasing a ring, ask to examine its side profile and, with the jeweller’s permission, gently pass a loose piece of fine fabric over the stationary setting. Note whether the fibre moves freely or catches at a particular point. Do not pull against resistance or use this test on a ring with visibly damaged prongs.
This fabric check is a practical screening exercise, not a professional security test. A ring can pass it and still have poorly seated stones or concealed structural weaknesses.
Once the physical cause is understood, the next decision is whether your daily activities justify a different setting or simply a lower, better-finished version of the one you prefer.
How to Choose a Setting Technique Using a 3-Question Lifestyle Test?
Choose a ring setting by asking three questions: what regularly touches your hands, how often your ring experiences impacts, and which compromise you can accept between stone visibility and maintenance. Frequent contact, repeated knocks and limited tolerance for repairs generally favour low-profile protective settings. Gentler wear and a strong preference for an open appearance make well-constructed prongs more practical.
A setting should match your present behaviour, not the careful routine you hope to develop after buying an expensive ring. Someone who regularly handles tools, catches jacket sleeves and grips hard surfaces has a different risk profile from someone who removes jewellery before demanding activities.
Use these three questions to establish your priorities:
- What comes into contact with your hands? Consider knitted sleeves, gloves, work equipment, bags, furniture and any materials that repeatedly slide across the ring.
- How often does the ring take a knock? Distinguish occasional accidental contact from repeated pressure against hard surfaces or tools.
- What trade-off will you accept? Decide whether an open appearance, lower maintenance demands or easier future repairs matters most.
The following comparison translates those answers into practical starting points rather than absolute rules.
| Wear pattern | Setting to consider | Main trade-off |
|---|---|---|
| Frequent clothing snags and repeated contact | Low full bezel or flush | Less exposed stone; repair access varies |
| Gloves and regular hand movement | Low bezel, flush or smooth channel | Band thickness and structural deformation still matter |
| Gentle wear with emphasis on an open appearance | Well-finished prongs | Exposed tips require inspection |
| Moderate activity with a preference for visible stone edges | Partial bezel or low prongs | Some exposed edges remain |
| Frequent impacts with hard equipment | Protective setting, plus removal during hazardous tasks | No setting eliminates impact or hand-injury risk |
Maintenance is part of this decision. Prong settings may need tips adjusted or rebuilt, channel settings may require work on their retaining walls, and a distorted bezel can require more extensive metalwork. The total cost of ownership therefore depends on more than the purchase price.
Your five-step ring-setting decision checklist
- Record the three activities most likely to catch or strike your ring; produce a short list of real exposure points.
- Review your recent routine and classify impacts as occasional or frequent; write down your actual wear pattern.
- Inspect candidate rings from the top, side and underside; identify any protruding tips, open galleries or exposed edges.
- Ask the jeweller how each candidate would be tightened, resized and repaired; record the restrictions for each design.
- Shortlist two setting styles and choose the one whose compromises match your recorded behaviour and maintenance preferences.
Observing your current habits for a few weeks can reveal risks that a showroom fitting will not. Keep a simple note whenever your existing ring catches fabric or must be removed for a task.
The resulting shortlist often comes down to bezel versus prong, particularly when the centre stone is important to the ring’s appearance.
Bezel or Prong: Which Should You Choose if You’re Prioritising Protection Over Maximum Sparkle?
Choose a full bezel if protecting exposed stone edges and reducing fabric snags matters more than an open, delicate appearance. Choose well-finished prongs if you prefer to see more of the gemstone and accept regular checks. A partial bezel or low-profile prong design can offer a middle ground, although neither eliminates the risk of impacts or loose stones.
A bezel secures the gemstone beneath a continuous metal rim that surrounds its perimeter. This design shields much of the girdle, the narrow boundary between the stone’s crown and pavilion, from direct side contact. It also replaces individual projecting prong tips with a more continuous surface.
Prongs secure a gemstone at selected contact points. They leave more of its outline visible, often producing a lighter-looking ring. But exposed sections of the girdle remain vulnerable to certain impacts, and each prong tip becomes a component that must retain its shape and position.
| Criterion | Full bezel | Prong setting |
|---|---|---|
| Snag resistance | Generally smoother when low and correctly finished | Depends heavily on prong height, shape and finish |
| Stone-edge protection | Continuous rim shields much of the perimeter | Exposed edges remain between contact points |
| Appearance | Defined metal outline around the gemstone | More open and visually delicate |
| Light and brilliance | May change perceived light performance depending on design | Exposes more of the gemstone |
| Routine maintenance | Rim and stone retention need inspection | Individual tips may need tightening or rebuilding |
| Repair after deformation | Can involve substantial bezel reconstruction | Individual accessible prongs may be easier to service |
It is tempting to conclude that a bezel always makes a diamond less brilliant. The distinction is more subtle. A well-cut brilliant diamond receives and returns much of its light through the crown, so enclosing its sides does not automatically produce a large visible loss of sparkle. Actual appearance depends on the stone, proportions, setting geometry and lighting. There is no reliable universal percentage reduction established by the supplied guidance.
For step-cut stones such as emerald and Asscher cuts, the metal rim can complement the geometric outline. On smaller stones, a bezel may make the overall centre feature appear more substantial because the surrounding metal becomes part of the visible shape.
There are worthwhile intermediate designs:
- Half or partial bezel: Covers selected portions of the perimeter while leaving other areas exposed.
- Low-profile prongs: Reduce overall height when the stone and mounting permit appropriate clearance.
- V-shaped prongs: Provide targeted protection for vulnerable corners or pointed gemstone shapes.
A protective setting also changes the repair calculation. A bent prong can sometimes be repositioned or rebuilt without removing the gemstone. A badly distorted bezel may require significant reconstruction or removal of the stone. Neither procedure is guaranteed to be quick or inexpensive in every case.
If daily snagging is your main frustration, a low full bezel is usually the stronger starting point. If occasional impacts are your main concern, discuss both the gemstone’s vulnerability and the setting’s repair options before deciding.
The Setting Choice That Looks Sleek but Becomes a Repair Nightmare Later
A substantial full bezel or heavily enclosed setting can look exceptionally clean while making future stone replacement or structural repair more involved. Tension and invisible settings may present additional complications because their retention systems depend on precise construction. A sleek exterior does not make a setting inherently unreliable; it means repairability deserves the same attention as everyday protection.
A full bezel provides an excellent example of this trade-off. Its metal rim surrounds the stone and offers few exposed snag points. If the stone must later be removed, however, the jeweller may need to carefully work back or cut the retaining metal, depending on its thickness and construction. Rebuilding the rim while maintaining the intended finish may be more involved than servicing an accessible prong.
Very enclosed galleries can also restrict access beneath a gemstone. Dirt, skin oils and residue may accumulate in areas that are harder to clean directly, particularly where the mounting has limited openings.
Repairability is a property of the complete ring construction, not merely its setting category.
Consider how different systems respond to workshop intervention:
- Prongs: Individual damaged tips can often be adjusted or rebuilt, provided the remaining structure is sound.
- Channel: Stone retention depends on accurately prepared seats and continuous metal walls. A damaged section may require extensive reconstruction.
- Pavé: Numerous small retention points complicate alterations, especially when resizing distorts stone-bearing areas.
- Tension: Precise pressure and structural geometry are central to retention. Ordinary resizing may be unsuitable.
- Invisible: Hidden rails and precision-cut gemstone grooves can require specialist intervention if damaged.
For channel settings, Ganoksin‘s article on channel-setting techniques and repairs explains how inaccurate stone seating and damaged channel structures create difficult bench-jewellery problems. Some defects may call for replacement of an affected channel section or mounting rather than straightforward tightening.
Invisible settings present a particularly important distinction between difficult and impossible repairs. In Ganoksin’s technical article on invisible-setting repairs, Robert Gravley describes the reconstruction of specialised retaining rails and the risks associated with conventional resizing. The documented techniques demonstrate that certain repairs are possible, but require an understanding of the particular construction.
Before purchasing an elaborate design, ask the jeweller four specific questions: Can a damaged stone be replaced without destroying the setting? Can the ring be resized? Can its surface be polished safely around the retained stones? And will an ordinary repair workshop be able to service it, or is specialist or manufacturer assistance necessary?
Request answers for the exact model rather than accepting general assurances about the setting category. Two rings that look nearly identical may use different methods of securing their stones.
Even a repair-friendly setting depends on timely maintenance. The next challenge is recognising wear early enough to prevent a loose stone from becoming a missing one.
When Should You Tighten Stones in Different Setting Styles to Avoid Surprise Loss?
Have your ring inspected whenever a stone moves, a prong changes shape, a visible gap develops or the ring begins catching fabric unexpectedly. Different settings wear differently, so there is no universally safe tightening interval. For prong-set engagement rings, GIA suggests considering professional inspections every six months; higher-risk wear or a significant impact can justify an earlier check.
Stones should not be tightened automatically simply because a date has arrived. A competent jeweller first checks whether any component has loosened, worn thin, cracked or distorted. Unnecessary manipulation can damage delicate retention structures, particularly when small stones or specialised settings are involved.
Different styles require different inspection priorities:
| Setting | Potential warning signs | Professional check |
|---|---|---|
| Prong | Lifted tips, gaps, newly exposed edges or movement | Tip condition, contact and overall head integrity |
| Bezel | Distorted rim, visible separation or stone movement | Continuity of the rim and retention around the perimeter |
| Channel | Misaligned stones, damaged walls or gaps | Stone seating, wall condition and band distortion |
| Flush | Movement or visible damage around the stone’s seat | Integrity of the surrounding metal and seat |
| Pavé | Missing stones, worn beads or local movement | Individual retention points and structural condition |
Under bright lighting, a 10× loupe can help reveal small gaps and changes that are difficult to see unaided. Inspect the ring from several angles, including its sides and underside. Compare prong positions where possible and look for tips that appear worn, lifted or displaced.
A home inspection should remain non-invasive. Do not push the gemstone with tweezers, an ordinary metal tool or even a toothpick to test its security. These methods are not validated as safe consumer diagnostics in the supplied references and could worsen an existing problem. If movement is visible or audible during normal handling, stop wearing the ring and arrange professional inspection.
GIA’s diamond engagement ring protection recommendations identify stone movement, visible gaps and damaged prongs as warning signs. The guidance also recommends considering a professional prong inspection every six months, while acknowledging annual inspections as a useful reminder. This is preventive consumer guidance, not a guarantee that a ring remains secure until its next appointment.
The reason to respond early is that damage can become self-reinforcing. A displaced prong may leave an edge less protected, allowing subsequent contact to increase stress on the remaining structure. Fixing the problem before further damage may preserve more repair options, although actual cost and feasibility depend on the ring.
Inspection becomes particularly important for people who repeatedly pull gloves over their rings, because this introduces a different form of mechanical stress from ordinary surface contact.
Prongs, Bezel, or Channel: Which Setting Should You Choose if You Wear Gloves Daily?
For frequent glove use, a low bezel or flush setting generally offers fewer catching points than prominent prongs. A smooth, carefully constructed channel setting can also work, especially for stones set along a band. However, the safest practical choice may be to remove the ring altogether when gloves, machinery, hygiene rules or workplace procedures make jewellery unsuitable.
Gloves expose rings to a repeated action that is easy to overlook: fabric or glove material travels across the setting each time the glove is put on or removed. A raised prong or gallery can interrupt that movement, causing the material to catch. Repeated pulling may place stress on an already vulnerable tip or mounting.
This differs from a single hard knock. The issue is repetitive contact and traction rather than necessarily a large impact. Glove fit, material, thickness, frequency of use and setting geometry all influence the actual risk.
A full bezel offers a continuous rim, reducing the opportunity for glove material to hook beneath individual claws. A flush setting goes further in reducing projection when the ring has sufficient metal to accommodate the stone correctly.
Channel settings can also present smooth surfaces. Their potential weakness is structural: if the band deforms under pressure or impact, the alignment of the channel walls and stone seats may be affected. This is a reason to assess band construction, not evidence that ordinary glove removal inevitably damages a channel.
Prongs remain more exposed, but their performance depends on finishing. A low head with rounded, closely seated tips may function better beneath gloves than a tall, widely projecting arrangement.
For regular glove use, consider the following design details alongside the setting name:
- Minimal practical mounting height without compromising the gemstone’s clearance or retention.
- No raised or sharp edges along the parts contacted by the glove.
- Accessible galleries that do not create obvious catching points.
- A band profile and width that do not interfere with glove fit.
- A professional assessment of whether the chosen stone is suitable for a flush or gypsy-style setting.
Healthcare, food-handling and mechanical environments introduce requirements beyond snag resistance. Workplace hygiene procedures may restrict jewellery, and rings can present hazards around rotating equipment or other machinery. Removing the ring, using an appropriate secure storage arrangement or following an approved workplace policy is often more important than choosing a different setting.
Some wearers consider a ring chain or pocket storage. Those alternatives should only be used when compatible with the activity and workplace rules; a loose chain itself can create hazards around moving equipment.
For activities involving hard contact as well as gloves, stone protection must be considered alongside the number, shape and strength of the prongs.
Four-Prong or Six-Prong: Which Should You Choose if You’re Hard on Your Hands?
A well-constructed six-prong setting generally provides additional retention if one prong fails, making it worth considering for someone who is hard on their hands. Four prongs can still hold a gemstone securely when correctly designed. Prong thickness, positioning, height and gemstone shape matter as much as the number of contact points.
With four prongs, each contact point makes a substantial contribution to holding the gemstone. If one fails, the remaining arrangement may no longer retain the stone adequately. A six-prong design distributes retention across more points and can offer a greater chance of keeping the stone in place after one tip breaks.
This distinction is supported by GIA’s diamond engagement ring protection recommendations, which discuss the potential retention advantage of six prongs while recognising that properly made four-prong settings can also be secure.
However, six delicate prongs are not automatically stronger than four substantial ones. The metal section, construction quality, seat preparation and condition of each prong influence resistance to deformation. A poorly positioned tip may contribute less useful retention even when the ring has additional prongs.
The number of prongs also affects the ring’s catching profile. Six short, well-finished prongs may present fewer problematic projections than four bulky claws on a high head. Equally, six badly finished tips create several opportunities for fibres to catch.
Stone shape changes the decision further. Four and six prongs are familiar choices for round brilliant diamonds, but the same calculation should not automatically apply to other outlines.
- Round: Four- and six-prong arrangements are both established options; retention and appearance depend on construction.
- Oval: Prong placement must support the stone’s proportions and protect areas exposed to contact.
- Princess: Corners deserve particular protection, often through appropriately shaped V-prongs.
- Pear, marquise or heart: Vulnerable points require purpose-designed coverage rather than simply adding prongs indiscriminately.
- Cushion: Corner geometry and the specific outline determine appropriate placement and tip shape.
For someone who regularly knocks their ring, compare actual finished examples from the side. Check whether the gemstone sits unnecessarily high and whether the prongs are smoothly integrated into the head. Ask the jeweller to assess the stone’s shape and vulnerable areas.
If the ring is routinely exposed to forceful contact, neither four nor six prongs provides the same practical protection as avoiding those exposures. Remove the ring for activities that threaten the mounting or your hands.
The final consideration is that even a carefully selected prong count cannot reveal every hidden weakness. Understanding how a stone is retained beneath its visible surface is essential when investigating unexpected losses.
What matters before a stone comes loose
- A smooth ring viewed from above may still have worn prong tips, weakened seats or structural problems beneath the gemstone.
- Repeated everyday contact can justify inspection even when no dramatic impact or visible damage has occurred.
- A multi-angle examination by a qualified jeweller is more dependable than judging stone security from appearance alone.
Why Do Stones Fall Out Even When the Ring Looks Perfect From the Top?
Gemstones can fall out of visually perfect rings because the components securing them are partly hidden. Prong seats, metal contact at the girdle, channel walls and structures beneath the stone may wear or deform without obvious changes to the top view. Repeated minor impacts can gradually compromise retention, so a normal-looking surface does not prove that a stone is secure.
Stone retention is a three-dimensional mechanical relationship. In a prong setting, each tip must extend over the gemstone sufficiently to prevent it escaping, while the prepared seat supports its position. The girdle is a critical contact area, but simply seeing metal around the stone from above does not establish whether the contact remains sound.
A prong may appear present and correctly aligned from a distance while its tip has become thin or lost effective contact. Deformation deeper in the mounting may also shift the relationship between the stone and its supports.
Channel settings introduce different hidden vulnerabilities. Gemstones depend on precisely prepared seats and retaining walls. If the band bends or metal wears at the contact surfaces, a stone may loosen without an obvious crack or gap when seen directly from above.
The same principle applies to pavé settings, where small beads or shared retaining elements may wear, and to bezel settings, where a continuous-looking rim may conceal local separation or deformation.
Daily behaviour helps explain why some losses feel sudden. Consider a hypothetical wearer who repeatedly rests a ring against hard handles, removes tight gloves and occasionally strikes the side of a desk. Each event might leave no clear surface mark. Over time, however, the cumulative strain may contribute to loosening, depending on the mounting’s construction and condition.
That scenario illustrates a possible failure mechanism; it is not evidence that every ring subjected to such contact will lose a stone.
For more useful inspection, examine three different views:
- Top: Look for unusual gaps, displaced tips or differences between neighbouring stones.
- Side: Check whether prong tips, the gallery and the stone’s position appear consistent and undamaged.
- Underside: Where accessible, look for visible deformation, cracks or changes in the supporting metal.
Use good lighting and magnification without applying force to the gemstone. Stop wearing the ring if a stone moves, rattles, catches unexpectedly or appears displaced. A jeweller can assess contact and retention using appropriate tools and determine whether tightening, rebuilding or a more extensive repair is necessary.
GIA’s professional inspection guidance provides a useful maintenance reference for prong-set diamond rings, but no universal inspection schedule can guarantee against gemstone loss. A significant knock or a new warning sign justifies assessment regardless of the time elapsed since the previous appointment.
Before buying your next ring, ask the jeweller to show you its profile and explain how the stone is secured. If your current ring catches clothing or has suffered repeated knocks, arrange a professional setting inspection rather than waiting for visible damage. The most suitable setting is the one that balances protection, appearance and realistic maintenance for the way you actually use your hands.
Can an existing prong ring be made less likely to snag clothing?
Sometimes. A jeweller may be able to correct a lifted tip, refine an unsuitable finish or repair a damaged prong. Lowering the entire setting or converting it to a bezel is a more substantial alteration and depends on the original mounting, gemstone and available metal. Have the design assessed before requesting structural changes.
Is a bezel setting suitable for every gemstone?
No setting should be selected without considering the gemstone’s properties, shape and condition. A bezel may provide useful perimeter protection, but installation and future removal still place demands on the stone. Fragile, damaged or unusually shaped gemstones require an individual assessment by a qualified setter.
Does a low-profile ring always provide better stone security?
No. A low profile can reduce exposure to fabric and accidental contact, but retention also depends on properly prepared seats, sufficient metal, accurate construction and the condition of the setting. A poorly made low mounting may be less secure than a well-engineered taller design.
Should a ring be removed before exercise or manual work?
Remove a ring when an activity exposes it to substantial impact, crushing, snagging or machinery hazards, or when workplace procedures prohibit jewellery. Even protective settings cannot eliminate the possibility of gemstone damage, ring deformation or hand injury. Store the ring securely while it is off your hand.
Can a secure-looking ring lose a stone without warning?
Yes. Metal wear, weakened retention points or distortion beneath a gemstone may be difficult to recognise without magnification and professional examination. Periodic inspection and prompt assessment after significant impacts reduce the chance of overlooking problems, although they cannot guarantee that a stone will never be lost.