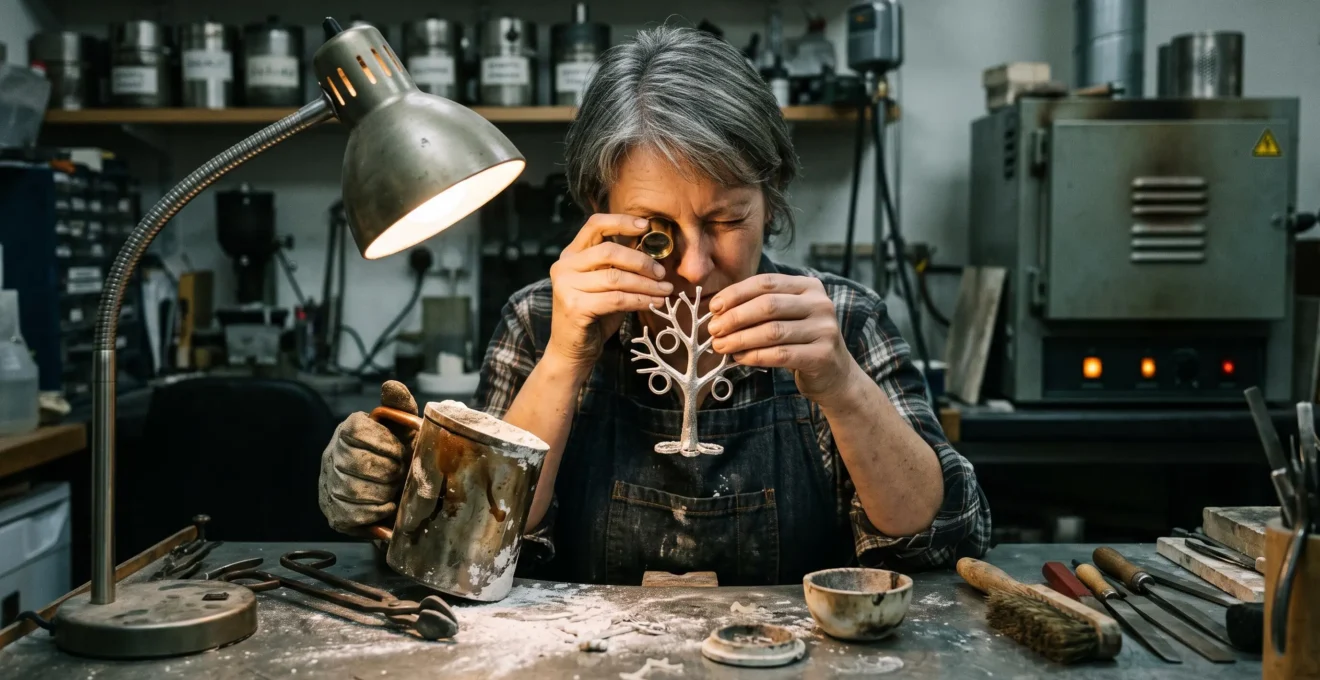
A wax model can carry perfectly defined engraving, sharp relief and precise edges, yet the finished metal casting may look grainy, rounded or unexpectedly shallow. The discrepancy does not necessarily mean the wax was defective. Fine-detail reproduction depends on what happens between investing the pattern and solidifying the molten metal.
The investment must flow into small recesses, set with adequate strength, withstand wax removal and burnout, and retain a stable cavity until metal fills it. Moisture, trapped air, inappropriate expansion and casting temperature can interrupt that sequence. Some problems appear immediately after devesting; others remain concealed until polishing or assembly.
The most useful diagnostic principle is to separate cavity formation, cavity survival and metal filling. Each stage produces different evidence. Checking these stages systematically helps jewellery makers avoid unnecessary recasting and gives buyers a clearer explanation of why two pieces made from apparently identical wax patterns may differ in surface finish or dimensional accuracy.
Fine-detail casting: the essentials
- Investment preparation determines cavity quality. Water ratio, mixing, trapped air and setting conditions affect how accurately the mold reproduces the wax.
- Burnout and expansion determine cavity survival. Insufficient strength, inappropriate heating and dimensional changes can damage details or alter the fit of components.
- Pouring conditions determine the final result. Metal temperature, mold temperature and feeding must support complete filling without introducing avoidable surface or internal defects.
- Why Can Moisture in Plaster Cavities Cause Grainy Surfaces and Lost Detail?
- How to Improve Casting Detail by Controlling Investment Mixing and Cure Time
- Standard Investment or High-Detail Investment: Which Should You Choose for Fine Texture?
- The Detail-First Mistake That Creates Shrinkage Misfits in Multi-Part Cast Jewellery
- When Should You Start Burnout to Avoid Cracked Investment and Distorted Cavities?
- Why Does Lost Wax Casting Create Porosity That Shows Up Only After Finishing?
- Why Can Overheating During Pouring Create Hidden Weakness Even if the Cast Looks Fine?
- Why Does Metal Pouring Temperature Control Affect Both Strength and Surface Finish?
Why Can Moisture in Plaster Cavities Cause Grainy Surfaces and Lost Detail?
Moisture can contribute to rough surfaces and lost casting detail when residual water or inadequate burnout compromises the investment cavity. Heating can generate vapor and internal stresses, while weakened mold walls may erode or flake. However, graininess and rounded edges are not uniquely diagnostic of moisture: mixing defects, mold damage and casting temperature can produce similar symptoms.
Gypsum-bonded jewellery investment contains a binder that reacts with water to form a solid structure, together with fillers that influence strength and expansion. More water is normally needed to make the mixture workable than the gypsum hydration reaction consumes. That additional water must be managed through the prescribed setting and burnout process.
Two forms of water matter. Free water occupies spaces within the investment structure and can be released during drying and heating. Chemically bound water belongs to the hydrated gypsum structure and is released through dehydration reactions at elevated temperatures.
These mechanisms should not be confused with a reliable visual classification of defects. Free-water release, dehydration and mold-wall deterioration can overlap. Neither pinholes nor eroded corners alone establish which form of water caused the problem.
Investment permeability also matters. Vapor and gases need paths through the mold structure or out through the casting system. An unsuitable mixture, poor venting or reduced permeability can aggravate gas-related defects. Excessive mixing, however, does not automatically mean lower permeability; its effects depend on the formulation and mixing method.
Richard D. Austin‘s technical discussion in Casting Investment Materials and Applications explains how water proportion, gypsum setting, investment strength and silica-related expansion influence casting performance. It also identifies multiple potential causes of poor surface texture rather than assigning all roughness to residual moisture.
A useful workshop comparison involves recording the weight of similar flasks at consistent points during a controlled drying procedure. Changes in weight can indicate moisture loss, provided temperature and handling are controlled. Flask weight alone cannot establish burnout readiness or distinguish free water from chemically bound water, so it should never replace the manufacturer’s burnout instructions.
For buyers, a grainy surface or indistinct engraving may indicate a process inconsistency, but it is not proof that the wax pattern was defective or that a specific casting step failed. The maker must compare the original pattern, process records and finished casting before identifying the cause.
Once moisture-related possibilities have been assessed, the next question is whether the original slurry actually reproduced the fine wax features before the mold entered the furnace.
How to Improve Casting Detail by Controlling Investment Mixing and Cure Time
Fine casting detail improves when investment powder and water are measured accurately, mixing follows the product’s working-time requirements, and entrapped air is removed before setting. Adequate curing gives the mold sufficient initial strength for subsequent handling. The correct mixture is not simply the thinnest slurry: fluidity, strength and setting time must remain balanced.
Investment preparation starts with the water-to-powder ratio. Too much water can make the slurry easier to pour into narrow wax recesses while increasing setting time and potentially weakening the mold. Too little water may increase viscosity, making complete contact with fine engraving and undercuts more difficult.
For a concrete manufacturer example, the R&R Advantage Jewelry Investment application instructions specify water-to-powder ratios of 39:100 for heavy castings, 40:100 for normal castings and 42:100 for delicate castings.
Those values apply to that particular investment, not to gypsum-bonded investment generally. The same instructions recommend adding powder to water, mechanical mixing for three minutes after initial wetting, and a maximum working interval of 8.5 minutes under the stated process conditions.
Vacuum mixing can improve consistency and remove entrained air when correctly performed. Conventional mixing followed by appropriate degassing can also be effective. Neither method compensates for an incorrect powder ratio, an expired working window or a poorly maintained vacuum system.
Air trapped against the wax surface is particularly important. After metal fills the cavity, a surface bubble in the investment can appear as a raised metallic nodule. That is different from a recessed pit caused by missing material or internal porosity.
For the specified R&R Advantage process, the manufacturer also describes approximately 1.5 minutes of vacuum treatment of the invested flask and two hours of undisturbed setting to achieve maximum green strength. These are product-specific values, not universal instructions.
Setting behavior can change with powder condition, water temperature and environmental conditions. A sacrificial pattern carrying the same fine lines, corners and relief depths as the production wax can help establish whether the process is reproducing features consistently.
Five checks before committing a fine-detail casting
- Record the materials. Identify the investment product, powder batch and recommended mixing instructions; retain a batch record.
- Measure the mixture. Record powder mass, water quantity and temperature; produce a reproducible mixing sheet.
- Document mixing and degassing. Log the method, timing and vacuum conditions where applicable; keep a process record for comparison.
- Verify the setting interval. Record when investing finished and when burnout preparation began; compare the interval with the product instructions.
- Inspect a test casting. Photograph and compare defined test features on the wax and metal; create a defect map showing any missing lines, nodules or softened corners.
A used mold fragment can sometimes reveal cracks, gross erosion or uneven investment texture, although devesting itself may damage the cavity. Its appearance should be treated as supporting evidence, not a conclusive diagnosis.
If a controlled process still fails to preserve the desired texture, the investment formulation and its compatibility with the casting system deserve closer comparison.
Standard Investment or High-Detail Investment: Which Should You Choose for Fine Texture?
Choose an investment by matching its binder chemistry, specified alloy compatibility, cavity reproduction, expansion and burnout requirements to the casting process. A product marketed for high detail is not automatically the best choice. Fine fillers may improve surface reproduction in some formulations, but permeability, mold strength and casting compatibility can impose competing constraints.
Standard gypsum-bonded investments commonly combine calcium-sulphate-based binder chemistry with silica fillers. Product formulations can differ significantly in setting behavior, thermal expansion, strength and surface performance.
Specialized investments may use different particle distributions, modified binders or other formulation adjustments. Fine particle size does not, by itself, identify a phosphate-bonded investment. Phosphate-bonded systems constitute a distinct chemical category, and their preparation and thermal specifications should not be inferred from gypsum-based instructions.
The following grid provides a selection framework rather than a product ranking.
| Decision criterion | Standard gypsum-bonded investment | Specialized high-detail investment |
|---|---|---|
| Detail reproduction | Can reproduce fine features when mixed and processed correctly; performance varies by formulation. | May offer improved reproduction of fine surfaces where the particular formulation supports it. |
| Gas permeability | Depends on porosity, composition and processing; must be sufficient for the casting method. | Requires verification, as finer structures or specialized formulations can change venting behavior. |
| Mold strength | Influenced by water ratio, setting, burnout and product chemistry. | May differ in strength or resistance to erosion; check the specified properties. |
| Dimensional expansion | Depends on binder and filler chemistry and the thermal cycle. | Must be checked independently; higher surface detail does not establish a particular expansion value. |
| Metal compatibility | Product-specific; commonly used for suitable lower-temperature jewellery alloys. | May target particular alloys or temperature conditions; verify the binder system. |
| Cost and handling | Compare supplier price, process requirements and reject rates. | Compare total usable-casting cost, not simply purchase price or marketing claims. |
One potential limitation of a finer investment structure is reduced gas transport under certain conditions. If permeability becomes insufficient, gas-related defects may offset the surface-detail advantage. This is a design and process question, not a universal flaw of high-detail products.
The manufacturer’s technical documentation should establish the correct liquid ratio, working time, setting requirements, burnout limits and casting compatibility. Claims about particle fineness, permeability or dimensional accuracy should be checked against actual product specifications where available.
When comparing formulations, use the same wax geometry and document relevant process differences. Record both feature reproduction and surface defects. An improvement in line sharpness is not a complete success if the casting becomes porous or dimensionally unsuitable.
Material selection becomes particularly important for jewellery assembled from multiple cast components, where surface accuracy and dimensional fit must survive together.
The Detail-First Mistake That Creates Shrinkage Misfits in Multi-Part Cast Jewellery
Multi-part jewellery can develop assembly misfits when makers optimize surface detail without validating the dimensional behavior of the entire casting process. Investment expansion, wax-pattern accuracy, alloy contraction and feeding conditions all affect the final dimensions. A crisper surface does not guarantee that separately cast components will align, hinge correctly or accept their intended fittings.
Dimensional change starts before pouring. Wax patterns may vary due to production, handling or measurement. The investment undergoes setting and thermal expansion, while the alloy changes dimensions during solidification and cooling.
These processes must be considered together. Investment expansion can compensate for some metal contraction, but the result depends on the formulation and conditions. Finer investment does not necessarily mean lower expansion, and a more conservative burnout schedule is not automatically a route to improved fit.
Austin’s discussion of gypsum-bonded investments includes examples of different expansion behavior associated with silica formulations. It also describes test-bar contraction measurements of 0.71% and 0.86% in the reported examples. Those figures illustrate why materials and process conditions matter; they are not general shrinkage allowances for jewellery alloys or a reliable basis for scaling every wax model.
Consider a hypothetical pendant made from two separately cast interlocking sections. Both pieces reproduce an engraved texture accurately, but one mounting point no longer aligns. Enlarging every wax dimension without identifying the cause could improve one interface while worsening another.
The better approach is to establish a dimensional chain:
- Measure the original design or master pattern at critical mating features.
- Measure the corresponding wax patterns without deforming them.
- Compare the final cast dimensions using consistent reference points.
- Identify whether the deviation is uniform, directional or concentrated around thicker sections and junctions.
- Repeat a controlled test only after identifying which stage appears responsible.
A uniform dimensional discrepancy may justify examining pattern scaling and overall expansion or contraction. Localized errors instead raise questions about wax distortion, cavity damage, feeding, incomplete filling or process variation. Measurements narrow the possibilities but rarely prove a single cause without supporting evidence.
Sprue and feeding design also matter because thicker regions may solidify differently from thin decorative features. Poor feeding can produce localized shrinkage cavities, although this must be distinguished from a general dimensional mismatch.
Discovering an assembly error after polishing, stone setting or other finishing operations introduces avoidable rework. A calibration component or test assembly can reveal incompatibility earlier, when adjusting the pattern or process is less disruptive.
Even a well-matched investment and correctly dimensioned pattern can fail if the mold loses structural integrity during wax removal and thermal processing.
When Should You Start Burnout to Avoid Cracked Investment and Distorted Cavities?
Burnout should begin only when the investment has completed the manufacturer-specified setting period and is ready for the prescribed heating cycle. Starting prematurely or heating too aggressively can expose a weak mold to thermal stress, vapor generation and wax-removal problems. The appropriate schedule depends on investment chemistry, flask dimensions, equipment and the intended alloy.
A mold that feels firm is not necessarily ready for burnout. Initial set and adequate green strength are related but different properties. Surface dryness also cannot establish that internal water conditions are suitable for heating.
For R&R Advantage investment, the published instructions specify two hours of undisturbed setting before the subsequent process. That requirement should not be shortened merely because the surface appears dry, nor transferred automatically to another formulation.
As the flask heats, the mold experiences several overlapping changes: free-water removal, gypsum dehydration where applicable, wax softening and drainage, thermal expansion, and eventual removal of remaining pattern residues.
An excessively aggressive heating stage can compromise a weak or unsuitable mold. Rapid vapor release, thermal gradients and pressure associated with wax removal may contribute to cracking or local erosion. Once the cavity wall fractures or flakes, the corresponding metal feature may contain flash, rough areas or displaced geometry.
Burnout is therefore a sequence of controlled heating stages and holds, not simply a temperature target. The correct program must accommodate the particular investment and equipment.
The Ultra-Vest jewelry investment instructions and casting-defect troubleshooting distinguish schedules by flask size and identify inadequate curing, improper dewaxing, incorrect thermal handling and other conditions as possible contributors to casting defects.
Its troubleshooting guidance also identifies spalling as material flaking from the mold wall into the cavity. This can create inclusions or surface imperfections and provides a useful distinction from defects caused by an original wax-pattern feature.
Incomplete wax removal or burnout may leave carbonaceous residue. Such residue can interact with casting conditions and affect the resulting surface. However, carbon residue and mold cracks are different mechanisms and should be investigated separately.
Practical readiness assessment should begin with the investment product instructions, setting records and compatible furnace program. Flask weight trends or external temperature observations may help document consistency, but neither is a substitute for the specified heating cycle.
Furnace loading, thermal response and flask dimensions can change actual heating behavior. Manufacturer schedules should be followed as the baseline, with any permitted adjustment verified against the relevant technical instructions rather than improvised from another investment system.
A cavity that survives burnout may still produce a defective casting if gases become trapped or the alloy cannot feed all regions during solidification.
Why Does Lost Wax Casting Create Porosity That Shows Up Only After Finishing?
Lost wax castings can contain internal pores formed by trapped gas or incomplete feeding during solidification. These defects may remain beneath apparently sound metal surfaces until grinding, polishing, engraving or setting exposes them. Because porosity can have several causes, its shape and position should be documented before changing burnout conditions, pouring temperature or sprue design.
The critical distinction is between gas-related porosity and solidification-shrinkage porosity. Both can occur within the same casting system, but they arise through different mechanisms and often require different corrections.
Gas-related cavities may result from gas present in the melt, gases associated with the mold or gas mechanically trapped during filling. Smooth, rounded pores are a useful morphological clue, although their appearance alone does not establish the gas source.
Shrinkage porosity develops when solidifying metal contracts and liquid metal cannot adequately feed the affected region. Irregular cavities, fissures or spongy internal structures may occur, particularly around heavier sections and wall intersections.
Thin features introduce another complication. Restricted flow, gas entrapment and incomplete filling may affect the same intricate region. A missing tip, a rounded pore and a small raised nodule should not be treated as interchangeable symptoms.
The technical classification in Identification & Correction of Platinum Casting Defects by Timothy L. Donohue and Dr. Helmut F. Frye emphasizes evaluating defect shape, appearance, location and dimensions before deciding on a cause. Its observations concern platinum casting, so they provide a diagnostic framework rather than proof that all jewellery alloys behave identically.
A simple defect map can distinguish patterns. Repeated pores near a heavy sprue junction may justify examining feeding and solidification. Pores scattered across thin decorative regions raise different questions about gas control, filling and metal conditions.
Finishing may reveal defects because removing surface metal exposes cavities that were already present. Polishing does not necessarily create those voids. The amount of material removed, however, can determine whether the defect becomes visible.
For buyers, this distinction matters when assessing quality. A casting may appear smooth before finishing yet contain internal discontinuities. Defects in prongs, joints or other load-bearing features warrant particular attention, although an isolated pore does not automatically establish mechanical failure.
After examining mold condition and feeding, molten-metal temperature becomes a particularly important remaining variable because it influences both filling behavior and the resulting solidification conditions.
Why Can Overheating During Pouring Create Hidden Weakness Even if the Cast Looks Fine?
Excessive pouring temperature can contribute to hidden casting defects by increasing exposure to gas absorption, mold reactions and unfavorable solidification conditions, depending on the alloy and process. A casting may appear complete while containing porosity or structural irregularities. However, overheating does not universally reduce strength or guarantee coarse grains; the outcome depends on alloy composition, cooling and other variables.
Raising metal temperature can improve fluidity and help fill narrow channels or thin features before the metal solidifies. That benefit is particularly attractive when a complex wax design contains shallow engraving, small prongs or delicate relief.
But increased fluidity is not the same as improved casting quality. Excessive temperature may increase interaction between molten metal and investment, aggravate surface roughness, or contribute to porosity under susceptible conditions.
Grain structure requires particular care in diagnosis. Cooling rate, composition, nucleation behavior and solidification conditions influence grain development. Pouring temperature can affect those conditions, but a larger temperature difference does not establish one universal grain-size or strength outcome.
The Ultra-Vest troubleshooting guidance identifies excessive metal temperature, excessive flask temperature and inappropriate burnout among possible causes of rough castings. It also includes overheated metal among several potential contributors to porosity.
Visible warning signs may include unusual surface deterioration, investment erosion or unexpected shrinkage-related indications near the feeding system. These are reasons to investigate, not reliable thermometers. Brightness and the apparent fluidity of a pour cannot establish the actual metal temperature.
For a process comparison, keep the alloy, flask preparation, sprue configuration and measurement method consistent while working within the alloy supplier’s approved casting parameters. Record differences in thin-section filling, surface defects and porosity rather than judging success only by the sharpness of a single feature.
Where structural integrity matters, visible inspection may need to be supplemented by appropriate testing. Surface appearance alone cannot reliably establish internal soundness or mechanical performance.
The final decision is not simply whether hotter metal fills better, but how metal and mold temperatures work together with the prepared investment cavity.
Key takeaways before adjusting pouring temperature
- Separate filling defects from structural defects. A complete outline does not prove that the casting is internally sound.
- Control the mold as well as the melt. Flask temperature, investment condition and feeding influence how a given pouring temperature performs.
- Change one variable at a time. Documented comparisons are more informative than increasing heat whenever detail reproduction disappoints.
Why Does Metal Pouring Temperature Control Affect Both Strength and Surface Finish?
Pouring temperature affects surface detail by influencing how molten metal flows through and fills the investment cavity. It also interacts with gas behavior, mold reactions and solidification conditions that influence internal quality. Successful control therefore means selecting an alloy-appropriate temperature alongside compatible flask temperature and feeding conditions, rather than maximizing fluidity or minimizing heat alone.
The casting system has to satisfy two different requirements. The metal must remain sufficiently fluid to reach fine features, and the filled casting must solidify without unacceptable porosity, surface reaction or structural irregularities.
At insufficient metal temperature, thin sections may fail to fill completely. The resulting defect can resemble lost wax detail, even though the cavity itself was accurately formed and remained intact through burnout.
At excessive temperature, filling may improve while the risk of certain mold reactions and surface defects increases. The outcome depends on the alloy, investment compatibility, flask temperature and casting method.
The relationship can be organized as a practical cause-and-effect comparison:
| Condition | Potential benefit | Potential risk or limitation |
|---|---|---|
| Metal temperature toward the lower end of the approved range | May reduce certain high-temperature reactions with the mold. | Incomplete filling or misruns in thin and intricate sections. |
| Metal temperature toward the higher end of the approved range | Greater available fluidity can support filling of delicate features. | Possible increased mold reaction, gas-related defects or other temperature-sensitive problems. |
| Compatible, controlled flask temperature | Supports the intended filling and solidification conditions. | An unsuitable temperature can contribute to incomplete filling or surface defects. |
| Stable, documented casting setup | Makes defect patterns easier to compare across production runs. | Cannot compensate for a damaged cavity, unsuitable gating or defective wax pattern. |
There is no universal pouring temperature for all gold, silver, bronze or other jewellery alloys. Composition matters, as do the intended casting technique and mold system. Manufacturer and alloy-supplier recommendations are the appropriate starting points.
Accurate temperature measurement can be challenging in a small casting studio. Optical readings, thermocouples and equipment displays have operating limitations. A recorded measurement should always be interpreted in relation to how and where it was obtained.
For repeatable results, the maker should document the alloy specification, approved pouring range, actual measurement method, flask-temperature conditions, investment batch and visible casting outcome. A controlled trial on representative geometry is more useful than repeatedly increasing temperature in response to incomplete detail.
Lost detail is a chain-of-process failure until evidence identifies the specific link. Crisp wax features require accurate investing, sufficient mold strength, suitable burnout, appropriate dimensional compensation and adequate metal filling. When any one condition falls outside its workable range, the metal may fail to reproduce what the original wax clearly showed.
For the next casting run, select a representative fine-detail test pattern, retain an accurate wax reference, record the investment and temperature conditions, and inspect the metal before finishing. Comparing those results across controlled trials provides a practical basis for reducing remakes without sacrificing fit, surface quality or structural reliability.
Can a casting mold look intact while its fine details are damaged?
Yes. A flask may retain its overall shape while localized erosion, surface damage or incomplete reproduction affects tiny cavity features. External appearance alone cannot confirm internal cavity accuracy. Comparing a defined wax feature with the finished casting and examining any available mold evidence is more informative.
How can a raised casting defect be distinguished from a missing detail?
A raised metallic nodule can indicate an air bubble trapped against the wax during investing, whereas a missing line or incomplete edge may result from cavity damage or insufficient metal filling. Compare the defect with the original wax and document whether material is missing or protruding before selecting a correction.
Should the wax model be enlarged to compensate for casting shrinkage?
Not without measuring the complete process. Pattern dimensions, investment expansion, alloy contraction and local solidification conditions can all affect the finished piece. A calibrated test casting is preferable to applying an assumed universal enlargement, especially when multiple parts must fit together.
Can changing investment eliminate every fine-detail casting defect?
No. A different investment may alter surface reproduction, mold strength or expansion, but it cannot automatically correct trapped air, damaged wax patterns, incomplete burnout, unsuitable sprue design or improper casting temperatures. Material changes should be evaluated against the specific defect and the complete process.
Why can two castings from identical wax patterns have different surface finishes?
Even when the wax geometry is nominally identical, investment mixing, bubble removal, setting conditions, burnout, flask temperature and metal filling may vary between runs. Those differences can affect cavity reproduction and final surface quality. Identical pattern design therefore does not guarantee identical casting results without consistent process control.