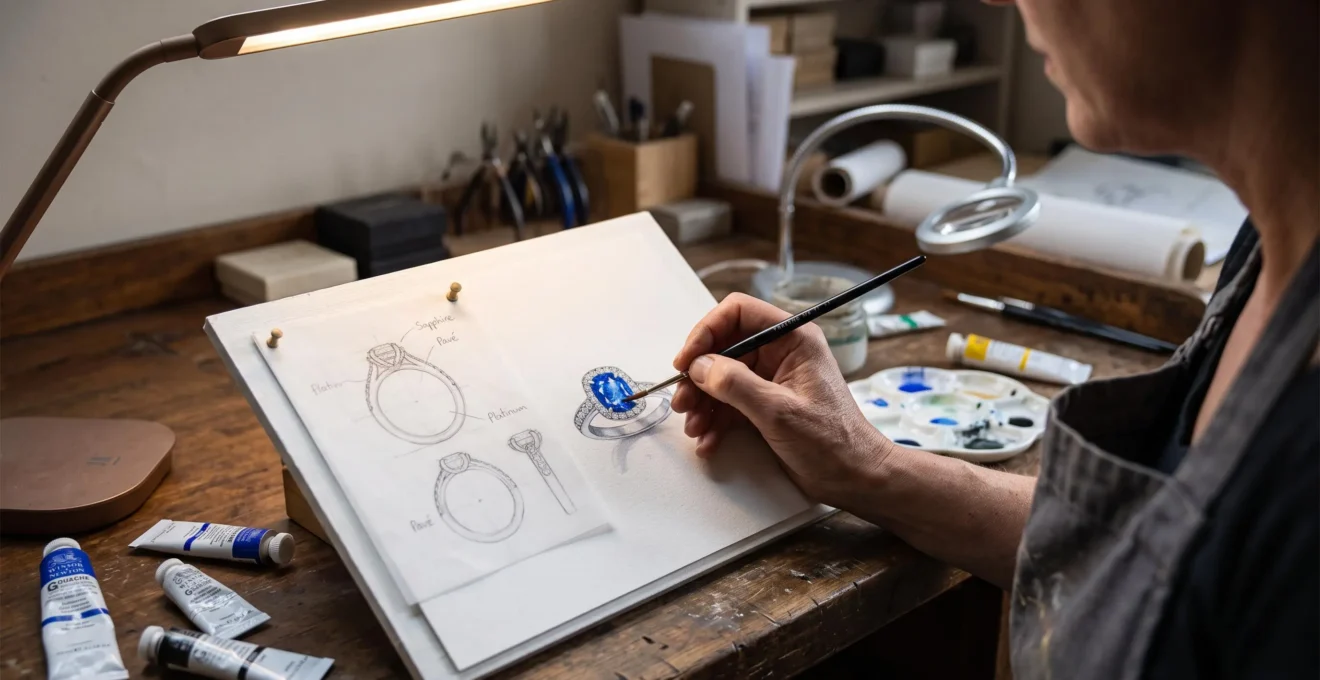
A hand-painted sapphire glows against polished gold. Every diamond seems perfectly positioned, the proportions look balanced, and the entire ring appears ready to wear. Yet when the finished piece arrives, the centre stone looks darker, the setting stands higher than expected, or the band feels heavier than the painting suggested.
That difference does not necessarily mean the jeweller made a mistake. A gouache rendering communicates a proposed design, not a guaranteed physical appearance. It can describe colour, composition, gemstone placement and artistic character with extraordinary clarity while leaving important questions about lighting, construction and comfort unanswered.
The safest approach is to treat the gouache as one part of a documented approval process. Measurements, actual gemstone references, technical drawings, CAD models and physical prototypes each answer questions that a beautiful illustration cannot resolve by itself.
Understanding these distinctions allows bespoke clients to approve the intended jewel rather than simply approve its most flattering image.
What to know before approving a jewellery gouache
- Painted brilliance is illustrative: gemstone brightness and colour depend on the actual stone, setting and lighting conditions.
- Scale requires independent verification: request dimensions and profile views rather than relying on a front-facing painting.
- Different approvals answer different questions: gouache establishes visual intent, CAD documents geometry, and a suitable physical prototype helps assess wearability.
- Why Does Gouache Make Stones Look Brighter Than They Will in Normal Lighting?
- How to Review a Gouache Approval Without Missing Scale and Height Problems?
- Gouache Only or CAD Too: Which Should You Choose for a Ring With Lots of Small Stones?
- The Approval Mistake That Leads to “That Colour Isn’t Available” After You Pay a Deposit
- When Should You Request a Gouache in the Custom Process to Save Time, Not Add It?
- How to Turn Pinterest Inspiration Into a Buildable Brief in 45 Minutes?
- How to Test a Wax Prototype on Your Hand in 15 Minutes Without Guesswork?
- Why Do Wax Prototypes Save People From Expensive Regret in Custom Jewellery?
Why Does Gouache Make Stones Look Brighter Than They Will in Normal Lighting?
Gouache can make gemstones appear unusually brilliant because an illustrator deliberately places highlights, shadows and saturated colour to communicate their ideal visual character. Unlike a real gemstone, the painted image does not change when the surrounding light changes. A stone that appears luminous on paper may therefore look quieter in ordinary indoor lighting.
Traditional jewellery illustration relies on controlled contrasts. Small areas of opaque white paint suggest intense reflections, while darker facets create the impression of depth. The artist can place these effects exactly where the composition benefits from them, without reproducing every optical condition affecting the finished jewel.
The Goldsmiths’ Centre jewellery rendering course explicitly covers gemstone illustration, layered gouache, metal colours, light, shadow and reflection. These are visual representation skills, not a method of measuring the actual brightness of a particular stone.
The critical distinction is between illustrated light and observed light. A painter can distribute sparkling highlights across an entire halo even though a real ring produces changing reflections as it moves. A gemstone viewed beneath a desk lamp may show darker areas or fewer bright flashes than its painted equivalent.
Gouache remains useful for judging the intended colour relationships, stone distribution and overall design. It is less dependable for predicting internal inclusions, extinction, optical behaviour in different environments or the exact visibility of metal beneath individual settings.
Coloured gemstones deserve particular scrutiny. A painted pink sapphire or emerald may have an appealing, consistent saturation that the sourced natural stone does not reproduce under every light. This does not establish that all gouaches exaggerate colour; it means the artist’s pigment choices cannot substitute for examining the actual gem.
Before approving, ask the jeweller for a photograph or video of the selected stone, or a genuinely comparable reference, under ordinary daylight and indoor lighting. Confirm whether the comparison shows the exact reserved stone or merely an example. Photographs also have limitations because exposure and screen settings affect perceived colour.
The rendering should establish the desired aesthetic. The gemstone itself must establish what that aesthetic can realistically look like.
How to Review a Gouache Approval Without Missing Scale and Height Problems?
Review a jewellery gouache in three passes: examine the front view for composition, the side view for setting height and construction, and an actual-size or on-hand reference for proportion. These checks address different risks. A visually balanced front-facing drawing cannot reliably establish how high a ring sits above the finger.
Start with the front view. Check the centre stone’s position, the symmetry or intended asymmetry of the design, the spacing of smaller stones, the width of the shoulders and the overall silhouette. Ask for a clearly identified scale rather than assuming the drawing represents the finished ring at actual size.
The side view requires closer attention. Cathedral settings, elevated halos and cocktail rings can appear visually compact from above while having substantial height. A profile drawing or cross-section can reveal the space beneath the gallery, the construction supporting the main stone and the relationship between the setting and the band.
These are not modern concerns alone. Petit Palais‘ exhibition documentation on jewellery design drawings describes historical drawings at a 1:1 scale, including technical annotations, profiles and indications of materials. A gouache can therefore contain meaningful technical information when those details are deliberately supplied.
Ask the workshop to confirm the following measurements in millimetres:
- The overall height from the inside surface of the shank to the top of the setting.
- The clearance beneath the gallery and whether another ring can sit flush beside it.
- The width and thickness of the shank, including at the back.
- The projection of the setting beyond the band’s normal outline.
If possible, compare an actual-size printout with a known ring or examine an equivalent setting on the hand. A drawing placed over a photograph of a hand can help with visual scale, but perspective and image resizing can make it misleading unless carefully calibrated.
Never assume that approval of a front view settles an unseen profile. Once the structure has been manufactured, changing its height can require substantial workshop intervention. Whether a change is included without charge depends on the jeweller’s written agreement, not on a universal approval rule.
A ring can look perfectly proportioned on paper and still feel unusually high. Recording the dimensions before production turns that surprise into a question the workshop can answer.
Gouache Only or CAD Too: Which Should You Choose for a Ring With Lots of Small Stones?
For rings containing extensive pavé, halos or snow-set gemstones, combining gouache with CAD is generally more informative than approving a painting alone. Gouache communicates colour and artistic rhythm; CAD allows the workshop to examine dimensions and setting geometry. Neither technique guarantees that every finished stone will reflect light exactly as illustrated.
The more small stones a ring contains, the more individual setting decisions influence its finished appearance. Prongs, beads, shared claws, metal channels and gaps between stones all occupy physical space. A painter can simplify these details to make the composition visually coherent, but the workshop still needs a construction method that secures each stone.
The Gemological Institute of America explains in GIA’s explanation of CAD and jewellery manufacturing how digital models support design modification, photorealistic images and prototype production. It also emphasises that jewellery construction requires engineering knowledge, including the strength of gemstone settings.
The appropriate approval tool depends on the uncertainty that needs resolving.
| Approval question | Gouache | CAD |
|---|---|---|
| Overall artistic character | Expresses colour, atmosphere and intended visual balance. | Shows the form through a defined digital model. |
| Small-stone distribution | Communicates the desired pattern. | Allows closer examination of positions, spacing and setting geometry. |
| Band and setting dimensions | Can include annotated measurements. | Supports dimensional specification and inspection. |
| Gemstone brilliance | Illustrates an intended lighting effect. | Can simulate reflections, but does not guarantee real optical behaviour. |
| Organic or asymmetrical design | Can capture expressive, irregular forms freely. | Can represent complex forms, although modelling them may require additional work. |
| Production verification | Communicates visual intent and selected details. | Provides geometry that can inform manufacturing and prototyping. |
For a ring with densely arranged diamonds, a useful hybrid sequence is to approve the artistic composition in gouache, review stone positions and metal dimensions in CAD, and confirm any remaining physical concerns through a suitable prototype.
Request a close-up of the CAD setting structure rather than relying entirely on a glossy photorealistic image. The latter may look convincing while leaving prong thickness, minimum clearances and manufacturing tolerances difficult to assess.
Very organic designs introduce another consideration. Free-form curves and intentionally uneven surfaces may be easier to communicate through hand illustration. CAD is not inherently incapable of modelling them, but the modelling method and workshop capabilities matter. In such cases, pair the gouache with an annotated profile or technical drawing.
The best approval package is not necessarily the one with the most images. It is the one that resolves visual, dimensional and manufacturing questions without confusing one kind of evidence for another.
The Approval Mistake That Leads to “That Colour Isn’t Available” After You Pay a Deposit
The mistake is approving a painted gemstone colour without confirming which actual stone or material specification the jeweller has secured. A gouache can establish the preferred shade, but it does not establish availability. If the selected gem has not been reserved, the eventual stone may differ from the illustration even when the design remains unchanged.
Consider a hypothetical commission for a ring featuring a vivid pink sapphire. The artist paints an attractive, saturated pink, and the client approves the composition. Only afterwards does the workshop discover that the available stones within the agreed specifications have a visibly different tone.
The issue is not necessarily poor illustration. It is the absence of a shared reference connecting the desired colour to the gemstone being purchased.
Natural stones can vary in hue, tone, saturation, clarity, cut and apparent brightness. Metal finish also affects the overall appearance of the piece. A painted colour swatch cannot independently identify which gemstone or alloy the supplier will deliver.
Before paying a deposit, request written confirmation of the relevant material specifications. Depending on the project, the information may include:
- Gemstone species and variety, together with any relevant treatment disclosure.
- Natural or laboratory-grown status, as applicable.
- Measurements, shape and agreed quality characteristics.
- Any origin claim that forms part of the purchase agreement, supported by appropriate documentation.
- Photographs or identification details of the exact stone if it has already been selected.
- Metal type, fineness and intended finish.
Ask whether the actual gemstone is already reserved for the commission. If not, establish whether the painted colour is an aspirational reference or a characteristic that the jeweller has specifically agreed to supply.
Five checks to complete before approving the deposit
- Request the final gouache with its version identifier and date; retain an identifiable approved design file.
- Obtain a written gemstone specification or the identification and image of the selected stone; retain a traceable material reference.
- Confirm the metal type, fineness and finish on the quotation; retain a documented material selection.
- Ask the jeweller to identify any unconfirmed colours, stone availability or substitutions; retain written answers to each outstanding item.
- Agree how material changes affect approval, price and delivery before payment; retain the applicable terms in the quotation or contract.
It is useful to distinguish design approval from material approval, but that distinction does not automatically determine contractual responsibilities. The effect of signing a rendering depends on the agreement and applicable consumer law.
Where substitutions are possible, specify whether the client must approve a replacement stone and how any price or delivery changes will be handled. Sourcing a suitable alternative may take additional time, but no universal delay can be inferred from the rendering alone.
A beautiful painting should begin a precise conversation about materials, not replace one. Colour approval becomes meaningful when both parties know which physical materials it refers to.
When Should You Request a Gouache in the Custom Process to Save Time, Not Add It?
Request a gouache when the main uncertainty is artistic: the balance of coloured gemstones, the character of a heritage-inspired piece or the translation of an unusual concept into a coherent jewel. If the design is already technically defined, a CAD model or physical prototype may answer the remaining questions more directly.
The ideal point for commissioning a gouache is generally after the design brief has been clarified and the major material decisions are sufficiently stable, but before irreversible manufacturing commitments. Exact sequences vary between workshops.
For complex coloured-stone jewellery, a painted rendering can help a client judge how several gemstones interact visually. It may also clarify decorative motifs, the relationship between polished and textured metal, and the intended character of a redesigned heirloom.
By contrast, a straightforward solitaire with a known setting, an existing stone and clear dimensional requirements may not benefit much from an elaborate painted illustration. The client may learn more from a dimensioned CAD profile, an existing sample or a suitable prototype.
Similarly, a pavé-only band may have relatively few unresolved artistic questions but several structural ones: stone spacing, band thickness, setting security and comfort. In that situation, additional painting may provide less decision-making value than technical modelling.
Timing matters because artistic approval depends on stable inputs. Commissioning a detailed sapphire gouache before the actual centre stone has been selected can create avoidable rework. The sourced stone may differ in outline, dimensions or colour, requiring the drawing to be revised.
A practical sequence is:
- Define the design brief and its non-negotiable characteristics.
- Clarify stone requirements and availability.
- Decide whether the remaining uncertainty is primarily artistic or dimensional.
- Commission a gouache if colour and visual interpretation need approval.
- Use technical drawings, CAD or a prototype to settle the outstanding construction questions.
Some designers develop gouache and CAD in parallel. Others produce the artistic rendering after an initial technical model. Neither sequence is universally preferable; what matters is identifying which decision each deliverable supports.
The potential time saving comes from reducing avoidable misunderstanding, not from a guaranteed reduction in the number of design revisions.
The earliest useful step is often not drawing at all. It is converting the client’s inspirations into a brief that the illustrator and workshop interpret consistently.
How to Turn Pinterest Inspiration Into a Buildable Brief in 45 Minutes?
Turn Pinterest inspiration into a usable jewellery brief by spending 15 minutes sorting references, 15 minutes identifying exactly what each image contributes, and 15 minutes writing a one-page specification. The aim is to separate aesthetic preferences from measurable requirements before an illustrator or jeweller begins interpreting the design.
A collection of attractive rings is not yet a design brief. One photograph may be appealing because of its narrow band, another because of its antique engraving, and a third because of its unusual gemstone colour. Without annotations, the jeweller has to guess which characteristics matter.
The first 15 minutes should be devoted to sorting. Organise the references into three categories:
- Silhouette: overall ring shape, head proportions, band profile and setting arrangement.
- Stones: colour relationships, cuts, shapes and distribution.
- Metal and finish: colour, texture, engraving and decorative details.
During the next 15 minutes, annotate each reference with a specific observation. Instead of writing “Love this ring”, record “Like the tapered shoulders, not the tall setting” or “Prefer the warm gold finish, but not the engraved pattern”.
The distinction prevents unrelated elements from being combined accidentally simply because they appear in the same inspiration photograph.
Use the final 15 minutes to produce a one-page brief identifying desired features, constraints and acceptable alternatives. Translate subjective expressions into workshop questions:
| Client expression | Workshop clarification | Approval evidence |
|---|---|---|
| “Dainty” | Agree an appropriate band width and thickness in millimetres. | Dimensioned profile. |
| “Vintage” | Identify specific features such as milgrain, engraving or period-inspired proportions. | Annotated reference or gouache. |
| “Chunky” | Specify the intended visual mass and band dimensions. | Measured design and physical sample. |
| “Low profile” | Confirm setting height and clearance from the finger. | Technical side view. |
| “Bright green” | Agree whether the colour refers to a specific gemstone or an artistic preference. | Actual-stone reference and written specification. |
Dimensions should be proposed and checked by the jeweller rather than inferred from the adjectives alone. A very narrow band, for example, must still satisfy the structural requirements of the chosen setting.
Conflicting inspiration images also need resolution. A client may admire an exceptionally slender band in one picture and a substantial cathedral head in another. Both elements might be achievable together, but the workshop must determine whether their intended proportions and structural requirements are compatible.
Mark each feature as non-negotiable, preferred or flexible, and ask the jeweller to confirm the resulting interpretation in writing. This creates a traceable point of reference for later gouache and CAD approvals.
The benefit of a clear brief is not simply better artwork. It provides a common standard against which subsequent drawings, models and material choices can be evaluated.
How to Test a Wax Prototype on Your Hand in 15 Minutes Without Guesswork?
Test a suitable wax prototype by examining its fit, height, proportions and interaction with neighbouring rings during a short, supervised session. Start with gentle hand movements, compare the profile with existing jewellery and record specific observations. Wax is fragile, so the jeweller should confirm which handling and try-on methods are safe for that model.
A physical prototype reveals spatial relationships that may remain difficult to judge in enlarged illustrations. The ring occupies real space on the hand, and its edges, setting height and visual mass become easier to evaluate.
However, a wax model is not identical to a finished metal ring. Its material, strength, surface finish and weight differ. It can demonstrate perceived size and approximate fit, but it cannot reliably reproduce the final weight or every aspect of wearing comfort.
A useful 15-minute examination can follow three five-minute stages.
Minutes 0–5: examine the ring on the hand. With the jeweller’s permission, carefully place the prototype on the appropriate finger. Observe its position while the hand rests naturally and during gentle movement. Check whether the head appears higher or wider than expected and whether the band occupies a comfortable amount of finger space.
Minutes 5–10: compare its relationship with other rings. If the model is sufficiently robust, position an existing band alongside it to examine the intended stacking arrangement. Look for interference beneath the gallery or unwanted gaps. Ask the jeweller to measure any critical clearance rather than estimating it visually.
Minutes 10–15: document the result. Photograph the prototype from above and from the side, preferably in consistent lighting. Record the dimensions or features that need adjustment. Natural daylight can make the profile easier to inspect, although lighting comparisons cannot demonstrate how the eventual gemstones will perform.
A jeweller can also help assess whether the design is likely to catch on clothing or everyday surfaces. Do not deliberately press a fragile wax setting against a table or another hard object: that can damage details that would behave differently in metal.
Feedback should be measurable whenever possible. Replace “It looks too big” with “The head extends farther across my finger than expected; please confirm the width.” Replace “It feels too tall” with “Please check whether the head can be lowered by approximately 1 mm without compromising the setting.” The requested change still requires the workshop’s feasibility assessment.
Avoid repeated forceful movement over the knuckle, twisting the model, carrying it loosely in a pocket or wearing it unsupervised. Some prototypes are made specifically for try-on; others are too delicate and should be handled only by the jeweller.
The objective is not to simulate months of wear in a quarter of an hour. It is to expose avoidable scale and profile misunderstandings while revisions are still comparatively accessible.
Key takeaways before final approval
- A visually approved design still needs dimensional and wearability checks before manufacture.
- Prototype feedback is most useful when it identifies a specific, measurable concern.
- When a conventional wax model is unsuitable, ask the workshop to propose a safer physical or technical verification method.
Why Do Wax Prototypes Save People From Expensive Regret in Custom Jewellery?
Wax prototypes can help prevent costly disappointment because they expose physical-scale and fit concerns before a design reaches its final metal form. Gouache explains the artistic intention, CAD describes geometry, and a suitable prototype makes that geometry tangible. Each approval stage addresses a different uncertainty, so none should automatically be treated as a substitute for the others.
Imagine a hypothetical bespoke ring with an elevated oval sapphire and a diamond halo. Its gouache shows a graceful, balanced composition. The CAD model confirms the planned dimensions and the arrangement of the setting. Yet when the client examines a physical prototype, the halo occupies more of the finger than anticipated.
The design may be consistent with the approved drawings. The problem is that the client has only now experienced its true scale.
This is the particular value of a physical model: it moves an important decision from visual imagination into a tangible comparison. A client can judge whether the head appears dominant, whether the band sits as expected and how the new ring relates to existing jewellery.
Such checks are useful before casting or final assembly. Once a metal structure has been produced, changes may involve modifying or remaking components, interrupting the setting process or producing a replacement piece. The precise consequences depend on the manufacturing method and the nature of the revision; remelting and resetting are not necessary for every change.
Traditional lost-wax casting uses a wax pattern to create a mould cavity for molten metal. Modern workflows can also involve digitally produced resin models and other manufacturing methods. This distinction matters because a wax or resin prototype made for client inspection is not necessarily identical to the model ultimately used in production.
A prototype also has limitations. It does not reproduce the final metal’s density, polish or tactile response. Very thin components may be too fragile to represent convincingly in wax. Tension-set designs can depend on metal behaviour that a wax imitation cannot demonstrate accurately.
Where a conventional wax model is impractical, discuss alternatives with the workshop. Depending on the design, these may include a reinforced resin model, a non-functional size reference, a metal sample of the proposed band profile or additional dimensioned CAD sections. The substitution should address the specific uncertainty rather than merely provide another attractive image.
The complete approval sequence can therefore be understood as three complementary decisions:
- Gouache: Is this the desired visual composition and artistic character?
- CAD and technical documentation: Are the proportions, construction details and specified dimensions understood and feasible?
- Physical verification: Does the proposed form appear and fit as expected at real scale, within the prototype’s limitations?
Skipping a stage is not automatically a mistake. Simple designs or familiar settings may need fewer deliverables. What creates unnecessary risk is leaving a significant question unanswered while assuming that another form of approval has already settled it.
Ask the jeweller for one consolidated approval record covering the artwork, material specifications, final dimensions and any prototype feedback. Approve the finished design for production only when the remaining uncertainties and agreed limitations are clear.
Does approving a gouache mean the finished jewellery must look exactly like the painting?
Not necessarily. The rendering communicates an agreed visual intention, but its contractual significance depends on the written agreement and applicable law. Gemstone lighting, surface reflections and viewing conditions can also produce legitimate differences between a painted image and a finished piece. Specific materials and dimensions should be documented separately where necessary.
Can a jewellery gouache be drawn at actual size?
Yes. Jewellery design drawings can be produced at a 1:1 scale and can include profile views, dimensions and material annotations. However, an image displayed on a screen or printed with automatic scaling may no longer be actual size. Check the stated scale against a known measurement.
Will a photorealistic CAD rendering show the exact sparkle of the finished gemstones?
No. Photorealistic CAD can illustrate shadows, reflections and proposed material appearances, but the result depends on its modelling and rendering assumptions. It does not replace inspection of the actual gemstones under relevant lighting conditions.
What should happen if the reserved gemstone becomes unavailable?
Review the agreed substitution terms before accepting an alternative. Ask for the replacement stone’s specifications, images and any revised price or delivery information. Whether a replacement requires renewed approval or other remedies depends on the contract and applicable consumer protections.
Can a prototype confirm whether a ring will be comfortable every day?
A suitable prototype can help identify obvious scale, fit, clearance and profile concerns, but it cannot guarantee long-term comfort. Wax and resin have different weight, strength and surface properties from finished precious metal. The jeweller should also assess the actual manufacturing dimensions, setting design and intended use.