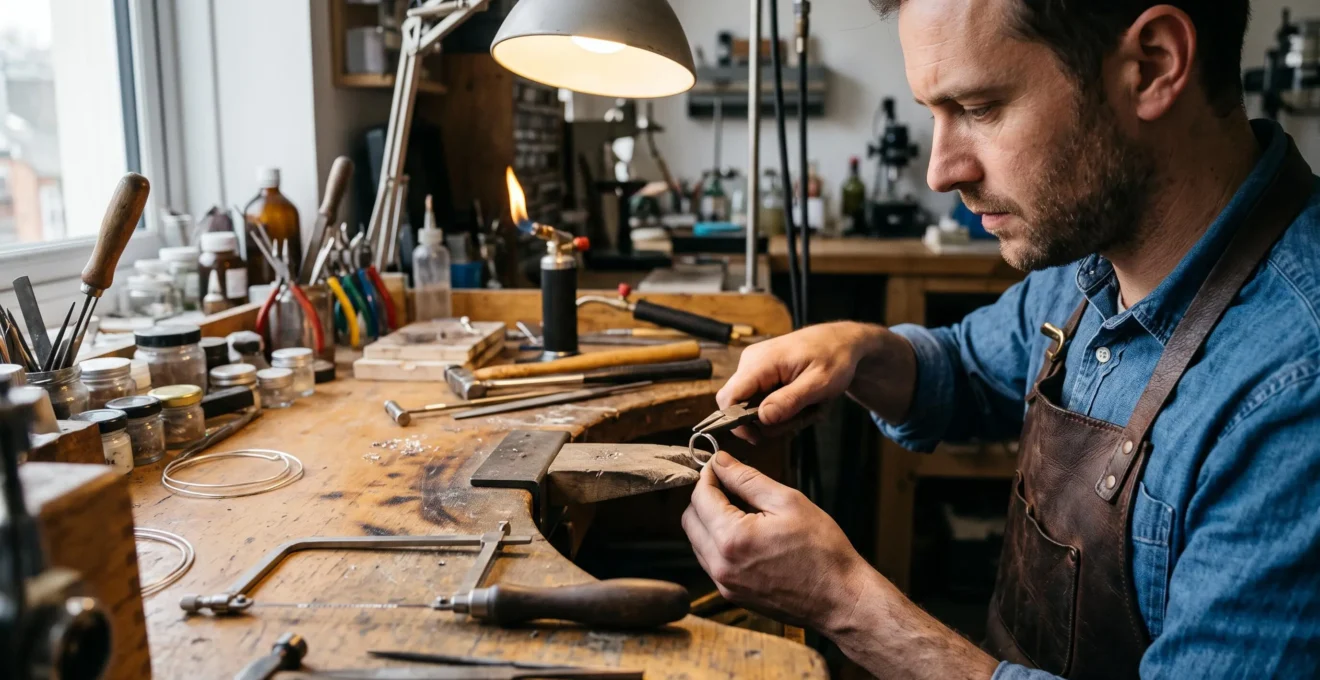
The fastest improvement in jewellery precision rarely comes from buying the most expensive tool available. It comes from identifying the operation where a tool introduces movement, excessive force, poor contact or inconsistent control, then addressing that specific weakness.
For an apprentice struggling with wandering saw cuts, the immediate solution may be better blade tension and workpiece support rather than a new saw frame. For someone forming silver bezels, polished, accurately aligned plier jaws may make a more noticeable difference than another finishing accessory. A jeweller who develops hand discomfort during repetitive work may benefit most from changing grip demands or bench positioning.
The useful distinction is between a tool that removes a genuine mechanical limitation and a tool that merely promises better craftsmanship. Quality matters where it changes how reliably the hand transfers force to metal. Technique, posture, maintenance and process control remain essential.
Before investing in specialised jewellery hand tools, examine where precision is lost, how frequently the problem occurs and whether a controlled adjustment can solve it without another purchase.
Which jewellery tool upgrades should come first?
- Start with the defect. Identify whether inaccurate cutting, marked metal, uneven forming or inconsistent finishing is the recurring problem before choosing a replacement.
- Pay for meaningful contact quality and control. Smooth plier jaws, dependable saw frames, well-cut files and comfortable handles matter when their characteristics directly affect the work.
- Upgrade progressively. Compare results before and after each change, and buy specialised tools when your projects and technique demonstrate a need.
- Why Do Better Hand Tools Reduce Mistakes When Your Hands Are Tired After 2 Hours?
- How to Diagnose Your Bench Problems and Buy Only 1 Tool That Fixes Them
- Premium or Mid-Range Tools: Which Should You Choose if You Work Mostly in Silver?
- The Tool-Buying Mistake That Keeps Beginners Stuck for Months
- When Should You Add Specialised Hand Tools to Your Bench as Your Skills Improve?
- How to Follow the Metal’s Journey From Raw Stock to Finished Jewellery Without Getting Lost?
- Torch Melt or Induction Melt: Which Should You Choose if You Cast Weekly?
- Why Does Metal Pouring Temperature Control Affect Both Strength and Surface Finish?
Why Do Better Hand Tools Reduce Mistakes When Your Hands Are Tired After 2 Hours?
Better jewellery hand tools can help maintain control during tiring bench sessions by reducing unnecessary grip force, awkward hand positions and resistance during repetitive movements. Smooth joints, balanced handles and suitable tool geometry may make delicate operations easier to repeat. However, two hours is not a universal fatigue threshold, and improved ergonomics cannot replace rest, positioning or sound technique.
Precision jewellery work requires many small corrections. The fingers stabilise a tool, the wrist guides its movement and the forearm manages pressure. When that coordination becomes harder to sustain, a jeweller may begin squeezing pliers too tightly, twisting a file or exerting excessive pressure during finishing.
A poorly matched tool makes those demands greater. Stiff plier joints require additional effort before the jaws move. Handles that do not suit the user’s grip can encourage awkward finger positions. A file that is difficult to control may prompt stronger pressure instead of smoother strokes.
NIOSH‘s guide to selecting non-powered hand tools recommends considering operating force, repetitive movement, posture and the task itself. These principles offer a useful framework for jewellery bench ergonomics, although the publication does not measure improvements in jewellery accuracy.
Different tools address different sources of strain:
- Ergonomic pliers: comfortable handles and smooth action may reduce unnecessary gripping effort during repeated forming operations.
- Spring-loaded cutters: an appropriate return mechanism can reduce the effort required to reopen the tool between cuts.
- Well-balanced files: suitable handles and predictable cutting action can help maintain pressure and direction without excessive force.
- Adjustable saw frames: secure blade holding and manageable frame geometry support consistent manual control.
- Correct bench-pin height: appropriate workpiece positioning can reduce unnecessary wrist and shoulder strain without requiring a new hand tool.
The difference between a fatigue-related problem and a tool-related problem becomes clearer through observation. Consider a jeweller whose bezel forming is accurate early in the session but becomes uneven after prolonged repetitive gripping. The first response should be to examine technique, posture, breaks and tool action together, rather than assuming the pliers need replacing.
A practical personal fatigue audit can reveal useful patterns. During several comparable bench sessions, note the first two noticeable mistakes, the tool involved, the task being performed and whether discomfort or reduced concentration was present.
After a week, look for repeated associations. If errors consistently appear during one high-force operation, reducing that task’s mechanical demands may be worthwhile. If mistakes occur across unrelated tasks, overall fatigue, lighting, posture or concentration may be more relevant.
Fatigue may develop sooner or later depending on grip intensity, repetition, working posture, rest and individual circumstances. The important measure is not the clock but whether performance changes predictably.
A suitable tool can reduce avoidable effort, but continuing precision also depends on working within comfortable physical limits. That distinction provides the starting point for diagnosing a specific purchase.
How to Diagnose Your Bench Problems and Buy Only 1 Tool That Fixes Them
To choose one jewellery tool upgrade, begin with a recurring defect rather than a product category. Record what goes wrong, identify the operation where it first appears, check technique and setup, then test whether the current tool has a measurable limitation. Buy a replacement only when that limitation persists and the proposed upgrade directly addresses it.
A defect is useful diagnostic evidence, but it rarely has only one possible cause. Wandering saw cuts may indicate blade condition, blade tension, workpiece movement or inconsistent hand control. Marked bezels may result from rough plier jaws, excessive gripping force or unsuitable contact surfaces. Uneven burnishing may reflect tool condition, surface preparation or movement technique.
Start by examining the tool and the workpiece under good lighting. Check whether the tool is clean, properly assembled and mechanically sound. Avoid modifying cutting edges, tool joints or safety-critical components without appropriate knowledge.
Accurate sawing is particularly dependent on setup. The GIA bench instruction on accurate jewellery sawing emphasises secure blade installation, lubrication, firm bench-pin support and perpendicular blade positioning. These are practical checks to make before blaming the frame.
The diagnostic process can be applied to common bench problems:
| Observed defect | Check before buying | Upgrade worth considering |
|---|---|---|
| Saw cut wanders or tilts | Blade installation, tension, blade condition, bench-pin support and hand position | A frame that holds the blade securely if the existing frame cannot do so |
| Silver bezel develops jaw marks | Jaw cleanliness, contact surfaces, gripping force and forming method | Smooth, accurately aligned pliers with suitable jaws |
| Filed edge becomes uneven | Workpiece support, stroke direction, pressure and file condition | A properly maintained file with a suitable cut and comfortable handle |
| Burnished surface looks irregular | Pre-finishing, burnisher surface, lubrication where appropriate and stroke consistency | A smooth, suitable burnisher if the existing contact surface is defective |
| Small components become distorted | Gripping pressure, jaw geometry and where force is applied | More appropriate precision pliers or another task-specific forming tool |
The most useful test is to repeat the operation under controlled conditions. Use comparable scrap pieces, the same preparation and a consistent inspection method. If a tool works well early in a session but results deteriorate later, fatigue deserves investigation. If it produces the same defect repeatedly even with careful technique, its design or condition becomes a stronger suspect.
Neither observation proves the cause on its own. Where possible, compare your tool with a well-maintained alternative borrowed during a supervised workshop or training session.
Once a likely mechanical limitation has been established, replace only the affected tool. Then repeat a similar task and record the resulting defects, finishing corrections and level of physical effort. A hypothetical comparison might involve forming several similar silver bezels with the existing pliers, then repeating the exercise with smoother-jawed pliers under comparable conditions.
The objective is not to generate a universal performance percentage. It is to determine whether the new tool reduces visible marks, improves control or shortens corrective work in your own hands.
Five checks before purchasing your next jewellery tool
- Photograph one recurring defect. Produce a clear image showing where the unwanted mark, deviation or distortion appears.
- Identify its first likely stage. Write down the operation, tool and setup associated with the problem.
- Test one no-cost correction. Adjust an appropriate technique or setup factor and retain a labelled comparison piece.
- Compare a suitable alternative tool. Record what changes when the same task is performed with a sound, correctly configured alternative.
- Document the decision. Create a short purchase note stating the defect, evidence, chosen upgrade and result to inspect afterwards.
When the evidence points to tool quality, the next question is how much quality you actually need—particularly when working with a comparatively easily marked metal such as silver.
Premium or Mid-Range Tools: Which Should You Choose if You Work Mostly in Silver?
For jewellery made mainly from silver, good mid-range hand tools are often sufficient when they have smooth contact surfaces, dependable alignment and suitable cutting performance. Premium tools become more compelling when repeated contact leaves marks, heavy use accelerates wear or improved handling reduces avoidable rework. The useful comparison is between actual workmanship outcomes, not brand prestige.
Silver jewellery makes surface damage especially noticeable. Sterling silver is relatively malleable compared with many tool materials, so rough plier jaws, poorly maintained burnishers and unnecessarily aggressive contact can leave marks that require additional finishing.
Silver also conducts heat efficiently, an important characteristic during soldering and other thermal operations. However, high thermal conductivity does not make premium hand tools universally necessary. The relevant tool characteristics change with the operation being performed.
For forming and finishing, contact quality often matters more than raw gripping strength. A pair of strong pliers with damaged jaws can produce poorer results than less expensive pliers with properly finished contact surfaces.
A well-maintained mid-range tool can therefore outperform a premium tool that is unsuitable for the task, worn or used incorrectly.
| Tool and operation | When mid-range is sufficient | When premium may be justified |
|---|---|---|
| Chain-nose and flat-nose pliers | Jaws are smooth, aligned and appropriate for the components | Frequent precision forming exposes recurring contact marks or inconsistent action |
| Burnishers | Working surface is smooth and can be maintained appropriately | Regular finishing work requires more consistent surface quality or improved control |
| Jeweller’s saw frames | Blade holding is secure and the frame suits the user’s technique | The existing frame repeatedly fails to hold tension or is uncomfortable during prolonged use |
| Hand files | Cut quality suits the metal, the file is sound and strokes remain controlled | Repeated precision work reveals poor cutting action, uneven wear or inadequate control |
| Side cutters | Cutting capacity suits the wire and edges remain serviceable | High-volume work reveals inconsistent cutting, rapid wear or excessive hand effort |
| General measuring tools | Readings are repeatable and sufficient for the required tolerances | Verified measurement limitations interfere with fitting or assembly |
This comparison is a practical decision framework, not a tested ranking of price tiers. A premium label by itself provides no guarantee of better cutting, alignment or finish.
The hidden cost of an unsuitable tool appears after the main operation. If a plier jaw leaves a visible indentation on a silver bezel, the jeweller may need to reshape, smooth or remake the component. The time spent correcting that damage is part of the tool’s real operating cost.
For a hobbyist making occasional pieces, a reliable mid-range pair of pliers may remain an entirely sensible choice. For a production jeweller repeatedly using the same contact surfaces, durability, ease of maintenance and consistency can carry greater weight.
Compare the total consequences of using each tool: initial expense, expected maintenance, physical effort, surface damage and finishing time. Avoid assuming that a higher purchase price automatically produces a better result.
A restrained purchasing strategy is particularly valuable for beginners, whose budget can easily disappear into tools they rarely use or do not yet know how to evaluate.
The Tool-Buying Mistake That Keeps Beginners Stuck for Months
One of the most costly beginner mistakes is purchasing a large assortment of jewellery tools before knowing which operations actually require them. The result can be a crowded bench, diluted budget and too little practice with essential equipment. Beginners generally benefit more from learning to use a compact set of suitable tools properly than from accumulating specialised accessories prematurely.
Buying equipment feels productive because it produces an immediate, visible change in the workshop. Improving a saw cut or forming a consistent bezel is slower and requires repetition. That difference can encourage a cycle in which frustration leads to another purchase rather than a careful examination of technique.
A broad starter kit is not inherently a mistake. A well-selected kit can provide a practical foundation, particularly when its contents match a taught course or a defined jewellery-making project. The problem arises when a kit is selected primarily for the number of included tools, without considering suitability, quality and actual frequency of use.
Consider two hypothetical beginners learning to make simple silver pendants.
One buys an extensive collection of inexpensive equipment immediately but spends little time checking blade setup, filing technique or surface preparation. The other begins with essential tools that function reliably and repeats a limited set of exercises, inspecting results after each stage.
The second approach creates clearer opportunities for deliberate practice, even though it does not guarantee faster progress for every individual.
For many initial fabrication exercises, the important tools include an appropriate saw frame and blades, suitable files, accurately functioning pliers, safe workpiece support and basic measuring equipment. Additional tools become relevant when the project calls for their specific capability.
The purchasing rule is straightforward: learn what acceptable performance looks like before replacing a functioning tool. This requires understanding both the operation and the limitations of the equipment.
For example, before purchasing a specialised bezel-forming accessory, practise shaping a bezel with appropriate basic pliers and a mandrel. Examine where the metal becomes distorted. If the defect disappears when pressure and support improve, the existing equipment may be sufficient.
Conversely, repeatedly using a damaged tool that marks metal or fails to function safely is not a valuable exercise in perseverance. Defective equipment should be repaired appropriately or replaced.
The same principle applies to protective equipment and essential safe-work provisions. Avoiding unnecessary purchases does not mean postponing equipment needed to control genuine workshop risks.
A small bench is not automatically a better bench, but a deliberately equipped one makes it easier to identify skill gaps and decide when specialisation is justified.
When Should You Add Specialised Hand Tools to Your Bench as Your Skills Improve?
Add specialised jewellery hand tools when a repeated task reveals a capability or control problem that your existing equipment cannot adequately resolve. Skill milestones are more useful than time spent making jewellery. The right moment comes when your basic technique is reasonably consistent, you can explain the limitation and a suitable tool offers a clear practical advantage.
Different jewellery-making projects demand different equipment. A person learning basic sawing and filing does not necessarily need the same tools as someone beginning stone setting or preparing detailed surface finishes.
The most useful upgrade sequence therefore follows the work rather than a predetermined shopping schedule.
| Skill milestone | Capability to establish first | Potential next upgrade |
|---|---|---|
| Basic cutting and shaping | Repeatable straight cuts, controlled curves and reasonably even edges | More suitable files or a better-functioning saw frame if an identifiable limitation persists |
| Repeated bezel fabrication | Consistent fitting, forming pressure and controlled joint preparation | Task-specific forming pliers, a suitable mandrel or a bezel-forming accessory |
| First stone settings | Understanding of fit, metal movement and safe support for the intended setting | Appropriate setting tools or specialised burnishers under suitable instruction |
| More demanding surface finishing | Controlled preparation, scratch removal and consistent inspection | Specialised finishing and burnishing tools matched to the surface |
| Repeated precision production | Stable technique and clearly defined repeatability requirements | Higher-durability or more specialised versions of heavily used tools |
The first signal of readiness is consistent basic technique. If a jeweller still changes pressure, angle or support unpredictably, a precision accessory may simply reproduce those variations.
The second signal is an identifiable limitation. Instead of saying that a ring looks wrong, the jeweller can specify that a bezel wall becomes uneven during one particular forming step.
The third is repeated demand. A specialist tool is easier to justify when the same operation occurs across several projects and repeatedly causes avoidable corrections.
Some tools require additional training before they improve results. Setting tools, for example, are not inherently safer or more effective simply because they are designed for precision work. Their benefit depends on suitable preparation, controlled force and understanding of the setting geometry.
Keep a short bench log to distinguish those limitations. Record the project, operation, defect, suspected cause, corrective attempt and outcome. Over time, the entries form a practical history of what has improved and what continues to restrict the work.
Review the log before each proposed purchase. If a limitation is still present after suitable practice and setup corrections, a specialised tool may be justified. If the issue disappears as technique improves, the saved budget can support a later, more meaningful upgrade.
As projects become more complex, following the complete manufacturing sequence becomes just as important as improving any individual operation.
How to Follow the Metal’s Journey From Raw Stock to Finished Jewellery Without Getting Lost?
Follow the metal’s journey by dividing jewellery manufacture into clear stages: material preparation, marking, cutting, shaping, joining, refining, setting where applicable, and finishing. At each stage, identify the tool responsible for accuracy and inspect the work before progressing. This makes it easier to catch early mistakes before they affect later operations and become expensive to correct.
A piece of jewellery does not acquire its final precision during polishing. Its geometry and surface quality are built progressively through the manufacturing process.
For a fabricated silver ring, the journey might begin with prepared sheet or wire. Marking establishes the intended dimensions. Cutting and filing create the edges that must fit. Forming brings the material into shape. Joining secures the structure, while refining and finishing reveal the quality of earlier work.
The sequence varies with the design, starting material and manufacturing method, but every stage creates opportunities for inspection.
| Production stage | Primary precision responsibility | Checkpoint before continuing |
|---|---|---|
| Material preparation and marking | Measuring, marking and checking the intended geometry | Confirm dimensions, layout and material suitability |
| Cutting | Sawing along the intended line with controlled blade alignment | Inspect the shape, cut direction and remaining material |
| Filing and initial shaping | Establishing even edges, profiles and mating surfaces | Check fit, symmetry and unintended tool marks |
| Forming | Controlling curvature, pressure and dimensional consistency | Inspect alignment, distortion and surface condition |
| Joining | Maintaining component fit and alignment during appropriate joining operations | Inspect joint continuity, geometry and visible defects |
| Refining and setting | Correcting remaining geometry and controlling component or stone fit | Examine surfaces, structural features and setting security as appropriate |
| Final finishing | Removing preparation marks without damaging intended details | Inspect finish, final dimensions and overall workmanship |
Errors can accumulate. A slightly inaccurate cut may create a gap at a seam. Forcing the parts together may distort the shape. Joining components that do not fit properly may create further difficulties, and extensive finishing can remove material without correcting the original geometry.
That chain is a practical risk, not an inevitable outcome. Careful inspection can interrupt it.
The GIA Quality Assurance Benchmarks for jewellery provide a structured framework for evaluating workmanship and identifying potential product failures involving settings, shape, structural damage and finish. Their detailed technical materials include a significant platinum focus, so material-specific guidance should not be transferred automatically to silver.
For the small workshop, the underlying quality-control principle is particularly useful: identify a defect at the stage where it can still be corrected appropriately.
Attach a simple record to each work-in-progress piece. It can contain a project identifier, the current stage, measurements or fit checks, observed defects and any corrections made.
Record both where a defect is discovered and where it probably originated. A flaw noticed during polishing may have been introduced during filing or forming. If similar failures repeatedly originate at the same operation, that stage deserves closer investigation.
This process also helps evaluate equipment upgrades. Instead of purchasing a new polishing tool because finished pieces look uneven, determine whether the finishing problem was already present before polishing began.
Some apparent bench-work defects originate earlier still, particularly when jewellery components are cast rather than fabricated directly from stock.
Torch Melt or Induction Melt: Which Should You Choose if You Cast Weekly?
Jewellers who cast weekly should choose between torch melting and induction melting according to repeatability needs, alloy requirements, equipment suitability, training and the actual defects occurring in their castings. Torch melting offers direct manual control but relies heavily on operator technique. Suitable induction systems can provide more structured melting controls, although they do not automatically eliminate casting defects.
Melting equipment is not a hand-tool upgrade, but the same purchasing principle applies. A new machine is worthwhile only if it addresses a demonstrated limitation in the current process.
With a torch, the operator controls heat application and judges the condition of the melt using observation and experience. The process can be flexible, but its consistency depends on several factors, including the operator’s technique, heating equipment, crucible, alloy and subsequent casting method.
An induction melting system heats conductive metal using an electromagnetic field. Depending on its design, it may offer defined operating parameters and temperature monitoring or control features. Those capabilities must be evaluated for the particular machine; they cannot be assumed from the word « induction » alone.
Weekly casting increases the number of opportunities to observe recurring problems. It also makes recording setup and results more valuable. However, casting once a week does not by itself establish that an induction machine is technically or financially justified.
| Decision factor | Torch melting | Induction melting |
|---|---|---|
| Heat management | Depends strongly on operator adjustment and observation | Depends on machine design, settings and the accuracy of any installed controls |
| Repeatability | Requires consistent manual procedure | May support repeatable operating parameters when properly configured |
| Equipment requirements | Appropriate torch, fuel system, crucible and safe working arrangement | Compatible machine, electrical installation, crucibles and associated casting setup |
| Learning requirements | Manual heat judgment and safe flame handling | Machine operation, settings, monitoring and process validation |
| Best reason to change | Current equipment is unsuitable for the intended melt or process | A verified need for capabilities that a suitable induction system can provide |
Before changing equipment, compare casting records. Document the alloy, batch preparation, melting arrangement, mould conditions and the defects observed in the final casting. Where appropriate, obtain qualified instruction for evaluating melt temperatures and equipment suitability.
Look for patterns involving incomplete filling, surface irregularities or porosity. These symptoms are not exclusive to one melting method, and they cannot establish a diagnosis without investigating other variables.
A jeweller may also encounter additional learning demands when switching methods. A familiar torch process and a new induction process require different controls and observations. Existing successful procedures should be documented so that the effect of any change can be assessed.
Once the melting method is suitable, control of the casting conditions—including metal temperature—becomes a separate precision challenge that hand tools cannot resolve afterwards.
Key takeaways before assessing casting temperature
- Separate fabrication defects from casting defects. An excellent file or burnisher cannot repair internal porosity or missing cast detail.
- Evaluate the complete casting process. Alloy, mould conditions, metal temperature and casting equipment can interact, so a single visible symptom rarely identifies one cause.
- Build repeatability through records. Compare results from controlled, documented casting conditions before investing in additional equipment.
Why Does Metal Pouring Temperature Control Affect Both Strength and Surface Finish?
Pouring temperature affects how molten metal enters and fills a mould, making it an important variable for cast detail and surface quality. Temperature also influences solidification conditions that can contribute to internal defects and mechanical performance. However, casting strength and finish depend on interacting factors, including alloy composition, mould temperature, feeding, contamination and cooling conditions.
Molten metal must remain sufficiently fluid to fill the intended geometry before solidification prevents further movement. If the metal or the casting system is too cold for the particular design, fine features may not fill completely.
Potential warning signs include incomplete edges, missing detail and cold shuts, where separate flow fronts fail to unite properly. These defects should prompt examination of both temperature and other filling conditions rather than an automatic increase in heat.
Excessive metal temperature may contribute to surface deterioration, oxidation-related problems or certain forms of porosity, depending on the alloy and process. Yet rough surfaces and internal voids can also result from mould conditions, gas entrapment, feeding difficulties, contamination and other causes.
Porosity is not proof of overheating. Treating every porous casting as a temperature error can lead to repeated adjustments that fail to address the actual problem.
Research published in Platinum Metals Review on casting platinum jewellery alloys investigated platinum-copper and platinum-ruthenium systems using induction melting and casting equipment. It examined casting variables including mould temperature, investment materials and centrifugal speed, with outcomes involving filling, microstructure and porosity.
The research found that casting success depended on interacting process conditions. For the investigated alloys and arrangements, relatively cooler mould conditions reduced the probability of severe porosity. These findings should not be treated as universal temperature recommendations for sterling silver, gold alloys or unrelated casting systems.
At the jewellery bench, a useful diagnostic distinction is between inadequate filling and defects that appear despite complete filling.
| Visible symptom | Possible temperature-related explanation | Other relevant checks |
|---|---|---|
| Missing fine detail | Metal may lose sufficient fluidity before complete filling | Alloy, mould conditions, flow path and casting method |
| Cold shuts | Flow fronts may solidify before bonding effectively | Filling pattern, gating and mould temperature |
| Rough surface | Unsuitable thermal conditions may contribute to surface defects | Investment condition, surface preparation, contamination and reactions |
| Porosity | Temperature and solidification conditions may contribute | Feeding, gas, alloy preparation, mould conditions and casting geometry |
| Visible cracks or weak features | Solidification and cooling history may be relevant | Design, alloy, shrinkage, mechanical stress and other structural defects |
For consistent results, use suitable equipment and a documented process matched to the alloy and casting design. Where the equipment supports it, measure and record relevant temperatures using appropriate, correctly maintained instruments. Follow the operating guidance for the specific melting and casting system.
When direct temperature measurement is unavailable, visual observation may form part of an experienced operator’s procedure, but it is less reliable than an appropriate measurement system and should not be treated as a universal thermometer.
Keep records of alloy identity, melt preparation, equipment settings, mould preparation and finished casting observations. Change one controllable variable at a time when practical, while recognising that casting conditions can interact.
Work involving molten metal also requires appropriate training, protective equipment, ventilation, suitable crucibles and compatible casting equipment. Tool selection and process optimisation must not override safe operating procedures.
Hand-tool precision becomes relevant again only after a structurally sound casting has been produced. Filing, setting and polishing may improve dimensions and appearance, but they cannot reliably restore an internal structure compromised by significant casting defects.
For your next project, select one recurring defect, identify the stage where it originates and record a controlled correction before purchasing anything new. This single habit can make tool upgrades more deliberate and precision improvements easier to evaluate.
Which jewellery hand tool should a beginner upgrade first?
Upgrade the tool that demonstrably limits your most frequent operation. A saw frame that cannot hold a blade securely may deserve attention before specialised finishing equipment. If your cutting tools function properly but pliers repeatedly mark silver, suitable smooth-jawed pliers may have greater practical value. Confirm that maintenance, setup and technique are not the underlying cause before purchasing.
How can you tell whether a jewellery tool is poorly made or simply needs maintenance?
Inspect its condition and function before assessing its quality tier. Look for damaged working surfaces, poor alignment, loose or excessively stiff joints and insecure blade holding. Clean, maintain and configure the tool according to appropriate guidance. If its limitations persist after suitable maintenance and technique checks, compare it with a properly functioning alternative. Replace damaged or unsafe tools rather than continuing to use them.
Can ergonomic pliers improve precision without changing your jewellery-making technique?
Ergonomic pliers may make controlled movements easier by reducing unnecessary gripping effort or uncomfortable positioning. However, ergonomic benefits do not automatically translate into measurable precision improvements. Jaw geometry, workpiece support, pressure control and the user’s technique remain important. Evaluate changes through comparable forming exercises and inspect the resulting surfaces.
Should you buy separate pliers for silver and harder jewellery metals?
Separate tools can be useful when an operation requires different jaw shapes, gripping capacity or surface protection. They are not automatically necessary just because the metal changes. The more important considerations are tool suitability, cleanliness, contact-surface condition and whether previous operations have damaged the jaws. Dedicated tools may also help keep delicate finishing surfaces free from unwanted marks.
Is a precision tool worth upgrading if it saves finishing time but does not improve the initial shape?
Potentially, yes. A tool that produces fewer scratches, requires less corrective finishing or reduces repeated surface damage may offer meaningful value even when dimensions remain unchanged. Compare comparable pieces and record the amount of additional work required. Make sure the improvement results from the tool rather than changes in technique or preparation.