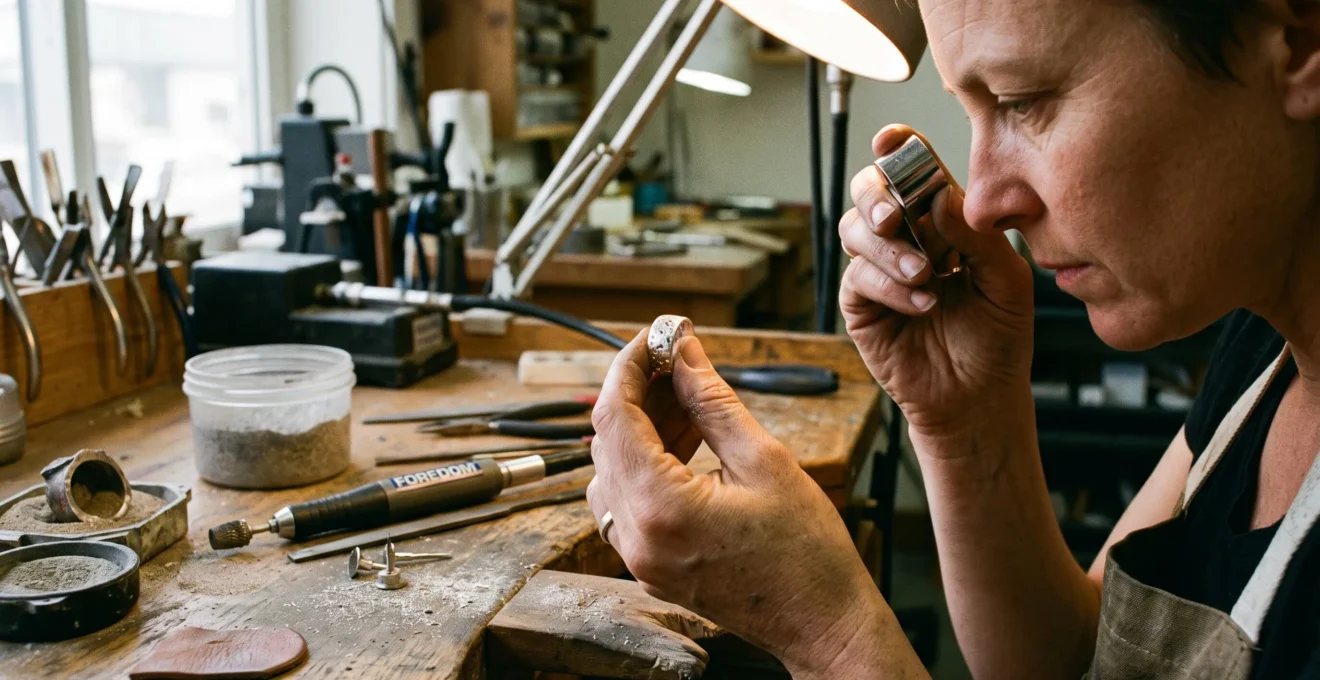
A lost wax casting can look perfectly reasonable when it leaves the investment flask, yet develop pinholes, dull patches or uneven texture as soon as a jeweller starts filing and polishing it. The immediate temptation is to change polishing compounds, apply more pressure or spend longer at the buffing wheel. None of those measures will remove a void that extends below the metal’s surface.
Roughness after polishing is not necessarily a finishing failure. The underlying cause may be trapped gas, inadequate metal feeding, contaminated alloy, damaged investment, incomplete burnout or a design that is difficult to cast cleanly. Different defects can look remarkably similar under workshop lighting, but they require different corrective actions.
For makers, the important question is where the defect originated and whether the next casting can be improved. For buyers, it is whether the surface is merely imperfect, likely to deteriorate or unsuitable for the jewellery’s intended use. Both need a practical distinction between cosmetic texture and unacceptable casting quality.
Why polishing does not always fix rough cast jewellery
- Polishing can expose internal pores, inclusions and shrinkage cavities rather than eliminate them.
- Sprue design, wall thickness, investment preparation, burnout and pouring conditions all influence the finished surface.
- Acceptable quality depends on defect location, structural importance, intended finish and agreed inspection criteria—not simply whether a casting appears shiny.
- Why Does Lost Wax Casting Create Porosity That Shows Up Only After Finishing?
- How to Design for Lost Wax Casting So Your First Pour Doesn’t Fail
- Casting or Hand Fabrication: Which Should You Choose for Sharp Edges and Crisp Lines?
- The Thin-Casting Mistake That Warps Pieces Before They Even Leave the Tumbler
- Why Does Contaminated Metal Stock Create Pitting That Polishing Can’t Fix?
- Why Does Metal Pouring Temperature Control Affect Both Strength and Surface Finish?
- How to Stabilise Your Metal Pouring Results Using 3 Consistency Checks
- In What Order Should You Plan Burnout, Casting, and Finishing to Meet a Fixed Deadline?
Why Does Lost Wax Casting Create Porosity That Shows Up Only After Finishing?
Lost wax casting can contain microscopic gas bubbles and shrinkage cavities beneath an apparently sound metal surface. Filing, tumbling and polishing remove part of that surface, exposing previously hidden voids. The finishing process makes the defect visible but usually does not create it. Identifying the shape and distribution of the openings helps determine whether gas, inadequate feeding or another casting problem is responsible.
When molten metal fills an investment mould, gas may become trapped in the metal. As the casting solidifies, insufficient feeding can also leave cavities in regions that need additional liquid metal to compensate for solidification shrinkage. Both mechanisms can produce subsurface defects.
The outer surface initially conceals some of these openings. Once the jeweller removes stock to eliminate sprue marks, refine contours or produce a high polish, the tool may break through into the voids.
The resulting surface can look worse after polishing than it did immediately after devesting. Continuing to remove metal may expose additional cavities deeper in the casting.
Defect morphology offers a useful starting point. It is not a substitute for examining the casting process, but it helps narrow the investigation.
| Defect appearance | Possible mechanism | What to investigate |
|---|---|---|
| Small, approximately round cavities | Gas porosity | Melt overheating, gas exposure, burnout conditions and metal cleanliness |
| Irregular or angular cavities, often near heavier sections | Solidification shrinkage | Sprue attachment, feeding capacity and section transitions |
| Shallow pits or irregular surface craters | Investment damage, inclusions or burnout residue | Investment preparation, pattern cleanliness and burnout compatibility |
| Raised rounded bumps | Metal entering air cavities in the investment | Investment mixing, vacuuming and vibration |
A raised metal nodule is especially important to distinguish from a pore: trapped air in investment can produce a protrusion, whereas gas trapped within the metal can leave a cavity. Treating them as one defect risks correcting the wrong stage of production.
Eddie Bell‘s technical analysis of jewellery sprue-system design connects poor feeding with shrinkage porosity and explains why surface defects may only become apparent during later finishing.
Not every microscopic imperfection makes a casting unacceptable. A minor pore on a deliberately textured, non-critical surface may be tolerable if it is stable and consistent with the agreed finish. Visible cavities on a high-polish face, however, are generally incompatible with a specification that calls for a clean, mirror-like appearance.
Porosity around a ring shank’s narrow section, a setting seat, a clasp or another load-bearing feature deserves more scrutiny because its significance extends beyond appearance. Visual inspection alone cannot establish that internal metal is sound.
Tumbling or burnishing may make a defective surface temporarily appear smoother by deforming or brightening the metal around shallow openings. That appearance is not evidence that internal voids have disappeared. A defect concealed at delivery may become visible again during later resizing, refinishing or wear.
Buyers and makers should therefore agree on whether quality means a particular appearance, a particular geometry, freedom from visible open porosity or additional integrity requirements for critical features. No universal numerical porosity allowance applies to every piece of jewellery.
The essential decision is whether the defect is superficial, repairable without compromising the design or evidence that the casting should be rejected. That assessment becomes easier when the design itself has already been reviewed for casting risks.
How to Design for Lost Wax Casting So Your First Pour Doesn’t Fail
A successful first pour begins with a design that allows molten metal to fill the mould and feed thicker regions as they solidify. Sprue size, attachment location, wall thickness, section transitions, model orientation and investment geometry all affect surface quality. Reviewing these features before investing the pattern prevents avoidable failures that cannot be corrected economically through polishing.
A jewellery design may look balanced in a rendering but behave very differently when surrounded by investment. Narrow passages can be difficult to fill, deep cavities can create fragile mould features and abrupt thickness changes can complicate solidification.
Sprues are not simply channels for delivering metal into the mould. They also influence whether sufficient liquid metal remains available to feed regions that solidify later.
Placement matters as much as size. A large sprue attached to an unsuitable location may leave an important thick region poorly fed. Likewise, a smaller gate may be appropriate for some geometries but inadequate for others.
The relationship between gate dimensions and the thinnest feature cannot be reduced to one reliable numerical ratio for every alloy and design.
| Design feature | Potential failure | Preventive review |
|---|---|---|
| Sprue attached away from a heavy section | Localised shrinkage cavities | Review how the thickest region will remain fed |
| Undersized feeding passage | Incomplete filling or inadequate feeding | Evaluate gate capacity against geometry and alloy |
| Sharp internal transitions | Investment stress, localised filling difficulties or poor detail | Introduce suitable fillets where the design allows |
| Deep undercuts and delicate galleries | Fragile investment features and rough negative details | Assess mould strength and possible redesign |
| Poorly oriented pattern | Difficult filling or gas evacuation | Review metal entry and potential gas-trapping regions |
| Abrupt thickness changes | Uneven solidification and distortion risk | Smooth transitions and reassess feeding |
Model orientation influences how metal moves through the cavity under the casting equipment’s operating conditions. It also changes the position of regions where air or gases may be difficult to evacuate. The best orientation is therefore not necessarily the one that uses the least investment space.
There is a commercial trade-off here. Hollowed backs reduce material, sharp undercuts create attractive shadows, and delicate galleries can make jewellery look lighter and more intricate. Yet these features may require fragile investment projections or feeding routes that are difficult to execute reliably.
For 3D-printed castable patterns, Formlabs’ technical white paper on casting 3D-printed jewellery patterns describes how sharp geometry, investment breakage, burnout conditions and inadequate feeding can contribute to poor casting results. Its resin-specific recommendations must not be automatically applied to conventional wax patterns.
Five checks to complete before committing a jewellery design to casting
- Map the wall thickness. Identify the thinnest and thickest areas on the pattern or CAD model. Deliverable: an annotated thickness map showing vulnerable transitions.
- Review gate capacity. Compare the proposed feeding passage with the sections it must fill and feed, without relying on an assumed universal ratio. Deliverable: a marked gate location and cross-section review.
- Trace gas escape. Examine orientation and possible gas-trapping regions under the intended casting method. Deliverable: a diagram showing filling direction and areas requiring further assessment.
- Check sprue-tree balance. Review the position and feeding demands of each pattern on the tree. Deliverable: a tree layout with identified high-risk attachments.
- Verify investment readiness. Confirm compatible investment, handling condition, mixing requirements and planned burnout procedure. Deliverable: a completed pre-investment preparation record.
These checks help separate geometry-driven failures from failures caused by melt preparation or flask processing. They do not guarantee a successful casting, but they make the first trial more informative and reduce the likelihood of repeating an avoidable problem.
If a design still depends on extremely delicate metal flow or vulnerable mould features, the right response may be to modify the geometry or consider hand fabrication for selected elements rather than force the entire piece through one casting process.
Casting or Hand Fabrication: Which Should You Choose for Sharp Edges and Crisp Lines?
Hand fabrication is often better suited to jewellery requiring long, sharply defined edges, precisely controlled flat surfaces or tight dimensional tolerances. Lost wax casting is particularly useful for complex three-dimensional forms and repeatable designs, but its edges may require additional refinement. The strongest choice depends on geometry, production volume, available finishing labour and whether combining the two methods can reduce risk.
Casting reproduces the cavity formed by the investment, subject to the limitations of the pattern, mould and metal flow. Sharp internal features can create fragile investment regions, while thin or acute metal features can be difficult to fill consistently.
Hand fabrication takes a different route. A jeweller can saw, file, shape and assemble sheet, wire or other worked stock while directly controlling an edge or plane. This does not mean fabrication produces perfect geometry automatically: soldering, distortion and manual workmanship introduce their own challenges.
The critical difference is where the precision work occurs. In fabrication, crisp lines may be established directly while making the component. In casting, achieving the same lines may require accurately formed patterns followed by careful removal of metal without losing the intended shape.
Consider a hypothetical pendant consisting of a simple rectangular frame with perfectly straight outer edges and sharply defined internal corners. If the design requires extensive filing after casting to recover those features, fabricating the frame from suitable stock may offer better control.
A pendant with sculpted organic relief, complex curves and interconnected details could favour casting because producing the complete shape by hand might require substantial assembly work.
The decision becomes more nuanced when the design combines both types of geometry.
| Design criterion | Method worth considering | Reason |
|---|---|---|
| Many long, straight, sharp edges | Hand fabrication | Direct control over planes and edge geometry |
| Complex sculptural detail | Lost wax casting | Can reproduce intricate three-dimensional patterns |
| Deep internal recesses | Design-dependent; assess hybrid fabrication | Investment fragility and finishing access may be limiting |
| Tight mating-surface tolerances | Fabrication or cast-and-machine workflow | Critical dimensions may need controlled finishing |
| One-off simple geometric design | Hand fabrication | May avoid pattern, investment and casting setup |
| Small series of complex repeated shapes | Casting | Repeatable patterns can justify casting preparation |
| Organic body with exact geometric edges | Hybrid workflow | Cast complexity, then refine or attach precision features |
Finishing labour is part of the manufacturing cost. A casting that needs repeated filing, filling, polishing and inspection may consume more time than expected. Every additional pass can soften a line, reduce thickness or uncover another pore.
That is one reason a cast piece may never become visually crisp despite extensive polishing. The problem is not necessarily the worker’s technique; the process may have been poorly matched to the geometry.
A hybrid workflow can avoid that trap. A maker might cast a detailed central element and fabricate the surrounding frame separately, or cast a shape with sufficient allowance for controlled machining or hand refinement where accurate edges are essential.
The method should be selected before quoting a finished piece, not after an unexpected amount of finishing work has already been invested.
Once the manufacturing route is established, the next major risk is material distribution. Even a well-designed casting process can struggle when the proposed walls are too thin or the transitions are too abrupt.
The Thin-Casting Mistake That Warps Pieces Before They Even Leave the Tumbler
Thin lost wax castings can distort because narrow sections solidify differently from adjacent heavy regions and may lack sufficient stiffness to resist stresses during cooling, handling or finishing. Thin edges are also more vulnerable to incomplete filling. Polishing cannot correct a surface that is uneven because the underlying geometry has moved, and aggressive finishing may make the section weaker.
The common design mistake is treating minimum thickness as purely a question of whether molten metal can enter the cavity. A feature may fill successfully yet remain too delicate to preserve its intended shape throughout production and use.
Thin regions usually lose heat more quickly than heavier ones under comparable conditions. Heavier regions can continue solidifying after adjacent thin features have become solid, creating feeding demands and possible residual stresses.
Warping is not the inevitable result of every thin-to-thick transition. The outcome depends on alloy, geometry, solidification conditions, constraint and subsequent handling. The risk increases when wide unsupported surfaces, tapered profiles and very narrow structural sections are combined.
A thin tapered ring shank, for example, should be evaluated not only at its thickest point but wherever the section approaches its narrowest dimension. Similarly, a wide flat pendant may need sufficient section stiffness to remain flat through casting and finishing.
Two kinds of failure should be distinguished.
- Structural failure: distortion, cracking or insufficient strength for the intended function. The solution may require increasing section thickness, changing geometry or making the component differently.
- Visual failure: incomplete edges, rough texture, localised shrinkage defects or a visibly uneven surface. Feeding, filling and mould conditions may be involved even when the piece is not obviously weak.
An orange-peel-like appearance should not automatically be attributed to thin walls. Similar-looking texture may arise through different mechanisms, so visual appearance alone is insufficient to establish the cause.
When examining the wax or CAD model, mark narrow transitions, broad unsupported faces, delicate galleries and areas that require substantial polishing allowance. Review whether the feeding system serves the heavier regions without creating excessively difficult filling paths to thinner details.
A defect discovered after tumbling requires a different economic decision from one identified immediately after devesting. By that point, additional labour has already been spent and corrective work may create new risks.
A practical triage order is to assess integrity first, then geometry, then surface condition. If a critical section is cracked or badly distorted, reject or recast it rather than attempt cosmetic improvement. If distortion is slight, evaluate whether controlled correction is appropriate for the particular alloy and design. If the piece is sound but rough, determine whether limited finishing will achieve the agreed surface without removing excessive material.
There is no universal minimum jewellery wall thickness that can be responsibly applied to all alloys, casting systems and intended uses. The acceptable dimension must be established for the actual component.
Where repeated castings distort in the same location, redesign is generally more informative than repeatedly trying to straighten the finished parts. When the geometry remains sound but pits appear unpredictably, the metal supply itself becomes an important suspect.
Why Does Contaminated Metal Stock Create Pitting That Polishing Can’t Fix?
Contaminated casting metal can produce pits that polishing cannot remove because foreign particles, oxides or associated voids are embedded in the casting rather than resting on its surface. Reused scrap, contaminated tools, deteriorating crucibles and residues from previous melts may contribute. As finishing removes metal, inclusions can become exposed or dislodged, leaving small cavities that resemble ordinary porosity.
Metal recycling is common in jewellery manufacturing, but the origin and condition of scrap matter. Clean, identified material recovered under controlled workshop conditions presents a different level of uncertainty from unmarked scrap collected from multiple sources.
Contamination may enter through poorly cleaned scrap, investment residue attached to reused material, oxide accumulation, flux contamination or deteriorated crucible surfaces. Material from incompatible or unknown alloys can introduce additional uncertainty about melt behaviour.
The resulting defects do not all look alike. An inclusion may remain visible as a contrasting particle, produce a rough patch or leave an opening after it is removed during finishing.
The investment-casting defect troubleshooting table hosted by Ganoksin identifies deteriorating crucibles, metal oxides, investment breakdown and contaminated reused metal among possible contributors to casting defects. Its entries are diagnostic possibilities rather than proof of the source of any individual pit.
Defect location can help prioritise an investigation.
| Observed pattern | Possible explanation | Next check |
|---|---|---|
| Similar pitting across several pieces from the same melt | Shared metal, melt or processing problem | Inspect charge records, crucible condition and batch-wide settings |
| Localised defects near particular gates | Local investment damage, turbulence or feeding conditions | Inspect gate geometry and mould condition |
| Visible foreign particles or irregular inclusions | Oxide, investment or other foreign material | Examine particles and review handling practices |
| Problems occurring mainly with reused material | Possible scrap contamination or altered charge composition | Compare with a controlled charge of identified casting metal |
A uniform defect pattern does not conclusively identify contaminated stock. Shared burnout, investment and temperature conditions may affect every piece on the same tree. Likewise, a defect concentrated near a gate does not prove that flux or investment debris is responsible.
A controlled comparison is more useful than guessing. If the process permits, examine castings made with identified clean material while keeping the other relevant variables consistent. Compare the results with the affected batch and document differences.
Scrap provenance should determine inspection confidence. Clean bench scrap of known composition may be managed under established workshop procedures. Customer-supplied scrap calls for additional assessment. Unmarked metal should not be treated as a known casting alloy without appropriate identification.
Routine hygiene helps: inspect crucibles, separate identified alloys, remove visible contaminants from suitable scrap and keep records of reused material. Cleaning does not restore unknown alloy composition or guarantee that hidden contamination is absent.
For buyers, a supplier’s handling of a defective piece is as important as its metal-reuse policy. A seller should be able to explain what inspection is performed and how a casting with unacceptable pitting will be repaired, replaced or recast under the agreed terms.
Even a clean alloy can produce poor results when the thermal process is unsuitable. Melt temperature, flask temperature and feeding conditions must be assessed as connected variables rather than independent settings.
Why Does Metal Pouring Temperature Control Affect Both Strength and Surface Finish?
Pouring temperature influences both the ability of molten metal to reproduce fine detail and the conditions under which the casting solidifies. Metal that is too cool may freeze before filling narrow features. Excessive temperature can increase reactions with the investment, contribute to gas-related defects and affect the solidified metal’s structure. The appropriate temperature depends on the alloy, flask conditions and design.
A common workshop response to incomplete filling is to increase the metal temperature. That can sometimes improve fluidity, but it does not correct every filling problem and may introduce new defects.
If inadequate sprue design is restricting metal entry, raising temperature could conceal the underlying flow problem while increasing exposure to high-temperature damage. Correcting the feeding system may be more effective than repeatedly heating the charge further.
At the other extreme, metal with insufficient thermal capacity for the chosen geometry and mould conditions may solidify before the finest details are filled. This can produce incomplete edges or areas where adjacent flows fail to merge properly.
The investment itself is sensitive to processing conditions. High temperatures or unsuitable combinations of materials and firing conditions may damage the mould surface, producing roughness that is directly transferred to the casting.
Metal temperature also interacts with solidification behaviour. Excessive heating may contribute to changes in the final microstructure and defect formation, although the degree of risk depends on alloy composition, actual overheating, cooling history and other process variables.
A polished surface is not proof of adequate structural integrity. A piece can look acceptable externally while containing pores or other defects that may matter under mechanical loading.
Neither a rough surface nor evidence of previous overheating alone establishes that a finished piece will fracture. Integrity assessment requires attention to its geometry, material, defect severity and intended use.
Flask temperature adds another layer. The same molten metal may fill a pattern differently when entering a hotter or cooler investment mould. Burnout history also matters because the flask must be sufficiently prepared before casting.
A useful process-development approach is to cast representative test pieces under controlled, manufacturer-compatible conditions while varying one relevant parameter at a time. Record the melt temperature, flask temperature, pattern geometry and resulting defects.
Comparing results can help identify a workable process window. However, the window established for one alloy, investment and piece should not be presented as a universal recipe.
When evaluating a test, inspect not only whether the cavity filled but also whether surface quality improved and whether feeding-related porosity remains. Complete filling achieved at the cost of investment breakdown or additional porosity is not an overall improvement.
Once suitable processing conditions have been established, the practical challenge becomes repeating them. That depends less on remembering a successful pour than on recording the variables that made it successful.
How to Stabilise Your Metal Pouring Results Using 3 Consistency Checks
More consistent lost wax casting begins with three repeatable checks: record the metal charge for each flask, verify melt and flask temperatures at the relevant casting stage, and inspect the sprue tree after devesting. Together, these checks make changes in material quantity, thermal conditions and defect distribution easier to identify before the same failure is repeated.
Two castings made from identical patterns can produce different outcomes when the process conditions have drifted. A different charge, a changed flask cooling interval, a deteriorating crucible or altered investment preparation may affect results without being obvious at the bench.
The aim of a consistency protocol is not to measure every possible variable. It is to record enough reliable information that the next failed casting can be compared meaningfully with a successful one.
The three checks form a practical minimum.
- Record the charge. Weigh and identify the metal allocated to the flask, including the relevant distinction between new casting material and suitable reused metal. Record the actual charge and any notable preparation differences.
- Verify thermal conditions. Record the measured or equipment-indicated melt and flask temperatures at the casting stage, together with enough timing information to identify cooling or transfer delays. Use measurement methods appropriate to the equipment.
- Inspect the tree after devesting. Before cutting all components apart, document incomplete fills, rough patches, visible shrinkage locations, inclusions and the distribution of defects across the tree.
The third check is particularly valuable because separating and polishing each piece can destroy evidence of the relationship between a defect and its sprue position.
For example, if several pieces show cavities near comparable heavy sections, feeding should be investigated. If the entire tree develops similar surface roughness, shared investment, burnout or melt conditions deserve attention. Neither pattern is a definitive diagnosis on its own.
A minimal casting record can contain the following fields.
| Check | Information to retain | Diagnostic value |
|---|---|---|
| Metal charge | Alloy identification, weight, source and reused-material status | Highlights material and charge changes |
| Thermal conditions | Melt reading, flask reading, equipment method and relevant timing | Reveals process-window drift |
| Tree inspection | Photograph, defect locations and brief observation | Preserves the spatial pattern of failures |
When a casting comes out rough, investigate the record backwards. Start with the observed defect distribution. Compare temperature information against previous acceptable batches, then examine charge differences. If those records do not account for the issue, expand the review to investment condition, burnout, sprue geometry and subsequent handling.
The checks themselves do not prevent every defect. They provide the evidence needed to distinguish repeatable process behaviour from an apparently random failure.
Keep the recording procedure light enough to use every time. A notebook, consistent batch identifier and clear photograph may be more useful than a complicated system that is abandoned during a busy production day.
Reliable process records also improve scheduling: the maker can see which operations regularly cause rework and reserve time for inspection rather than assuming every casting will proceed directly to polishing.
Key takeaways before scheduling production
- Estimate delivery from the completed and inspected piece, not from the moment molten metal enters the flask.
- Protect the investment and burnout sequence from unrealistic deadline compression; follow the compatible material and equipment requirements.
- Reserve an explicit decision point for repair, recasting or a revised delivery date when defects are discovered.
In What Order Should You Plan Burnout, Casting, and Finishing to Meet a Fixed Deadline?
Plan a lost wax casting deadline backwards from the finished, inspected jewellery. Allow time for polishing, setting and quality checks first, then casting and cooling, followed by burnout, investment preparation and pattern production. This reveals whether the schedule includes enough time for essential processing and potential rework. Rushing burnout or finishing may create exactly the surface defects the schedule was intended to avoid.
Pouring is only one stage of the manufacturing sequence. A piece can be successfully filled with metal yet still require sprue removal, filing, pre-finishing inspection, surface refinement, setting and final quality control.
For designs with highly reflective faces or intricate surfaces, finishing can be a major labour bottleneck. However, it is not always the longest stage: intricate pattern preparation, specialist setting or a lengthy compatible burnout programme may control the schedule instead.
To plan backwards, begin by identifying the actual handover requirement. A delivery-ready ring is not simply a cast ring. It must have the intended dimensions, finish, completed setting where relevant and acceptable inspection results.
Next, reserve the operations immediately preceding delivery. Work backwards through final inspection, finishing and any additional assembly, then assign the casting and cooling stages. Finally, schedule the investment preparation and burnout according to the chosen material system and equipment.
Burnout should not be arbitrarily shortened to recover lost time. The appropriate heating stages and holding conditions depend on the pattern, investment and manufacturer’s instructions. An unsuitable burnout can leave residues or damage the mould surface.
A delayed or interrupted burnout cycle must be assessed against those instructions. It cannot be assumed that reheating or repeating a generic cycle will restore the flask without consequences. Equally, not every schedule deviation necessarily makes a flask unusable; the correct response depends on its actual thermal history and material requirements.
For multiple pieces, batching compatible operations can reduce repeated setup and handling. Casting all suitable flasks within a planned production window and then organising finishing by task may improve consistency. This is not an absolute rule: different alloys, burnout requirements, priorities and equipment constraints may justify separate batches.
Consider a hypothetical order in which a polished ring develops visible porosity shortly before the promised delivery date. The maker has three broad options: accept limited local repair where technically and commercially appropriate, recast if sufficient processing time remains, or agree to a revised deadline.
Shipping an obviously defective high-polish surface merely because the order is due does not resolve the underlying quality problem. The appropriate decision should be made against the agreed specification and any applicable consumer obligations, without assuming that one repair or warranty policy applies in every market.
Inspection must occur early enough to change the production decision. Examine the casting after devesting and again after initial controlled finishing. That second check is essential because subsurface porosity may only become visible once the surface skin has been removed.
Before committing to a delivery date, define what happens if that inspection fails. A pre-agreed recast decision, alternate manufacturing route or communication procedure can prevent rushed polishing from becoming the last and least effective attempt to rescue the order.
For a new design, begin with a representative casting trial, record its actual finishing demands and approve the surface standard before fixing the delivery sequence. That provides a stronger basis for promising consistent quality than assuming every rough surface can be polished away.
Can a jeweller fill pinholes in a cast ring instead of recasting it?
Some localised defects may be repairable using an appropriate jewellery repair process, depending on the alloy, defect depth, location and required finish. Filling the visible opening does not necessarily eliminate additional subsurface porosity. Critical structural areas and widespread defects require more cautious assessment, and recasting may be the better option.
Why does a cast ring look smooth before polishing but become pitted afterwards?
The original metal surface may cover subsurface pores or inclusions. Filing and polishing remove that outer layer and expose cavities beneath it. The pits are therefore newly visible rather than necessarily newly formed. Their shape, distribution and relationship to the sprue position help guide diagnosis.
Does a rough cast surface always mean the metal is weak?
No. Roughness can originate from the investment surface or incomplete burnout without establishing that the entire component is structurally unsound. Conversely, a smooth-looking casting can contain internal porosity. Strength concerns depend on defect type, location, severity, geometry and intended loading.
Can a jewellery tumbler remove casting porosity?
A tumbler can help refine or brighten accessible surfaces, depending on the media and process. It cannot remove internal voids. Surface deformation or smoothing may sometimes make shallow openings less obvious, but the underlying casting defect remains and may reappear during subsequent finishing.
What should a buyer specify when ordering high-quality cast jewellery?
Specify the intended surface finish, critical dimensions, edge definition, areas where visible open pores are unacceptable and the inspection stage used for acceptance. For load-bearing or setting-related features, discuss appropriate integrity requirements separately. A sample or approved reference finish can make expectations clearer than a general request for flawless casting.