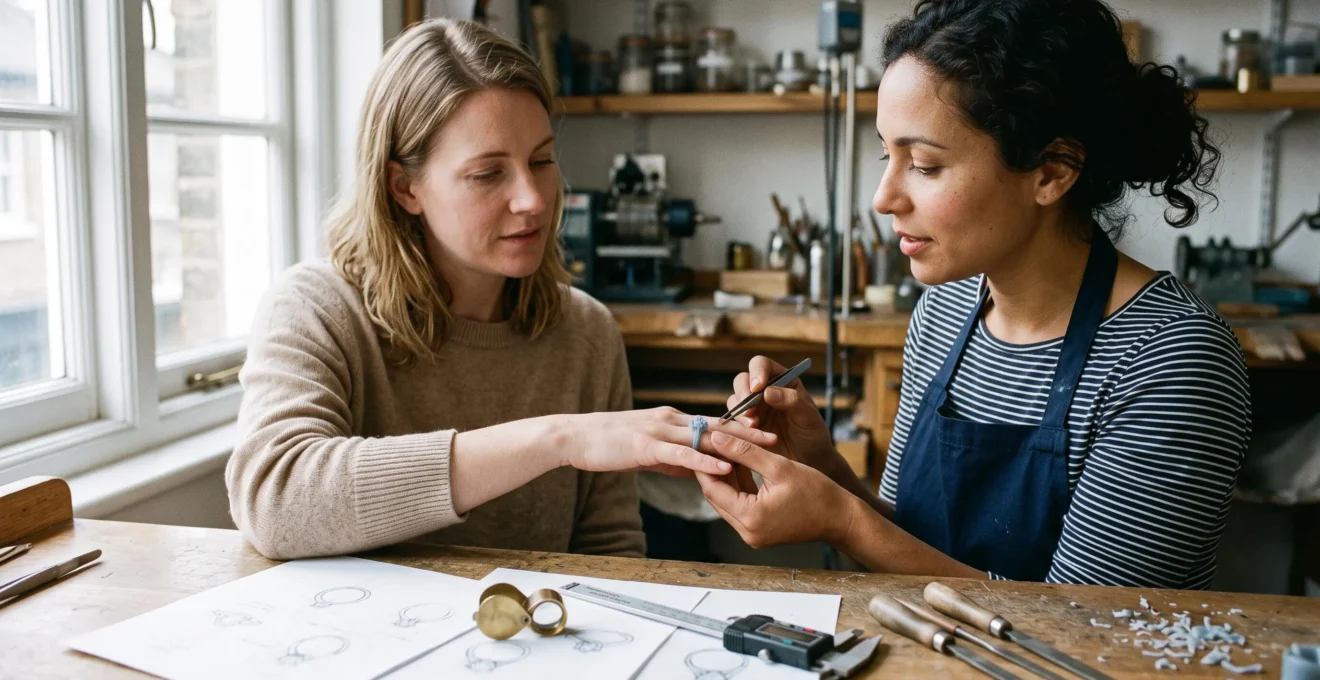
A custom ring can look perfect in a sketch, a computer-generated image and even a detailed 3D model, yet feel unexpectedly bulky, awkward or uncomfortable when worn. A wax prototype gives the client an opportunity to evaluate the physical design before committing to casting, gemstone setting and finishing. That distinction matters because visual approval and physical approval answer different questions.
The principal benefit of a prototype is the opportunity to identify design changes while the project is still at the modelling stage. Clients can assess proportions, the position of the setting, the shape of the band and preliminary wearability, then discuss specific adjustments with the maker. A physical model can also make design decisions easier for people who struggle to interpret technical drawings or CAD renders.
However, a wax model is not a miniature version of every aspect of the finished ring. Its weight, surface finish, strength and interaction with the final gemstones may differ substantially from those of the completed piece. Its value lies in testing the characteristics it can represent, understanding its limitations and using the results to make informed decisions before production.
What to Know Before Approving a Custom Ring
- A physical prototype helps assess proportions, finger clearance and preliminary comfort before casting.
- A wax model cannot reliably reproduce the finished ring’s metal weight, final surface finish or every detail of stone-setting behaviour.
- Request the prototype before production commitments, and agree on the dimensions, revision process and schedule with the jeweller.
- Why Does a Ring That Looks Fine in Photos Feel Wrong Until You Try the Wax?
- How to Test a Wax Prototype on Your Hand in 15 Minutes Without Guesswork?
- Wax Prototype or Straight to Metal: Which Should You Choose for a Simple Solitaire?
- The Wax Approval Mistake That Leads to a Bulkier-Than-Expected Final Ring
- When Should You Request Wax Prototypes to Keep a Custom Project on Schedule?
- Why Does a Beautiful Sketch Sometimes Become Unwearable Once It’s Engineered?
- Why Can 0.3 mm in the Model Change Comfort Dramatically Over a Full Day of Wear?
- Why Does the Model Maker Matter More Than the CAD File for How a Ring Feels on Hand?
Why Does a Ring That Looks Fine in Photos Feel Wrong Until You Try the Wax?
A ring can look balanced in a photograph and still feel wrong because a flat image or computer rendering cannot reproduce the experience of wearing the design on a real hand. Perspective, viewing angle and screen scale influence how the band and setting appear. A wax prototype turns those visual impressions into a physical object that can be assessed from several angles while worn.
One important difference is the relationship between the ring and the finger. In a render, the underside of the setting may appear to have generous clearance, but the physical model can reveal that the gallery sits too close to the skin or interferes with finger movement. The band may also appear delicate from above while feeling broad at the base, where it meets the palm.
The wearer’s own viewing angle is equally important. A product photograph usually presents the ring from a carefully chosen angle, whereas everyday wear means looking down at the hand, turning the wrist and seeing the ring alongside neighbouring fingers. These perspectives can reveal a head that sits too high, a silhouette that feels unbalanced or shoulders that visually dominate the design.
A physical trial is particularly useful when proportions remain uncertain after CAD approval. In a documented jewellery-retail workflow, Formlabs’ case study on in-store jewellery prototyping describes customers trying physical ring models and requesting changes to width, thickness and stone-setting arrangements before manufacture. The example illustrates how physical feedback can uncover preferences that remain unresolved on screen.
The objective is not simply to see whether the prototype photographs well. It is to decide whether the proposed geometry suits the intended wearer and to identify any changes worth making before the design advances to production.
A successful approval therefore confirms more than appearance: it establishes that the wearer has examined the ring from relevant angles, considered its relationship with the hand and identified any unresolved questions about the finished piece.
How to Test a Wax Prototype on Your Hand in 15 Minutes Without Guesswork?
A useful 15–minute prototype session should test movement, fit, proportions and potential points of contact rather than concentrate exclusively on appearance. Fifteen minutes is a practical starting framework, not a scientifically validated duration or a guarantee that every comfort issue will become apparent. The aim is to produce specific observations that the maker can translate into design adjustments.
Begin by confirming that the prototype is intended for the correct finger and approximate ring size. Put it on carefully, then move through ordinary hand positions. Close your fist, bend the knuckle, simulate typing and hold a bag handle. Notice whether the head contacts a neighbouring finger, whether the gallery presses into the skin and whether the band feels uncomfortable at the base.
Next, examine the ring in a mirror from arm’s length and at reading distance. Look at the side profile, the height of the head and the apparent thickness of the shank. Photograph the ring in natural light from your own eye level and, if relevant, from a partner’s viewing distance. Different perspectives can reveal different proportion concerns.
Finally, distinguish three types of feedback. A sizing issue concerns how the ring passes over the knuckle or sits on the finger. A proportion issue concerns dimensions such as band width or head height. A design issue concerns the arrangement or geometry of the setting itself. These categories help the maker identify the appropriate adjustment rather than guessing what a general comment such as “it feels wrong” means.
Material limitations also matter. Formlabs identifies its wax-filled Castable Wax Resin as suitable for jewellery prototyping and fitting before production, while explicitly distinguishing printed models from finished functional jewellery. Its guidance supports preliminary physical evaluation, not an assumption that every type of wax or printed resin behaves identically to finished metal.
Your Five-Step Wax Approval Checklist
- Confirm the intended finger and size; record the finger and prototype size used for the fitting.
- Test a closed fist, a fully bent knuckle, typing and a bag-holding grip; record each pressure point or interference.
- Inspect the ring from above and from the side at two viewing distances; save photographs of any proportion concerns.
- Compare the fit and appearance with a familiar ring if useful; note differences in width, head height and rotation.
- Send the maker a prioritised revision list and request the expected finished-metal weight and confirmation of which issues the model can resolve.
The session should finish with an agreed list of changes, questions and accepted dimensions. Do not interpret the prototype’s unusually light feel as proof that the final ring will feel equally light, and do not assume a successful short fitting guarantees comfort throughout an entire day.
Wax Prototype or Straight to Metal: Which Should You Choose for a Simple Solitaire?
A simple solitaire does not automatically require a full wax prototype, but skipping one is sensible only when the design is well understood and the consequences of a mistake are acceptable. A conventional round stone in a familiar six-prong setting with a standard band may present fewer geometric uncertainties than a complex custom ring. The decision depends on the actual design, the client’s experience and the cost of making changes after casting.
The following comparison helps identify the more appropriate route.
| Decision factor | Wax prototype | Direct to metal |
|---|---|---|
| Familiar proportions | Useful if the client is unsure how the proposed dimensions will look on the hand. | More defensible when comparable rings have already established the preferred proportions. |
| Band geometry | Helpful for unusual width, thickness or profile. | More reasonable when the band follows a proven, familiar design. |
| Setting height | Useful for assessing the physical silhouette and preliminary clearance. | Requires confidence in the specified geometry and acceptance of the remaining uncertainty. |
| Revision budget | Adds a modelling step and potentially a fee, but creates an opportunity to revise before casting. | Avoids the prototype step, but a substantial post-casting change may require expensive remaking. |
| Alternative validation | A complete model provides a broader physical reference. | Precise dimensions or a separate band model may address some, but not all, uncertainties. |
The important financial comparison is not simply the prototype fee versus no fee. It is the upfront cost of validation compared with the possible cost of correcting a mistake later. The probability of a remake and its cost vary by design and workshop, so there is no reliable universal saving to promise.
A middle option is to validate the critical dimensions individually. For a straightforward solitaire, the maker may provide measurements for the band width, thickness, inner profile and head height, or offer a physical model of the shank alone. This can be appropriate when the setting geometry is established and the remaining uncertainty concerns the band.
However, a partial model cannot prove the complete ring’s wearability or reproduce the interaction between every component. It is a narrower validation method, not an equivalent substitute in every case.
Choose the validation route that addresses the uncertainties still unresolved. If the design contains unfamiliar proportions or a deadline makes a remake especially problematic, resolving those questions before casting may justify the additional modelling step.
The Wax Approval Mistake That Leads to a Bulkier-Than-Expected Final Ring
The most avoidable approval mistake is judging a prototype in isolation without comparing its proportions with something familiar. A ring can look delicate when viewed on a workbench yet feel substantial when worn. The final metal piece may also feel heavier than the wax model, and finishing can alter details of its surface and edges. Approving the general silhouette without checking actual dimensions leaves important questions unresolved.
To make the comparison meaningful, bring an everyday ring with proportions you already like. If the design permits, try both on the same finger, one after the other. Compare the band thickness at the base, the height above the finger and how far the head projects from the hand. A familiar reference gives those measurements practical meaning rather than leaving you to judge unfamiliar dimensions from memory.
The comparison is only useful if the finger size and position are appropriate. A design that looks balanced on one finger may appear chunkier on a smaller finger, and a prototype made for the wrong size can distort the client’s judgement. Confirm the intended finger and sizing before assessing the proportions.
It is also important to separate model dimensions from manufacturing changes. Casting involves material and process considerations, and polishing or other finishing operations can affect the final geometry. The direction and magnitude of those changes depend on the design and production method. A client should therefore ask the maker how the approved model will translate into the finished piece instead of assuming that the casting process always makes a ring larger or smaller.
The distinction between visual delicacy and structural adequacy matters as well. GIA‘s educational guidance on ring construction identifies the head, shoulders and shank as important elements of the setting and explains that construction and finishing influence durability, appearance and comfort. A visually thinner design is not automatically a better design if it compromises the requirements of the setting.
The aim is not to force the custom design to resemble an existing ring. It is to make the differences deliberate, understood and accepted before production, including any unavoidable trade-off between the desired silhouette and the construction requirements.
When Should You Request Wax Prototypes to Keep a Custom Project on Schedule?
The most practical time to request a wax prototype is during the initial design discussion, with the physical model scheduled after the CAD design has been developed and before casting and stone setting are finalised. This allows the workshop to include modelling, fitting, feedback and any agreed revisions in the production plan. Waiting until manufacturing is already underway can create avoidable delays if an approved design must be reopened.
At the first consultation, explain whether the piece has a fixed delivery date, such as an engagement ring needed for a planned event, or whether it involves sentimental jewellery that cannot easily be replaced. These circumstances do not automatically require a prototype, but they make it especially important to decide early how design uncertainty will be managed.
Ask the maker to identify the exact milestone at which the model will be ready, the expected time needed for production and review, and how revisions will affect the delivery date. A physical model may be prepared using a particular printing or carving workflow, so turnaround times vary by workshop, material, equipment and complexity. A universal number of additional days cannot be assumed.
Each revision can require a new model or another round of preparation and approval. If casting, stone setting or hallmarking has already been scheduled, changes can interfere with those subsequent steps. The size of the delay depends on the workshop’s capacity and the nature of the correction, not merely on the number of changes requested.
Agree on the number of included revision rounds, the fee for additional models and the deadline for final approval. Clarify whether small adjustments can be incorporated into the existing workflow or whether a fresh prototype is necessary. These details should be confirmed in writing rather than inferred from an informal discussion.
A prototype is most useful when it has a defined place in the schedule and a clear approval process. The next challenge is ensuring that the physical model can represent the design the client actually wants, including the engineering constraints that a sketch may conceal.
Key Decisions Before the Final Design
- Determine whether the sketch can be engineered to the intended proportions without compromising structural requirements.
- Separate problems of physical wearability from aesthetic compromises that require a design decision.
- Use the prototype to examine the consequences of engineering choices before approving the final geometry.
Why Does a Beautiful Sketch Sometimes Become Unwearable Once It’s Engineered?
A sketch communicates visual intent, not every physical requirement needed to make a durable ring. During engineering, the design must accommodate the gemstone, the setting, adequate material and the clearances needed for the ring to function on the hand. Those requirements can change the silhouette, sometimes making a design appear heavier than the original drawing suggested.
Consider a hypothetical split-shank ring with exceptionally thin shoulders in an initial sketch. The drawing may show two elegant strands converging around the centre stone, but the engineered design must account for the junctions, setting structure and the material needed to hold the stones securely. The resulting model may need more substantial sections than the sketch implies.
This does not mean that every delicate sketch inevitably becomes bulky. The result depends on the stone dimensions, metal, setting configuration, construction method and design choices. The important question is whether the original appearance can be achieved within the constraints of a sound design, or whether a deliberate compromise is necessary.
GIA’s technical feature on engineering jewellery designs incorporating small gemstones explains that setting techniques can remove metal and that excessive removal from an improperly engineered piece can lead to structural weakness or failure during daily wear. Its dimensional recommendations apply to particular setting types, not universally to every bespoke ring.
A prototype can help the client see how the engineered proportions differ from the drawing. It can reveal an unexpectedly high head, a wider shoulder or a band that appears less delicate than anticipated. It cannot independently certify that the ring is structurally sound, so the maker must still assess the design’s engineering and manufacturing requirements.
The distinction is between a mechanically unworkable design and a feasible design that has lost some of its original lightness. A catching edge, inadequate clearance or a pressure point requires a different response from an appearance that simply feels too substantial. The first calls for technical correction; the second may require revising the aesthetic priorities.
That conversation is most productive when the client and maker agree on the essential visual features and the minimum functional requirements. Once those are clear, even relatively small dimensional decisions can be assessed according to their real effect on the hand.
Why Can 0.3 mm in the Model Change Comfort Dramatically Over a Full Day of Wear?
A 0.3 mm adjustment can matter in one part of a ring and be barely noticeable in another. Its effect depends on the location of the change, the surrounding geometry, the wearer’s hand and the design of the ring. The figure is a useful illustration of why small dimensions deserve attention, not a universal comfort threshold or a guarantee that every change of this size will be perceptible.
Consider the inner shank, the edges that contact the finger and the space beneath the setting. A small adjustment to a sharp inner corner may change how pressure is distributed when the hand closes. The same adjustment on a broad, smoothly rounded band may have little noticeable effect. A gallery positioned too close to the skin may also interfere with movement even when the rest of the ring feels comfortable.
Time changes the assessment. A quick fitting captures the immediate sensation of putting on the ring, but ordinary hand movements repeatedly change the points of contact. A small protrusion or uncomfortable edge may become more noticeable during extended wear. That possibility makes repeated, safe movement tests useful, although a wax model cannot establish how the finished ring will feel after a full day.
Ask the maker which dimensions are critical to comfort and which primarily affect appearance. The inner profile, edge rounding and clearance beneath the gallery are useful subjects for that discussion. The answer should relate to the actual model rather than a universal list of measurements.
The prototype can reveal the shape of an edge or a potential contact point, but the final metal, finishing and gemstone setting can change the experience. It is therefore important to distinguish a geometry issue visible on the model from a property that can only be confirmed once the ring is finished.
The practical objective is to resolve avoidable contact and proportion problems without promising that a prototype can predict every aspect of long-term comfort. That requires a maker who can connect the client’s physical observations to precise, appropriate model changes.
Why Does the Model Maker Matter More Than the CAD File for How a Ring Feels on Hand?
The CAD file defines the intended geometry, but the physical model determines how that geometry can be examined and experienced during fitting. The model maker’s interpretation, the production method and the finishing of the model can affect the feedback a client receives. Neither the file nor the maker should be considered in isolation: useful approval depends on accurate design data, an appropriate physical model and a professional who can interpret what the client feels.
Two models created from the same underlying design may differ in how faithfully they represent the specified surfaces, edges and proportions. This does not mean that the maker is free to disregard the CAD geometry. Rather, it means that the client should understand what has been reproduced accurately, what has been finished by hand and which features may change during subsequent manufacturing.
The distinction is especially important when evaluating the inner shank and the edges that touch the hand. A model that is rough, fragile or poorly finished may create sensations that do not reflect the intended finished ring. Conversely, a smooth model cannot prove that the final metal ring will have identical comfort, weight or durability.
Ask to handle a model or finished ring from a comparable design style. Discuss how the workshop checks inner rounding, edge transitions, setting clearance and the relationship between the head and band. A good technical conversation should connect these features to the proposed design and explain which changes are feasible.
Pay attention to how the maker responds to feedback. If the ring feels tight at the base, the useful next step is to identify the relevant surface, dimension or fit issue and determine whether a change is appropriate. Reassurance alone does not resolve the problem, but neither should every subjective sensation automatically lead to a model alteration.
The value of the fitting stage ultimately depends on a shared understanding of what the prototype can establish. The client supplies observations about appearance and wearability; the maker translates them into technically appropriate decisions and explains the limits of those decisions.
Before authorising production, request a written record of the approved proportions, outstanding limitations and agreed changes. That creates a clear reference for the next stage and helps ensure that the final ring is manufactured to the design the client actually approved.
Does a wax prototype accurately represent the weight of the finished metal ring?
No. Wax and wax-filled resin models do not reproduce the density of the final metal, so the prototype should not be used as a direct guide to finished-ring weight. Ask the jeweller for the expected metal weight based on the approved design and clarify whether that estimate may change during manufacturing.
Can a wax prototype prove that a custom ring will be comfortable all day?
No. It can help reveal preliminary fit problems, awkward proportions, potential pressure points and interference with finger movement. However, the model’s material, surface finish and weight differ from the final piece. A successful fitting reduces uncertainty about geometry but cannot guarantee all-day comfort.
Should the prototype include the actual gemstones?
That depends on the model and the questions being tested. A model may represent the setting’s geometry without containing the final gemstones. Ask whether the prototype accurately represents the stone dimensions, setting height and intended arrangement, and remember that snagging, security and final finishing may require separate assessment by the jeweller.
What should happen if the wax prototype feels wrong?
Record the specific problem, where it occurs and which movement or viewing angle reveals it. Distinguish a sizing problem from a proportion concern or a design issue, then discuss the appropriate correction with the maker. Confirm the revision cost, whether a new model is needed and how the change affects the production schedule before approving the next stage.
Is a 3D-printed resin ring equivalent to a traditional carved wax prototype?
Not necessarily. Materials and manufacturing methods have different properties. Formlabs documents the use of its Castable Wax Resin for jewellery prototyping and preliminary fitting, but that guidance does not establish equivalent performance for every traditional wax or printable resin. Ask the maker which material is being used and which aspects of the finished ring the model can reliably represent.