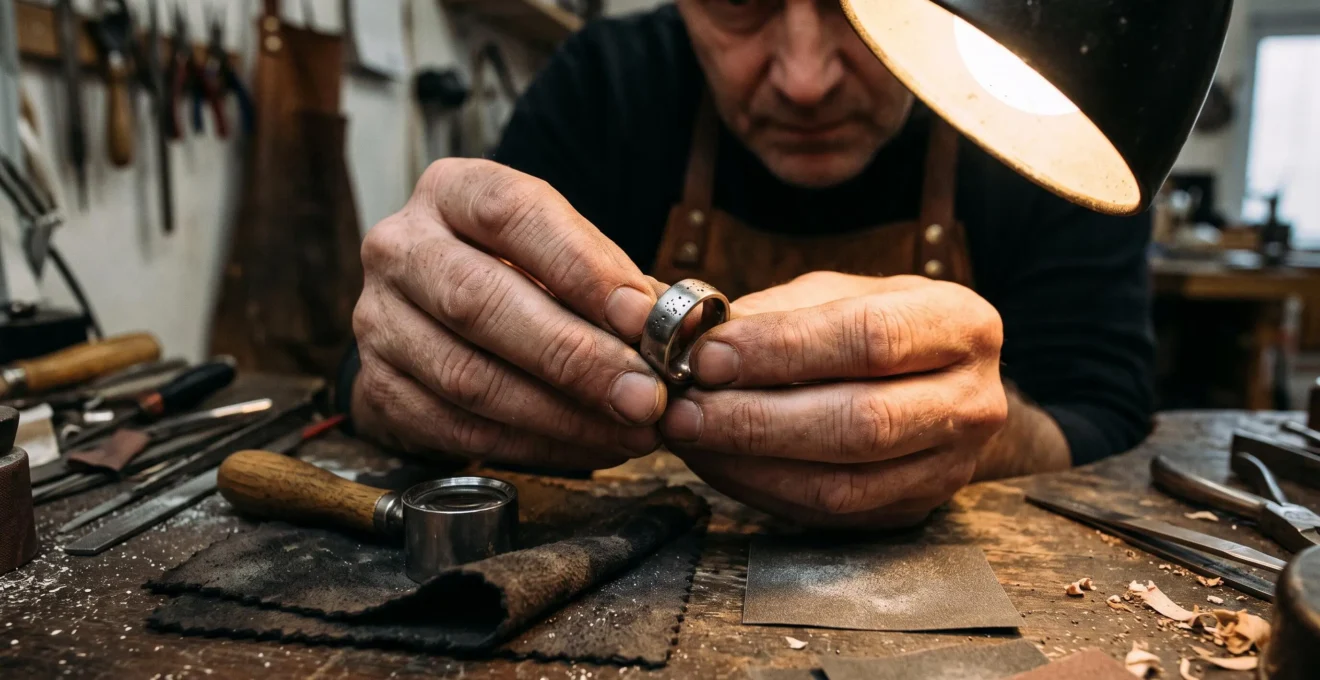
A jewellery piece can develop pits, weak spots or unexpected fractures even when the maker has excellent casting and finishing skills. The reason is that craftsmanship cannot compensate for every defect already present in the metal. Alloy composition, contamination, internal shrinkage cavities and dissolved gases can all influence the quality of the material before the first finishing operation begins.
The distinction matters because porosity is not always a surface defect. A polished ring may look sound until sanding removes the outer layer and exposes cavities underneath. A casting may also contain internal shrinkage that compromises a thin section or a stone-setting prong, even when its external appearance initially seems acceptable.
However, poor starting stock is not the only possible cause. Investment casting conditions, mould preparation, metal temperature, casting geometry and insufficient feeding can create similar problems. The practical objective is to identify whether the defect originates in the incoming metal, the alloying stage or the casting process before investing more time in finishing.
For hobbyists and small makers, the most reliable approach combines controlled material handling, representative test castings and inspection at several stages. Recognising the limits of visual diagnosis also helps prevent an expensive mistake: repeatedly polishing a component whose underlying structure is already compromised.
What to know about jewellery metal porosity
- Internal cavities, dissolved gases and contaminants can create pits or weak spots that emerge during finishing.
- Recycled metal can be economical, but uncertain composition and contamination make it less predictable for critical stone-setting components.
- Inspect and test representative material, document each melt and investigate casting conditions before committing an entire batch.
- Why Does Contaminated Metal Stock Create Pitting That Polishing Can’t Fix?
- How to Store and Handle Metal Stock to Avoid Cross-Contamination in a Small Workshop?
- Recycled Scrap or Fresh Stock: Which Should You Choose for a Stone-Set Piece?
- The “Polish Will Fix It” Mistake That Wastes Hours on Bad Metal From the Start
- In What Order Should You Alloy, Cast, and Test Metal to Avoid Ruining a Full Batch?
- Why Do Better Hand Tools Reduce Mistakes When Your Hands Are Tired After 2 Hours?
- Why Does Lost Wax Casting Create Porosity That Shows Up Only After Finishing?
- Why Do Lost Wax Cast Pieces Sometimes Come Out With Rough Surfaces Even After Polishing?
Why Does Contaminated Metal Stock Create Pitting That Polishing Can’t Fix?
Contaminated metal stock can create pitting because foreign substances, dissolved gases and irregular alloy composition can interfere with solidification or the resulting metal structure. Some defects become visible only when finishing removes the outer surface. Polishing can smooth the surrounding metal, but it cannot reliably eliminate cavities distributed below the surface or restore the strength of a compromised section.
Three upstream problems deserve particular attention. First, investment residues, oxides and other foreign material can enter metal intended for remelting. Second, gases such as hydrogen and oxygen can dissolve in molten precious-metal alloys and contribute to gas porosity during solidification or blistering during annealing. Third, an alloy that has not been properly prepared or homogenised can develop local variations in composition and microstructure.
These mechanisms do not necessarily produce identical defects. Gas pores may appear relatively rounded or smooth, while inclusions and irregular discontinuities may have less regular outlines. Shrinkage cavities can also occur when solidifying metal is not adequately fed. Such appearances are useful clues, not a definitive visual test: a jeweller cannot reliably identify a particular contaminant, such as zinc or lead, from the shape of a pit alone.
The metallurgical background is explained in Christopher W. Corti’s paper on the basic metallurgy of precious metals, which discusses alloy composition, contamination, dissolved gases and casting defects.
Repeated polishing can make the problem appear to move. Removing one cavity may expose another beneath it, requiring further material removal and potentially changing the component’s dimensions. This is particularly concerning around thin walls, settings and prongs, where preserving the original cross-section matters.
For a preliminary workshop check, cast a representative test specimen from the same prepared batch and finish it using the intended method. Record the number and distribution of visible pits, then compare the result with an established acceptable sample. A single specimen cannot prove that an entire batch is defect-free, but it can reveal a problem before valuable material is committed.
The key distinction is between an imperfection that can be removed without compromising the component and a structural defect that continues beneath the surface. When repeated finishing exposes further cavities, pause and investigate the metal and casting history instead of automatically removing more material.
How to Store and Handle Metal Stock to Avoid Cross-Contamination in a Small Workshop?
A small jewellery workshop can reduce cross-contamination by separating metals by alloy and batch, keeping equipment clean, and recording where each piece of stock came from. The objective is to prevent foreign particles and incompatible residues from entering the melt while making it possible to trace a defect back to its source when a finished casting develops porosity.
Contamination can occur during several ordinary operations. A dirty ingot mould may transfer residue to newly prepared stock. Crucibles and melting tools can retain material from previous melts. Filings collected from a bench may combine metals, solder fragments and abrasive particles. Scrap that looks clean can also contain investment residue or other foreign matter that becomes apparent only during melting.
Visual inspection is useful, but it has limits. Discolouration, visible deposits and thick surface oxides can signal a need for cleaning or isolation. Conversely, an alloy with an unsuitable composition or dissolved contaminants may look perfectly normal before melting. Appearance alone cannot establish chemical purity.
A practical storage system does not require a large workshop. Use separate, clearly labelled containers for each alloy and batch, and keep recovered filings separate until their composition is known. Where practical, dedicate crucibles and handling tools to particular metals. Inspect equipment before use, and isolate suspect stock and any potentially contaminated melting equipment until the cause has been assessed.
Surface condition also deserves attention. Silver and copper-rich alloys can tarnish or oxidise, but tarnish should not automatically be interpreted as evidence of internal porosity. Conversely, a clean-looking piece is not proof of a suitable composition. Remove unsuitable surface residues using a method appropriate to the alloy and intended process before remelting, rather than allowing a thick layer of foreign material to enter the next melt.
For platinum casting, Ganoksin’s technical overview of platinum casting specifically discusses clean scrap, crucible inspection and isolating suspected contaminated material. Its platinum-specific guidance should not be treated as a universal procedure for every precious-metal alloy.
Once stock separation and equipment checks become routine, recurring defects are easier to investigate. If several batches develop similar pits, the recorded alloy, tools and processing history can help distinguish a persistent material problem from an isolated casting error.
Recycled Scrap or Fresh Stock: Which Should You Choose for a Stone-Set Piece?
Fresh, traceable stock is generally the more predictable choice for delicate stone-set jewellery, particularly where thin prongs, narrow settings or other load-bearing details must retain their strength. Recycled scrap can remain useful for suitable components, but its composition and cleanliness should be established before it is used in a critical casting. Neither new stock nor recycled material guarantees a defect-free result.
The principal difference is control over the starting material. Fresh stock from a traceable supplier gives the maker a clearer basis for identifying the intended alloy and following the appropriate processing requirements. Scrap may combine pieces of different compositions, solder residues, oxides and previous casting material. Even when every fragment appears to be the same colour, visual similarity does not prove that the pieces share the same chemistry.
Repeated melting can also change an alloy’s composition. Depending on its constituents and the melting conditions, some elements may oxidise or be lost, while residues from solder or foreign metal may enter the mixture. The degree of change is alloy- and process-dependent; it would be incorrect to assume that every remelt necessarily makes an alloy unusable.
| Criterion | Recycled scrap | Fresh stock |
|---|---|---|
| Composition traceability | Depends on the identity and separation of the recovered material. | Usually easier to establish from supplier and batch records. |
| Cost of material | Can reduce the amount of new metal purchased. | Requires an additional material purchase. |
| Critical prongs and settings | Use only when composition and suitability have been adequately assessed. | Often the more predictable starting point when paired with controlled casting. |
| Preparation | Requires careful sorting, cleaning and assessment before reuse. | Still requires correct alloying, handling and casting procedures. |
The economic comparison must include more than the purchase price. Repeated test melts, rejected castings, additional finishing and replacement components can consume the savings from inexpensive scrap. This is especially relevant when a defect appears after setting or after substantial labour has already been invested.
A practical compromise is to segregate compatible scrap, prepare it as a separate intermediate batch and assess the resulting material before deciding where to use it. A representative casting, examination of a cross-section and appropriate mechanical checks can provide useful evidence. These checks do not independently certify the alloy’s chemical composition, so uncertain material may require professional analysis.
The right decision depends on the component’s function, the confidence in the recovered material and the consequences of failure. For a valuable stone or a delicate prong structure, predictable material and controlled processing generally deserve greater weight than a small saving on metal.
The “Polish Will Fix It” Mistake That Wastes Hours on Bad Metal From the Start
Polishing will not reliably repair porosity that extends beneath a jewellery component’s surface. Abrasives remove material; they do not restore missing metal inside a cavity or correct an unsuitable alloy composition. If pits continue to appear as finishing progresses, the useful next step is to investigate the defect rather than repeat the same polishing sequence indefinitely.
The familiar failure pattern begins with a small number of dark marks on a casting. The maker sands the area, sees an improvement and continues towards a finer finish. A new cavity then appears, or an existing opening becomes more obvious. Further sanding removes more metal, potentially exposing additional discontinuities and changing the shape of the piece.
Surface deformation can sometimes make a small opening less visible temporarily, but an apparent improvement is not proof that the underlying cavity has been eliminated. Burnishing and other finishing operations must therefore be judged by the integrity of the component, not just by the immediate appearance of its surface.
The correct stopping point depends on the part’s dimensions, function and defect location. Two or three unsuccessful finishing passes can be used as a practical workshop warning to stop and reassess, not as a validated universal rejection threshold. A tiny isolated imperfection in a non-critical area is not equivalent to repeated pores in a thin prong or a load-bearing section.
Once a defect reappears, inspect the surrounding area under directional light and, where appropriate, examine a representative cross-section. Compare the result with other pieces from the same batch. If the problem is distributed through the metal, additional polishing may merely conceal one opening while exposing another.
This distinction also matters when communicating with a customer. A casting defect does not automatically indicate careless workmanship. The source may be the incoming stock, alloy preparation or casting conditions. Explaining the diagnostic findings is more useful than promising that further polishing will solve a structural problem.
Finishing should refine a sound component, not serve as an endless attempt to rescue uncertain material. When repeated work reveals a deeper problem, stopping early can preserve both the remaining metal and the evidence needed to identify the cause.
In What Order Should You Alloy, Cast, and Test Metal to Avoid Ruining a Full Batch?
The safest production sequence is to verify the identity and condition of the stock, prepare and homogenise the intended alloy using an appropriate procedure, and test a representative casting before committing the full batch. Inspecting the test piece for surface defects and internal discontinuities can reveal problems early, although no single workshop test establishes every aspect of alloy quality.
Begin with a clean, identified source of metal and equipment suitable for the alloy. Keep recovered scrap separate from the main production batch until its suitability has been assessed. During alloy preparation, follow the appropriate melting and mixing procedure rather than assuming that a visually uniform melt necessarily has a uniform composition.
Homogeneity matters because local variations in composition and microstructure can produce inconsistent mechanical and finishing behaviour. Solidification can also create segregation and internal shrinkage. If molten metal cannot adequately feed a region as it solidifies, a cavity may form even when the incoming stock was not contaminated.
For a representative test, inspect the as-cast surface before polishing. If the application warrants it, section a test specimen and examine its interior. Filing, bending and density measurements are among the casting-quality assessment methods described in the Santa Fe Symposium presentation on testing the quality of jewellery casting. These methods provide different kinds of information; the appropriate choice depends on the material and the question being investigated.
Do not interpret a successful test specimen as proof that every component in the batch is sound. Casting geometry, mould conditions and feeding can vary from one part to another. A test is a screening step that reduces uncertainty, not a substitute for inspecting production pieces.
A five-step batch-control checklist
- Identify the material. Record the alloy designation, supplier or scrap source, and batch number in a stock log.
- Check the preparation equipment. Inspect the crucible and ingot mould, and record any cleaning or equipment concerns before melting.
- Prepare the batch separately. Record the date, alloying additions where applicable, and whether recovered material was included.
- Cast and inspect a representative specimen. Record its as-cast appearance and any visible defects before finishing.
- Document the test and decision. Note any cross-sectional, filing, bending or density checks performed, the observed results and the reason for accepting, isolating or investigating the batch further.
These records make it easier to compare good and defective batches without relying on memory. They also help isolate whether a recurring problem follows a particular stock source, equipment item or casting setup.
A disciplined test-and-record routine is particularly valuable when the same alloy is used for several pieces. It helps narrow the investigation when a finished component develops porosity and prevents an unexplained defect from being automatically attributed to the last person who handled the piece.
Why Do Better Hand Tools Reduce Mistakes When Your Hands Are Tired After 2 Hours?
Well-maintained, appropriately designed hand tools can reduce the force and effort needed for precise jewellery work, helping a maker maintain control as fatigue develops. Ergonomic handles, suitable tool weight and sharp cutting edges can make filing, sawing and preparation more manageable. They reduce some avoidable workshop errors, but they cannot remove internal porosity or correct poor metal stock.
As attention and hand control decline, a jeweller may apply uneven pressure, slip with a file or burr, or remove more material than intended. An accidental tool slip can scratch a finished surface, damage a thin section or introduce particles from another alloy if tools and work areas are not kept clean. These are separate risks from pores created during melting or solidification, even when they appear together on the same piece.
Tool choice should match the task. A correctly sharpened file can cut more predictably than a worn one, while a comfortable handle can reduce the need to grip excessively. Tools should also be maintained and cleaned appropriately, particularly when switching between different metals. Better ergonomics are useful controls, not a guarantee against every mistake.
The timing of demanding operations matters too. Reserve precision work, such as final finishing and stone setting, for periods when concentration is strongest. Less demanding tasks, including sorting identified stock or preparing the workspace, may be better suited to periods of reduced energy, provided they can still be performed safely.
A maker can also pause when control deteriorates instead of attempting to compensate by gripping harder or working faster. The aim is consistent technique and reliable inspection, not simply completing a fixed amount of work in one session.
Good tools and good material control work together, but they solve different problems. If pits persist despite careful technique and suitable equipment, the next investigation should focus on the stock and casting process rather than assuming that a more expensive file or polishing tool will resolve the issue.
Why Does Lost Wax Casting Create Porosity That Shows Up Only After Finishing?
Lost-wax casting can produce porosity that becomes visible only after finishing because the outer as-cast surface may conceal cavities underneath. These cavities can arise from gas-related defects, solidification shrinkage or inadequate feeding of metal into a section as it solidifies. Removing the surface layer reveals the underlying structure rather than necessarily creating a new defect.
The distinction between stock-related and process-related porosity is essential. Dissolved gases, contaminants or an unsuitable alloy can compromise the starting metal. Separately, casting temperature, mould conditions, the casting setup and the geometry of the part can influence filling, gas entrapment and solidification. A defect may therefore occur even when the starting stock is suitable.
One important mechanism is shrinkage during solidification. As metal changes from liquid to solid, its volume changes, and a region that cannot receive sufficient additional molten metal may develop a cavity. Christopher W. Corti‘s technical work on precious-metal solidification explains how insufficient feeding can produce shrinkage porosity and weaken cast components, including prongs.
The shape of the component and the arrangement of the sprue system also matter. Abrupt transitions between thick and thin sections can contribute to filling problems and porosity. Consequently, a casting defect should not automatically be blamed on contaminated stock merely because it becomes visible during polishing.
Early inspection helps preserve diagnostic information. Examine the casting after removal from the investment, before abrasive work changes the surface. Compare several pieces from the same tree, paying attention to whether defects recur in similar locations. Where appropriate, cut a representative specimen to investigate internal cavities and assess areas that may have been poorly fed during solidification.
When defects appear across several batches made from the same stock, material preparation deserves closer examination. If the same stock produces different outcomes under different casting conditions, the process may be contributing. Neither pattern is conclusive by itself, so change one relevant parameter at a time and document the result.
The most useful intervention occurs before extensive finishing. A sound diagnostic sequence starts with the raw casting, checks representative samples and then investigates the metal and process together. This reduces the risk of spending hours polishing a part whose internal defects should have been identified earlier.
Key takeaways before diagnosing persistent roughness
- Inspect the raw surface before polishing, so the original condition remains visible.
- Compare several pieces from the same casting tree to identify recurring defect patterns.
- Separate stock-quality questions from casting-process questions before changing settings or finishing methods.
Why Do Lost Wax Cast Pieces Sometimes Come Out With Rough Surfaces Even After Polishing?
Lost-wax cast pieces can remain rough after polishing because different defects require different remedies. Investment-related surface texture may originate at the mould interface, while pits and inclusions can reflect metal quality or casting conditions. Excessive metal temperature, unsuitable investment preparation, inadequate process control and contaminated stock are possible contributors, but the appearance alone does not establish which one is responsible.
The first distinction is between distributed surface texture and discrete cavities. A consistently granular surface may point towards an issue involving the investment or the metal–mould interface. Isolated pits, irregular openings or visible inclusions may warrant a closer investigation of the alloy and casting process. These patterns are diagnostic clues, not proof: different causes can produce similar appearances.
Polishing can improve surface texture when the underlying metal is sound and the defect is shallow enough to remove safely. It is less effective when cavities continue below the surface or when an inclusion or composition-related problem recurs as material is removed. In such cases, additional finishing may increase material loss without resolving the underlying issue.
The order of inspection is therefore important. Examine the piece straight from the flask, photograph or record the defects, and compare components from the same casting tree. Note whether roughness appears across the whole piece or is concentrated in particular areas. Then review the relevant variables, such as metal and mould temperatures, investment preparation, vacuum conditions where applicable, and the design of the sprue and casting sections.
Adjust one process variable at a time whenever practical. Changing several settings simultaneously can make a successful or unsuccessful result harder to interpret. If the defect persists across different setups or appears in the same material batch, investigate stock quality and alloy preparation as well as the mould process.
The evidence should guide the next action. A surface that improves consistently with controlled finishing is different from one that repeatedly exposes new cavities. In the latter case, a test casting or further examination may be more informative than another polishing session.
Before beginning another production run, document what the raw casting looks like, what changed during the test and whether the same defect recurred. That record provides a practical starting point for deciding whether to refine the mould process, reassess the alloy or reject an unsuitable batch. When the cause remains uncertain, a representative specimen and a structured technical assessment are preferable to assuming that craftsmanship alone is at fault.
Can poor-quality metal cause porosity even when the casting technique is correct?
Yes. Contamination, dissolved gases and defects already present in an ingot can contribute to porosity or weaken a finished component. However, porosity can also arise from solidification shrinkage, inadequate metal feeding and other casting-process problems. A sound diagnosis must consider both the starting material and the casting conditions.
Can visual inspection confirm whether metal stock is free from contamination?
No. Visible deposits, oxides and discolouration can reveal possible problems, but an apparently clean surface does not establish the alloy’s composition or exclude internal defects. Traceable stock records, representative casting tests and, where necessary, professional material analysis provide additional evidence.
Is recycled jewellery metal always unsuitable for stone setting?
No. Suitability depends on the alloy’s identity, cleanliness, processing history and mechanical requirements. Well-identified, appropriately prepared scrap may be usable, but mixed or uncertain material deserves particular caution for delicate prongs and settings. A test casting can help assess casting quality, although it does not independently confirm chemical composition.
What is the most useful test before casting an expensive jewellery piece?
Start with a representative test casting made from the prepared batch. Inspect its raw surface, finish a sample to reveal concealed defects, and consider cross-sectional examination or appropriate mechanical and density tests where relevant. No single test proves that every production component is sound, so combine the results with batch traceability and inspection of the actual castings.
Should a jeweller keep polishing a piece when new pits continue to appear?
Not automatically. Repeatedly exposed pits suggest that further material removal may not solve the underlying problem. Stop when additional finishing risks compromising the component’s dimensions or strength, inspect the defect and investigate the stock and casting history. The appropriate decision depends on the component’s function, remaining material and the extent of the porosity.