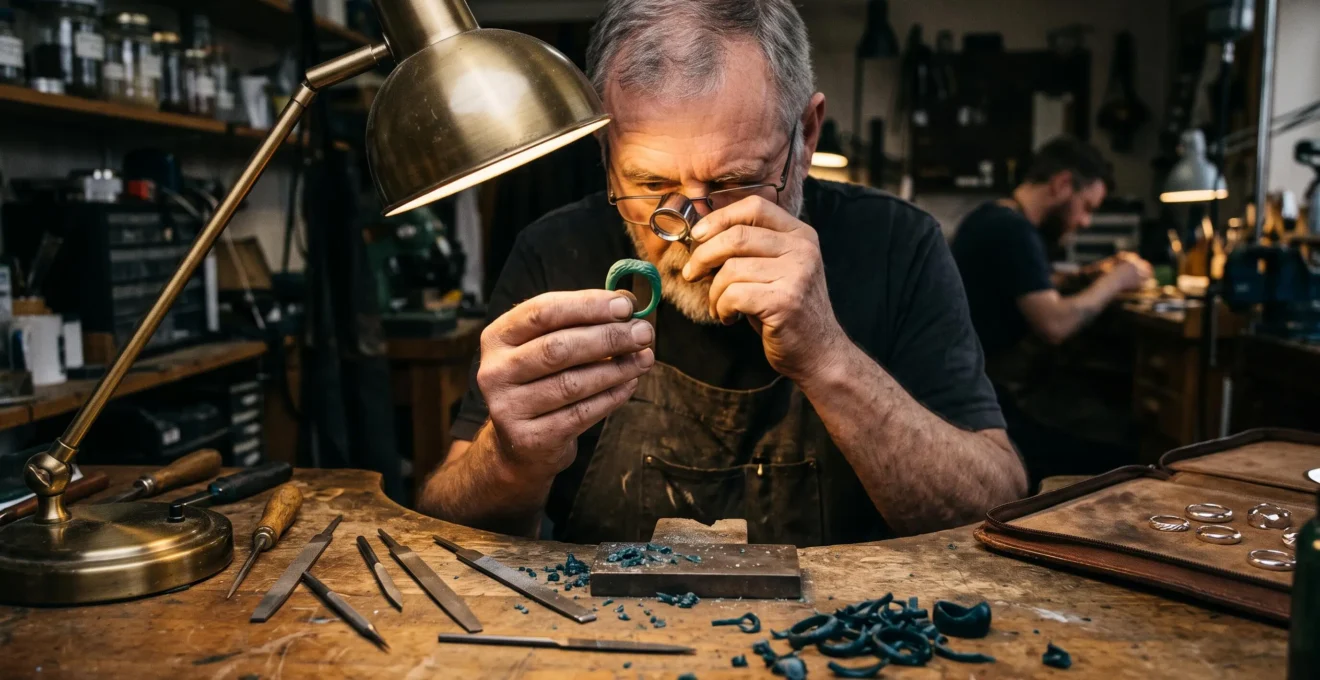
A ring can look immaculate in a CAD rendering and still press against the finger, rotate unexpectedly or catch on clothing once it is made. The difference often lies in details too small to notice on screen: an interior edge, a shoulder transition, a fraction of extra thickness beneath the setting.
The master model maker works at the point where design becomes physical geometry. Whether the starting point is hand-carved wax, a printed resin model or a digitally engineered form, someone must evaluate the surfaces that will eventually contact the hand, anticipate manufacturing changes and determine which refinements are necessary.
CAD is not inherently uncomfortable or imprecise. In skilled hands, it can incorporate sophisticated ergonomic features. But a technically correct digital file is not proof that those features will survive production or suit an individual wearer.
For bespoke clients, the practical question is therefore not simply who created the CAD design. It is who checks the physical model, what they inspect and when the wearer can approve its geometry.
What matters before a bespoke ring is made
- The master model translates digital dimensions into physical contours that must account for comfort, casting and finishing.
- Interior edges, underside transitions and paired features reveal workmanship that polished photographs frequently conceal.
- A suitable physical prototype, carefully reviewed before final approval, can expose problems while geometric changes are still relatively straightforward.
- Why Can 0.3 mm in the Model Change Comfort Dramatically Over a Full Day of Wear?
- How to Spot a High-Master Model by Looking at 4 « Hidden » Areas
- Hand-Carved Model or CAD-Only: Which Should You Choose for Organic Shapes?
- The Try-On Model Step People Skip That Causes Long-Term Regret With Custom Rings
- When Should You Lock the Master Model to Avoid Paying for the Same Fix Twice?
- Why Does Specialisation Improve Quality but Sometimes Increase Lead Times?
- Why Does a Ring That Looks Fine in Photos Feel Wrong Until You Try the Wax?
- Why Do Wax Prototypes Save People From Expensive Regret in Custom Jewellery?
Why Can 0.3 mm in the Model Change Comfort Dramatically Over a Full Day of Wear?
A 0.3 mm difference in a ring model can noticeably change comfort when it alters an edge, interior curvature or local contact point. The effect depends on where that material sits, the width of the band and the wearer’s finger. It is an illustrative dimensional difference, not a scientifically established threshold at which discomfort begins.
Imagine two otherwise identical rings. One has a softly rounded inside edge; the other retains a slightly more abrupt transition. Both may slide over the knuckle and seem correctly sized. During gripping or typing, however, the second profile may concentrate contact along a narrower area of the finger.
The master model determines not only the nominal inner diameter but also the shape and distribution of contact surfaces. The inner band, the underside of the gallery and the junction between the shoulders and shank all contribute to the wearing experience.
Finger dimensions are not constant. The Gemological Institute of America explains in GIA’s ring-sizing recommendations that band width, knuckle dimensions, temperature, humidity and time of day influence fit. Wider bands also tend to feel more snug than narrow ones at the same nominal size.
A model maker must distinguish between a ring that is incorrectly sized and a ring whose geometry is uncomfortable. Enlarging the entire band may relieve pressure, but it can also increase rotation or compromise stability. Sometimes the better intervention is a refined interior edge or a smoother transition rather than a change in overall circumference.
There is also a manufacturing dimension. A CAD file records intended geometry, while printing, casting and finishing can introduce variations. A skilled modeller anticipates these changes instead of assuming that nominal dimensions will remain untouched.
Before approval, ask the workshop to check the inside dimensions and cross-sectional profile at several relevant positions. Inspect the actual wax or resin for rounded edges and the intended comfort curve. Measurements should be related to the final production process, not treated as promises of perfect dimensional equivalence.
A narrow band on a relatively straight finger may tolerate a small variation that becomes noticeable in a wide ring worn over a prominent knuckle. The important next step is to inspect the hidden surfaces where those differences originate.
How to Spot a High-Master Model by Looking at 4 « Hidden » Areas
A well-executed master model reveals its quality in four places: beneath the shank and gallery, between adjoining design elements, across interior contact surfaces and in the symmetry of paired features. These areas are more diagnostic than a polished top view because they expose abrupt transitions, uneven finishing and inconsistencies that may affect both appearance and wear.
Inspect the model under angled light, ideally while comparing it with the approved CAD design. A loupe can help, but the objective is not to demand an artificially flawless wax surface. It is to identify defects that would survive into manufacturing or require correction later.
Four areas deserve particular attention:
- Underside of the shank and gallery: Look where the band approaches the setting. Check for unexpected ridges, sudden thickening, rough junctions and unnecessarily sharp projections.
- Transitions between design elements: Follow the curve from shoulder to setting, or between overlapping decorative forms. Look for flat spots, interrupted contours and unwanted changes in thickness.
- Interior surfaces: Examine the band where it rests against the finger. Check whether the intended comfort profile continues smoothly, rather than disappearing near structural features.
- Paired features: Compare shoulders, prongs and other corresponding elements from the wearer’s viewpoint. Determine whether any asymmetry is deliberate or a modelling inconsistency.
A slight tool mark is not automatically a defect. In an unfinished model, some surface evidence of carving is normal. What matters is whether the surface can be finished appropriately without weakening a feature or altering the intended silhouette.
Raking light makes subtle irregularities easier to see. Position a light source at a low angle to the surface and rotate the model slowly. A change in reflection or shadow may expose an uneven transition that disappears under diffuse frontal lighting.
This inspection also highlights why production allowances matter. Morris and Watson’s CAD Design Guidelines note that finishing can remove approximately 0.10–0.20 mm of surface material in the processes they describe. Those figures are workshop guidance, not universal tolerances, but they demonstrate why the model must account for subsequent finishing.
Before commissioning, ask to see an unfinished master or an earlier model that required correction, if the workshop is willing and able to share one. The maker’s explanation of what was changed, and why, is often more informative than a finished portfolio photograph alone.
The inspection should establish whether the model is ready for production, not simply whether it looks handmade. This distinction becomes especially important when choosing between carved, printed and hybrid modelling methods.
Hand-Carved Model or CAD-Only: Which Should You Choose for Organic Shapes?
Hand carving is particularly useful when a design depends on flowing, irregular or deliberately asymmetrical surfaces. CAD is especially effective for controlled geometry, repeatable dimensions and precise stone-setting layouts. For many bespoke rings, however, the strongest choice is a hybrid workflow that combines digital engineering with physical inspection and selective hand refinement.
The misleading assumption is that CAD and handwork are mutually exclusive. A ring can be digitally designed, printed in resin or wax, modified by a model maker and then cast. Another ring may be hand-carved initially and subsequently checked against digitally defined dimensions.
The relevant question is which parts of the design benefit from each method.
For example, a branch-inspired engagement ring might require irregular surface movement along the shoulders while retaining precise gemstone clearances and a carefully controlled interior band. Organic treatment does not remove the need for engineering.
The following comparison is a practical decision guide, not an experimentally established ranking of manufacturing quality.
| Decision criterion | Hand-carved emphasis | CAD-led emphasis |
|---|---|---|
| Organic curves | Direct tactile shaping and intuitive changes | Digitally sculpted curves with controlled adjustments |
| Geometric symmetry | Requires careful manual checking | Supports precise mirrored and measured geometry |
| Stone-setting positions | Can be established manually by experienced makers | Supports explicit measurement and repeatable layouts |
| Design revisions | May require physical rebuilding or reshaping | Allows changes to a retained digital model |
| Physical comfort | Can be refined directly on a tangible model | Can be engineered digitally and validated physically |
| Reproduction | Depends on the original model and production method | Provides a reusable digital design specification |
CAD can absolutely incorporate comfort curves, clearances and controlled edge radii. The weakness is not the technology itself. It arises when an apparently perfect model is released for production without checking how those intended surfaces translate into a physical object.
GIA’s Jewelry Design & Technology programme explicitly connects digital jewellery engineering with comfort, durability, proportions and physical prototyping. It also covers digital sculpting, demonstrating that organic-looking forms are not exclusive to traditional hand carving.
Ask a workshop describing its work as hand-carved what was actually carved: the original form, the printed wax, specific decorative areas or only minor finishing details. Process photographs and a clear description of the modelling stages are better evidence than a label alone.
Neither workflow excuses skipping the physical fit assessment. Once the form exists in wax or resin, the wearer has an opportunity to test assumptions that remain invisible in the digital design.
The Try-On Model Step People Skip That Causes Long-Term Regret With Custom Rings
The commonly missed step is a structured physical try-on before the model receives final approval. A brief fitting can confirm that the ring passes over the knuckle, but it may not reveal a troublesome edge, unstable setting or awkward profile. Longer observation can help when the prototype is suitable for wear, although fragile wax and resin models may have strict handling limits.
A try-on should not automatically mean wearing a wax ring all day. Some prototypes are brittle, relatively soft or dimensionally different from the finished jewellery. The workshop must confirm whether a particular sample is appropriate for repeated or extended wear.
The safest approach is to match the test to the material and construction. A fragile presentation wax may be suitable only for carefully supervised fitting. A more durable, purpose-made sizing or trial ring may allow broader evaluation during ordinary movements.
Use a progressive fitting method:
- Place the prototype on the intended finger and check its position over the knuckle.
- With the maker’s permission, gently open and close the hand, form a relaxed fist and test comfortable gripping.
- Observe whether the ring rotates, tilts or contacts neighbouring fingers.
- Note specific pressure locations and whether the setting catches against suitable test fabric.
- If the workshop supplies a prototype expressly suitable for extended wear, follow its stated duration and handling instructions, recording changes in comfort across the approved testing period.
Do not assume that handwashing, sleeping, exercise or prolonged wear are acceptable tests. Water, heat, impact and household activities may damage a prototype, and its suitability cannot be inferred from appearance alone.
Translate the observations into actions. Instead of saying the ring feels strange, identify whether the pressure occurs on the palm side, near a shoulder or against the adjacent finger. This gives the model maker a location and a reproducible condition to investigate.
Physical approval is not the same as complete approval of the finished ring. A prototype can help evaluate profile and approximate contact geometry, but it cannot reliably reproduce metal weight, thermal sensation, final finishing or gemstone behaviour.
Once these observations have been addressed, the workshop and client can decide whether the master model is genuinely ready for production approval.
When Should You Lock the Master Model to Avoid Paying for the Same Fix Twice?
The master model should be locked only after the client has reviewed the physical geometry, reported any comfort issues and approved the corrected version. Locking means authorising the workshop to proceed with the agreed production stage. After mould-making or casting, changing the underlying geometry can require additional modelling, metalwork or reconstruction.
A final model approval should be treated as a defined production decision, not an informal expression of enthusiasm. A client saying that a photograph looks good does not necessarily mean the ring’s contact surfaces and proportions have been physically accepted.
Production arrangements vary. Some workshops cast directly from a printed pattern without creating a traditional reusable mould. Others produce a master for mould-based reproduction. In both cases, late design changes can invalidate work already completed.
Consider an explicitly hypothetical example: a client approves a wide ring based on renders, then discovers after casting that the underside is uncomfortable. If a simple adjustment is insufficient, the workshop may need to revise the design, produce another model and repeat parts of production. The original modelling and casting work has already consumed resources.
Correction costs generally become more complex as production advances:
- Before model approval: permitted adjustments may involve additional CAD work, carving or a replacement prototype.
- After casting: corrections may involve metal removal, rebuilding, new casting or a changed design.
- After stone setting: substantial rework may require stone removal or create additional risks to settings and finished surfaces.
These are possible operations, not fixed charges or guaranteed outcomes. The workshop’s written terms determine which revisions are included and which become chargeable.
Before sign-off, confirm that the corrected physical model has been reviewed, essential dimensions have been checked and any remaining limitations are documented. Approval should identify the design version, the agreed specifications and the stage being authorised.
A dated written record can also clarify responsibility if a dispute arises. It should state which observations were resolved and what changes, if any, will require a new quotation.
Time pressure is a poor substitute for that sequence. If an important date is approaching, the sensible next question concerns workshop capacity and the consequences of choosing a faster manufacturing route.
Why Does Specialisation Improve Quality but Sometimes Increase Lead Times?
Specialisation can improve a bespoke ring when model making, casting, stone setting and finishing receive dedicated technical attention. It can also extend lead times because each stage may depend on a different person’s availability. A ring can require relatively little active work yet remain in production longer while waiting for sequential handoffs, corrections or approvals.
A master model maker who regularly shapes rings can develop particular sensitivity to shank profiles, setting transitions and the practical consequences of removing small amounts of material. A dedicated setter may identify clearance requirements that the modeller needs to accommodate before casting.
The advantage appears when those specialists exchange information early. The disadvantage appears when a problem is discovered only after a previous stage has been completed.
For example, an unusually low-profile setting might look attractive during modelling but provide inadequate access for a particular setting operation. If the setter reviews the construction only after casting, the workshop may face avoidable modifications.
However, specialisation does not automatically guarantee better quality. An experienced generalist may manage the entire process with excellent continuity, while a poorly coordinated specialist workflow can introduce delays and inconsistent decisions.
The most useful quotation question is not simply how many weeks the project takes. Ask who owns each production stage, which operations are outsourced, when physical approval occurs and how revisions affect the schedule.
A meaningful schedule can distinguish design development, model production, fitting, casting, setting, finishing and final inspection. It should also identify dependencies rather than presenting the delivery estimate as if every operation happens continuously.
Clients ordering for a proposal, anniversary or another fixed occasion may reasonably favour a simpler, more predictable design. Clients prioritising complex sculptural details or repeated comfort refinements may accept a less rigid timetable.
For prototypes suitable for use outside the workshop, written observations can become part of this specialist handoff. A modeller receiving a precise note about ring rotation or pressure near one shoulder has more actionable information than a vague request to make the design more comfortable.
A transparent workshop will explain which refinements require additional time and which dates remain contingent on customer approval or another specialist’s assessment. This is more useful than assuming that the shortest quoted delivery window represents the most efficient production process.
The aim is a production sequence that leaves room for meaningful verification without making every revision an unexpected delay. That verification becomes especially important when photographs create confidence that the physical model has not yet earned.
Why Does a Ring That Looks Fine in Photos Feel Wrong Until You Try the Wax?
A ring may look convincing in photographs because images capture shape and appearance without conveying sustained physical contact. They cannot show how an edge presses against skin, whether a setting shifts during movement or how the band interacts with neighbouring fingers. A physical prototype reveals aspects of three-dimensional fit that even accurate renders cannot communicate through sight alone.
Consider a ring with a large decorative head and a comparatively narrow shank. In a photograph, the composition may appear balanced. On the hand, the wearer may notice that the head tips forward or the band rotates under ordinary movement.
Another design may have beautifully rounded shoulders when viewed from above but an abrupt underside that contacts the finger during gripping. Neither issue necessarily makes the CAD file inaccurate. The model may faithfully reproduce a design that still requires ergonomic revision.
This involves proprioception: the body’s ability to register position and movement. A wearer also perceives local contact, pressure and tactile sensations. Together, these signals influence whether a ring feels unobtrusive or constantly noticeable.
Importantly, a wax or resin model is only an approximation of the final wearing experience. Differences in weight, rigidity, surface texture and temperature can influence balance and sensation. Even exact-looking geometry does not guarantee identical comfort after metal production.
That does not make physical prototyping unnecessary. It simply defines what the test can reasonably answer.
Use observations that describe location and movement: « The band presses against the palm side when gripping, » « The head rotates toward the little finger, » or « The shoulder catches against the adjacent finger. » Such statements can guide decisions about internal profiling, shank proportions or setting placement.
When a safe physical try-on exposes an issue, the workshop can decide whether to alter the CAD geometry, adjust the physical model or recommend a different construction. The corrected version should then be checked again before approval.
The prototype is therefore not a miniature version of the finished experience in every respect. It is a targeted diagnostic tool, valuable precisely because it can reveal certain problems before metal and gemstones make revision more complicated.
Key takeaways before approving the model
- Choose the modelling workflow according to the ring’s geometry, but require a credible method of checking physical proportions and contact surfaces.
- Agree on an appropriate prototype-handling protocol; do not assume that every wax or resin model can withstand extended wear.
- Resolve and document design objections before authorising casting, with the approved model version clearly identified.
Why Do Wax Prototypes Save People From Expensive Regret in Custom Jewellery?
Wax prototypes can prevent costly bespoke jewellery mistakes by exposing unwanted proportions, uncomfortable contours and design misunderstandings before major production steps. Their value lies in making the design physically inspectable while certain changes remain relatively straightforward. They do not guarantee perfect final comfort, but they create an important checkpoint between digital approval and committing resources to metal production.
A prototype brings together the decisions that a client might otherwise approve separately: the fit of the shank, the position of the setting, the balance of decorative elements and the visibility of surface transitions.
It also gives the workshop a chance to explain how the design will change during manufacturing. Casting and finishing allowances, material properties and subsequent stone setting can all influence the final piece. A model is an intermediate reference, not an unconditional promise of exact reproduction.
The financial benefit follows from the sequence of operations. Adjusting a model before casting may require relatively limited additional work. Discovering the same underlying flaw after casting may require metal reworking or another production cycle. After gemstones are set, the consequences of major reconstruction become more complicated.
Actual costs depend on the workshop, design, production method and agreed revision policy. A precise saving cannot be established from the existence of a wax prototype alone.
Remote clients can also benefit from physical review. Jessica Flinn’s 3D-printed ring try-on service illustrates a UK workshop offering models by post before production. Its published instructions also warn that the models are not intended for prolonged wear and that the finished metal jewellery may differ slightly.
That distinction is crucial. A mailed model can support a visual and limited physical inspection, but it should not be treated as equivalent to an unrestricted everyday-wear test. A remote buyer should ask what type of prototype is supplied, what handling is permitted and how any reported changes will be verified.
Five checks before approving your bespoke ring model
- Confirm the intended geometry. Obtain an agreed specification or annotated CAD view identifying the ring size, shank profile, setting dimensions and other critical features.
- Inspect the hidden surfaces. Review the underside, interior, transitions and paired features under angled light, producing a short list of any visible concerns.
- Complete an authorised fit assessment. Follow the workshop’s handling instructions and record the permitted movements tested, pressure locations and any instability observed.
- Verify the revised model. Request clear confirmation that agreed corrections have been incorporated, together with updated images, measurements or another physical review as appropriate.
- Approve the correct version in writing. Keep a dated approval record identifying the final model and the production stage being authorised.
For clients who cannot attend in person, these five checks can be adapted into a remote approval process. Ask whether the jeweller offers a posted prototype, a separate durable trial ring, a guided video inspection or another suitable method for evaluating fit.
The objective is not to impose the same procedure on every workshop or design. It is to ensure that the client understands what has been validated, what remains uncertain and what will become expensive or impractical to change after approval.
Ask the jeweller for a clearly defined physical model review and written sign-off stage before casting. A few well-targeted questions about fit, geometry and permitted revisions can be more valuable than another set of polished renders.
Does every bespoke ring need a hand-carved wax master?
No. Bespoke rings can be produced through hand carving, digital modelling, additive manufacturing or a combination of methods. What matters is that the selected workflow accounts for final geometry, manufacturing requirements and appropriate physical verification. Traditional hand carving is a method, not an automatic guarantee of superior comfort.
Can a jeweller make a comfortable ring using CAD alone?
Yes. CAD can define interior curves, appropriate edge transitions, band thickness and other ergonomic features. The distinction is between designing comfort into the digital geometry and validating the finished result. Physical inspection remains useful because manufacturing and individual anatomy introduce factors that a render alone cannot confirm.
Is a resin prototype as accurate as the finished metal ring?
Not necessarily. A resin prototype can communicate the intended proportions and approximate contact geometry, but its dimensions, stiffness, weight and surface characteristics may differ from the finished metal jewellery. The workshop should explain its manufacturing allowances and specify which aspects of fit the prototype can reliably assess.
What should a remote bespoke jewellery client request before casting?
Request detailed views of the physical model, relevant measurements, an explanation of the comfort profile and written approval terms. Ask whether a physical prototype can be shipped and whether it is intended for brief inspection or longer fitting. Any concerns should be recorded and resolved before authorising production.
Can an uncomfortable ring always be corrected after casting?
No. Minor adjustments may be possible, but the available remedies depend on the band’s construction, metal thickness, gemstone placement and the nature of the discomfort. Some designs are difficult to resize or substantially rework. In certain cases, remodelling or remaking the ring is more appropriate than attempting to alter the existing piece.