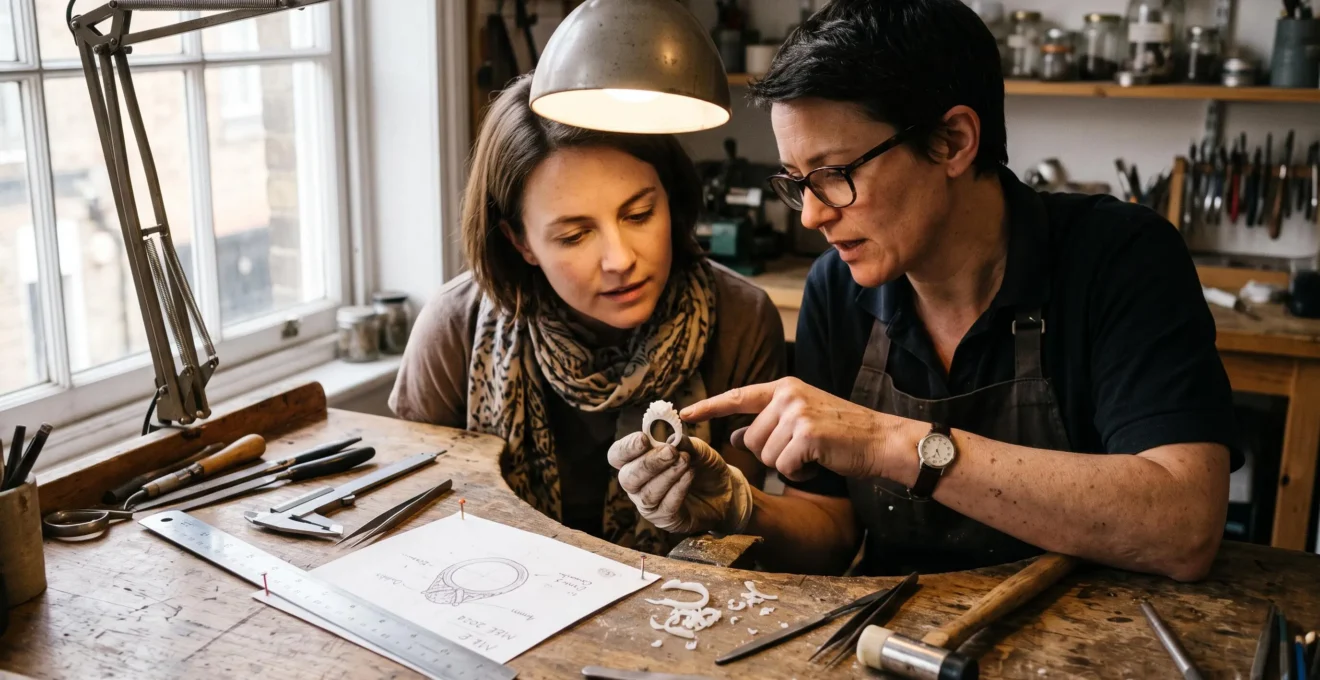
A bespoke jewellery concept can look perfect on a screen and still be difficult to manufacture, uncomfortable to wear or unexpectedly expensive. The problem is rarely the idea itself. It is the gap between what an image communicates and what a finished piece must physically achieve: structural strength, balanced proportions, secure stone settings, practical dimensions and an acceptable production cost.
For first-time bespoke clients, the solution is not to abandon ambitious designs or surrender every decision to the jeweller. It is to make the important decisions in the right order. A clear brief, early engineering checks and staged approvals help distinguish the features that define the design from those that can change without compromising it.
A successful commission therefore begins before the first prototype. The objective is to establish what must remain, what can be adapted and how the piece will behave in everyday life. Physical prototyping then provides a valuable opportunity to test dimensions and fit before committing to precious metal, gemstones and finishing. The following methods make that process more transparent, helping clients reduce avoidable revisions while keeping their original vision intact.
How to Make a Bespoke Jewellery Concept Work
- Test structural feasibility, proportions and everyday wearability before approving a polished render or production budget.
- Turn inspiration images into a precise brief with clear priorities, constraints and acceptable compromises.
- Approve the design in stages and use a physical prototype to identify fit and proportion problems before production.
- Why Does a Beautiful Sketch Sometimes Become Unwearable Once It’s Engineered?
- How to Turn Pinterest Inspiration Into a Buildable Brief in 45 Minutes?
- Bigger Centre Stone or Better Craft: Which Should You Choose When Budget Is Tight?
- The Wearability Oversight That Makes Clients Regret a Custom Ring After 30 Days
- In What Order Should You Approve a Custom Design to Avoid Paying for Revisions Twice?
- Hand-Carved Model or CAD-Only: Which Should You Choose for Organic Shapes?
- How to Test a Wax Prototype on Your Hand in 15 Minutes Without Guesswork?
- Why Do Wax Prototypes Save People From Expensive Regret in Custom Jewellery?
Why Does a Beautiful Sketch Sometimes Become Unwearable Once It’s Engineered?
A beautiful sketch can become unwearable because a drawing communicates appearance without fully expressing thickness, weight, balance or mechanical strength. Once a jeweller translates it into three dimensions, unsupported sections may need reinforcement, a raised setting may catch on clothing, or an uneven distribution of mass may make a ring rotate. The concept can remain attractive while requiring practical changes.
A sketch is a starting point, not proof of manufacturability. A wide band that appears easy to slip on may become uncomfortable if its internal profile does not accommodate the finger properly. An off-centre stone may shift the ring’s balance, while delicate filigree loops may catch on hair, gloves or fabric. Each issue emerges from the relationship between the design and the physical object.
The distinction is between **aesthetic feasibility** and **structural feasibility**. Before discussing final prices, examine three factors:
| Factor | What to examine | Warning sign |
|---|---|---|
| Unsupported span | How far a delicate element extends without support. | A long, thin feature may need reinforcement or a revised shape. |
| Stress points | Thin sections around the stone setting, shoulders and band junctions. | There is insufficient material for the intended construction or expected wear. |
| Contact zones | Where the piece meets fingers, neighbouring jewellery, skin or clothing. | The design restricts movement, catches or creates a pressure point. |
The GIA’s Jewelry Design & Technology programme covers scale, proportion, engineering, comfort and manufacturing constraints in the development of jewellery designs. These are practical design considerations, not proof that a particular concept will fail.
A jeweller should explain which changes are technically necessary and which are matters of preference. That distinction lets the client protect the defining silhouette without assuming every original dimension must survive unchanged.
Once the physical constraints are understood, the next challenge is communicating the intended design precisely enough that the jeweller does not have to guess what the inspiration images mean.
How to Turn Pinterest Inspiration Into a Buildable Brief in 45 Minutes?
A buildable jewellery brief separates essential design requirements from visual inspiration and negotiable details. In 45 minutes, a client can organise reference images, define priorities, record practical constraints and prepare a concise summary for the jeweller. The goal is not to specify every technical measurement, but to make the intended outcome clear enough to discuss, estimate and develop without avoidable misunderstandings.
The method works best when images are classified by purpose rather than collected into one undifferentiated mood board. A photograph might communicate the silhouette of a ring, the texture of its band or simply the atmosphere of a style. Unless these roles are explicit, a jeweller may reproduce the wrong feature.
Use this timed process:
- Minutes 0–10: Sort the images. Create three folders: “silhouette I want”, “detail I want” and “mood only”. Place each reference according to the element it actually communicates.
- Minutes 10–25: Define priorities. Write one sentence for each folder explaining what must be preserved and what may change. Identify the features that make the piece recognisably yours.
- Minutes 25–35: Record hard constraints. State your budget range, preferred metal, intended frequency of wear, sizing concerns and any relevant practical requirements.
- Minutes 35–45: Write a one-piece summary. Describe the intended item, its essential features, acceptable compromises and intended use in a short paragraph.
One distinction is especially important: a **reference** demonstrates a feature you want; an **analogy** merely resembles the idea you have in mind. For example, a photograph of a sculptural ring might be useful because of its curved silhouette, even though you do not want its exact stone setting or metal finish. Label that intention explicitly.
Before sending the brief, answer three questions:
- If the design requires a substantially wider band to be practical, what proportions or details can change?
- If the quotation exceeds the budget, which feature can be simplified or removed first?
- Should the inspiration piece be copied, adapted or merely evoked?
A clear brief gives the jeweller a defensible starting point for technical development and pricing. With priorities established, budget discussions become easier because each proposed compromise can be assessed against what matters most to the design.
Bigger Centre Stone or Better Craft: Which Should You Choose When Budget Is Tight?
When a bespoke jewellery budget is tight, prioritise the centre stone if its size and presence define the design; prioritise craftsmanship if construction, engraving, mixed metals or intricate setting work give the piece its identity. In either case, protect the features that create the intended effect, then explore adjustments elsewhere instead of assuming that the largest possible stone produces the best result.
The right decision depends on how the design achieves its visual impact.
| Design priority | Budget approach | Compromise to consider |
|---|---|---|
| Stone-led simplicity, such as a solitaire | Preserve the stone’s visual presence and appropriate setting. | Compare alternative carat weights and stone characteristics. |
| Construction-led design, such as a halo or engraved band | Protect the setting, detailing and quality of finishing. | Simplify secondary details before compromising essential construction. |
| Mixed or uncertain priorities | Ask the jeweller to price two clearly defined versions. | Compare the visual effect and technical implications of each version. |
For diamond engagement rings, the Gemological Institute of America explains that colour, clarity, cut and carat weight all influence purchasing decisions. Its engagement ring budgeting advice also describes how diamonds just below popular carat-weight thresholds, such as 0.97 carat rather than 1.00 carat, may cost significantly less. The actual saving depends on the complete stone characteristics and market conditions; a lower grade is not guaranteed to look identical.
Craftsmanship deserves equal scrutiny. A technically sound setting, secure stone retention and appropriate finishing affect how the piece functions and feels. A cheaper construction that fails to deliver the intended appearance is not necessarily a saving, especially if it later needs correction.
Consider the ten-year horizon, not just the first impression. Stone size can affect the proportions and practical demands of a ring, while setting choices may influence future maintenance or resizing. Neither a larger stone nor more elaborate craftsmanship automatically guarantees better long-term value.
The strongest budget decision is the one that makes the intended design work without hiding technical compromises. That includes considering how the piece will behave in ordinary life, where small comfort problems can become more significant than differences visible in a showroom.
The Wearability Oversight That Makes Clients Regret a Custom Ring After 30 Days
The wearability oversight that most deserves attention is approving a ring for its appearance without testing its profile, balance and contact points against everyday activities. A tall setting may catch on clothing, a top-heavy design may rotate, and an uncomfortable inner edge may become irritating over repeated wear. These problems are easy to overlook during a short appointment because appearance is immediate, while cumulative discomfort takes time to recognise.
Start with the ring’s geometry. The height of the centre stone and setting influences how often the piece encounters pockets, gloves, clothing or nearby objects. The inner edge and band profile affect comfort as the fingers move. Weight distribution can influence whether the stone remains aligned on the hand.
Setting construction matters as well. In GIA’s guide to engagement ring settings, raised prongs are identified as a potential source of fabric snagging. The guide also explains that some channel and tension settings can complicate future resizing. These limitations depend on the complete design rather than the setting label alone.
Before approval, carry out a real-life week audit. List recurring activities such as typing, driving, cooking, exercise, washing and childcare. For each activity, ask:
- Could the ring catch on an object, fabric or equipment?
- Could its height or shape interfere with movement?
- Could pressure, rotation or contact with neighbouring fingers become uncomfortable?
- Would the activity expose the setting to impacts or other avoidable risks?
If a conflict appears, decide whether to alter the design or consciously accept the limitation. Neither choice is automatically wrong, provided it is understood.
Future changes also deserve consideration. Changes in work, finger size or personal circumstances may alter how a ring is worn. Engraving inside a band, for instance, should be discussed alongside the jeweller’s proposed resizing method rather than treated as a universal prohibition. Settings with extensive stones around the band may restrict adjustment options.
Once the intended use is clear, it becomes easier to decide which design details are settled and which remain open to adjustment. Recording those decisions in sequence also helps prevent late changes from undermining work already approved.
In What Order Should You Approve a Custom Design to Avoid Paying for Revisions Twice?
Approve a bespoke jewellery design in layers: concept and silhouette first, then proportions and wearability, technical construction and materials, CAD or rendering, physical prototype, and finally production. This sequence allows practical problems to be addressed before they are embedded in more advanced work. The exact process and fees vary by jeweller, so the approval stages and the point at which changes become chargeable should be agreed in advance.
The six stages have different purposes:
- Concept and silhouette: agree on the overall form and the features that define the piece.
- Proportions and wearability: settle dimensions, profile, setting height and intended use.
- Technical construction and materials: confirm the proposed metal, setting method and practical design constraints.
- CAD and rendering: review the digital geometry and visual representation against the agreed requirements.
- Physical prototype: evaluate real dimensions, fit and proportions before committing to production.
- Production: proceed once the design and any outstanding approvals are confirmed.
Changes made early may be relatively straightforward. Once CAD modelling has begun, revisions may require additional modelling work. After a model has been produced or casting has started, a substantial change may require rebuilding part or all of the work. These are possible consequences, not universal fee rules: the actual cost depends on the design and the jeweller’s process.
The most common mistake is approving a photorealistic render before practical proportions have been settled. A convincing image can make the concept feel finished, even when important questions remain unanswered. Later corrections then feel like a loss of the approved design rather than a necessary part of development.
Your five-step approval record
- Write down the approved silhouette and essential features; save a dated concept summary.
- Record the agreed proportions, ring size and wearability requirements in a specification sheet.
- Obtain written confirmation of the proposed construction, materials and known technical limitations.
- Save the approved CAD or render version and list any unresolved changes beside it.
- Record the prototype decision, outstanding corrections, final approval and the jeweller’s stated revision charges before production.
Staged approval works best when the design method also matches the character of the piece. A precisely matched pair of rings and a one-off organic sculpture may require different modelling choices, even when both need to satisfy the same practical constraints.
Hand-Carved Model or CAD-Only: Which Should You Choose for Organic Shapes?
Choose CAD when precision, symmetry, repeatability or future matching matters most. Choose hand-carving when the appeal depends on individually sculpted contours, distinctive surface texture or intentional irregularity. Organic shapes do not automatically require hand-carving: digital sculpting can also produce a hand-worked appearance. The useful question is which method can deliver the intended character, construction and revision flexibility within the agreed scope.
CAD creates a digital model that can be measured, reviewed and adjusted before manufacture. This makes it useful for symmetrical designs, matched wedding bands, precise stone layouts and pavé alignment. It can also support a future matching piece when the original design files are retained.
Hand-carving begins with a physical model shaped by the maker. It can introduce individual variations, tool marks and sculpted transitions that contribute to a deliberately handmade character. If those qualities define the design, a carved model may communicate them more naturally during development.
Use the following selection test:
| Design requirement | Approach to consider | Important question |
|---|---|---|
| Exact proportions or matched components | CAD | Will the design need to be reproduced or matched later? |
| Distinctive texture or irregular contours | Hand-carving or digital sculpting | Which surface characteristics must be created by hand? |
| Precise structure with organic finishing | Combined approach | Which elements will be modelled digitally and which finished manually? |
A combined method can be effective: the structural framework may be modelled in CAD while the surface receives hand-finishing. The important point is to agree on the division of work, since a smooth digital render does not automatically show how much hand-finishing the final piece requires.
Revision costs also depend on timing and process. A digital model may be relatively easy to modify before manufacture, whereas changing a carved model may require further carving or rebuilding. Conversely, a digital file can facilitate repeat orders and matching pieces. Neither approach is universally cheaper or better.
Whichever method is chosen, a digital image or carved model cannot answer every question about wearing the finished piece. A physical fitting introduces a different kind of evidence, particularly when finger clearance, profile height and movement matter.
How to Test a Wax Prototype on Your Hand in 15 Minutes Without Guesswork?
A wax prototype can help you evaluate a ring’s dimensions, profile and fit before production, provided you understand its limitations. In 15 minutes, you can test how it passes over the knuckle, behaves during everyday gestures, feels on the finger and sits beside neighbouring rings. The test will not reproduce the finished metal’s weight, the stone’s presence or the final surface finish, so those questions must be assessed separately.
Follow this timed protocol and record the observations rather than relying on memory.
- Minutes 0–2 — Check the fit. Slide the ring over the knuckle and position it at the base of the finger. Note whether it passes without force and sits securely without excessive pressure.
- Minutes 2–5 — Perform five gestures. Make a fist, type a sentence, hold a glass, button a coat and pick up keys. Record any snagging, rotation or pressure points.
- Minutes 5–10 — Move normally. Wear the prototype on both hands during ordinary room activity where practical. Notice whether the profile interferes with movement or neighbouring fingers.
- Minutes 10–13 — Inspect the shape. Under good light, examine the inner edge, band thickness, setting height and visibly thin sections. Ask the jeweller to assess any suspected structural weakness.
- Minutes 13–15 — Score and record. Rate comfort from 1 to 5, list every proposed change and confirm which observations require the jeweller’s technical assessment.
The material matters. Formlabs documents castable wax-filled resin designed for jewellery prototyping and fitting before production, including applications involving fine details and thin walls. Such a model is not a functional substitute for the finished precious-metal piece.
Wax is much lighter than metal, and a model without the final gemstone cannot reproduce the complete experience. Ask the jeweller for the expected finished weight and discuss how the proposed metal and setting may affect balance. Also check whether the ring rotates after normal movement and whether its shape allows the intended stacking arrangement.
The value of the fitting lies in identifying questions while the design can still be adjusted. Understanding what a prototype reveals—and what it cannot reveal—makes the final approval more reliable rather than merely more reassuring.
Key Takeaways
- Use a physical model to test proportions and fit, but do not mistake it for an exact representation of finished metal and gemstone weight.
- Resolve any structural, comfort or setting concerns before authorising casting or other irreversible production work.
- Agree on the prototype’s purpose, the corrections it can support and the associated costs before commissioning it.
Why Do Wax Prototypes Save People From Expensive Regret in Custom Jewellery?
Wax prototypes can help prevent expensive regret by making a design physically testable before the project commits to finished metal and gemstone setting. A sketch communicates an idea, while CAD and rendering communicate a proposed form. A fitted physical model adds information about dimensions, proportions and interaction with the wearer’s hand. Its value depends on what is tested and how its limitations are understood.
The important distinction is between discovering a problem and correcting it. A proportion that looks wrong in a sketch may be easy to revise during early development. The same issue discovered after casting, setting or finishing may require additional work or partial reconstruction. The precise cost difference varies by workshop, design complexity and production method, so it should be discussed with the jeweller rather than assumed.
A wax model also changes the client’s perspective. A ring viewed on a screen is judged mainly by its appearance. A ring placed on the hand can be examined through movement, contact and fit. That does not make the prototype a perfect prediction of the finished piece, but it gives the client a more informed basis for approval.
Formlabs’ technical documentation for Castable Wax Resin describes printed parts suitable for jewellery prototyping and fitting before production. It also distinguishes these prototypes from final or functional parts. This is an important limitation: physical fitting provides useful evidence, but the model’s weight and mechanical behaviour are not equivalent to those of finished precious-metal jewellery.
Prototyping deserves particular consideration for a first bespoke commission, an unusual profile, a design with a high-value centre stone or a ring made for someone else, where the person commissioning the piece may not be the eventual wearer. The appropriate model and level of testing depend on the project’s complexity and agreed budget.
The next practical step is to ask the jeweller what the prototype will demonstrate, which decisions remain open after fitting, and what changes may cost. Treating that conversation as part of the design brief turns prototyping into a defined approval stage rather than a formality.
Can a jeweller guarantee that a bespoke jewellery design will work from a sketch alone?
A sketch alone cannot establish every structural, manufacturing and wearability requirement. The jeweller should assess the design’s proportions, materials, setting and intended use, then explain any uncertainties before finalising the construction. CAD modelling and physical prototyping can address different parts of that assessment.
Does every bespoke ring need a wax prototype?
Not necessarily. A prototype is particularly worth discussing when the design has unusual proportions, a complex setting, significant fit concerns or a wearer who cannot assess the design directly during early development. Simpler commissions may require a different approach. Ask what the proposed prototype would validate and whether its benefits justify the cost for your particular design.
Is a CAD render an accurate preview of the finished ring?
A CAD render can communicate shape, proportions and intended appearance, but its accuracy depends on the model and rendering assumptions. A screen image does not reproduce physical weight, tactile comfort or the exact appearance of every material and gemstone under different lighting. Confirm the dimensions and construction separately, and consider a physical fitting when those factors matter.
What should be agreed with a jeweller before approving a bespoke design?
Agree on the essential design features, budget range, materials, dimensions, intended wear, technical constraints and approval stages. Ask which revisions are included, when additional charges may apply, what the prototype will test and which limitations remain before production. Keep the approved design version and outstanding decisions in writing.
Can a wax prototype show how heavy a platinum ring will feel?
No. A wax or castable-resin model is much lighter than the finished precious-metal ring and does not reproduce its final weight. Ask the jeweller to estimate the finished piece’s weight and explain how the chosen metal, band dimensions and setting may influence balance and comfort.